How to Build a Concrete Shed Base: Complete DIY Guide 2026
A concrete shed base needs 150-200 mm of excavation. Half is compacted MOT Type 1 sub-base, half is a 1:2:3 concrete mix. A typical 3 m x 2 m base costs £200-£350 including tool hire. Active work takes four days, then 28 days of curing. Concrete bases last 50+ years and suit sheds, garden rooms, and greenhouses. This guide covers the full 10-step process based on 16 years of professional experience.
A concrete shed base needs 150-200 mm of excavation. Half is compacted MOT Type 1 sub-base, half is a 1:2:3 concrete mix. A typical 3 m x 2 m base costs £200-£350 including tool hire. Active work takes four days, then 28 days of curing. Concrete bases last 50+ years and suit sheds, garden rooms, and greenhouses. This guide covers the full 10-step process based on 16 years of professional experience.
Key Takeaways
- Dig 150-200 mm total: Half for MOT Type 1 hardcore sub-base, half for concrete.
- Mix ratio 1:2:3: One part cement, two parts sharp sand, three parts aggregate.
- Work within 2 hours: Once water hits cement, you have 2 hours to pour and level.
- Wait 28 days to build: Full curing gives a 50+ year foundation.
- Budget £200-£850: Small 2 m x 3 m base costs £200-£350; large 4 m x 6 m costs £500-£850.

Installer's Note
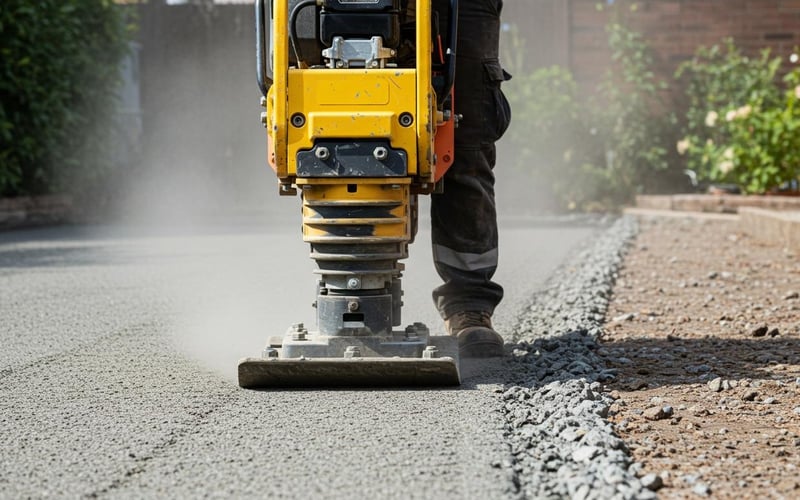
We have laid hundreds of concrete bases for greenhouse and shed installations. The single biggest cause of problems is skipping the sub-base. Without compacted hardcore underneath, the concrete cracks after the first winter frost. Every base we lay starts with 75-100 mm of MOT Type 1. We compact it with a wacker plate until you can walk on it without footprints.
Why Choose a Concrete Shed Base?
A concrete base is the strongest foundation for any garden building. We fit sheds, potting sheds, garden rooms, and greenhouses on concrete bases every week. Here is why we recommend them.
- 50+ year lifespan: We have inspected concrete bases from the 1970s that are still level and crack-free. Timber bases need replacing every 10-15 years.
- No settling or movement: Your building stays square for decades. Doors hang true, windows seal properly, and panels stay aligned.
- Moisture protection: Concrete with a damp-proof membrane stops rising damp from rotting timber floors and warping frame joints.
- Pest resistance: Mice and insects burrow under timber bases. They cannot penetrate 100 mm of concrete.
- Heavy load capacity: Supports ride-on mowers, workshop machinery, and heavy wooden buildings without flex or sag.

Tools and Materials You Need
Tools List
- Measuring: 5 m tape measure, builder's square, spirit level (1.8 m minimum)
- Digging: Spade, garden rake, wheelbarrow
- Concrete work: Cement mixer (hire for £30-£50 per day), tamping beam, steel float, pointing trowel
- Compaction: Wacker plate (hire for £40-£60 per day)
- Safety: Rubber boots, safety goggles, heavy-duty gloves. Wet concrete is caustic and burns skin on contact.
Materials Shopping List
- Concrete: Cement, sharp sand, and 20 mm aggregate (1:2:3 ratio). Or ready-mix bags for bases under 4 m².
- Sub-base: MOT Type 1 hardcore, 75-100 mm depth when compacted
- Formwork: 25 mm thick sawn timber and 50 mm x 50 mm wooden stakes
- Waterproofing: 1000-gauge DPM (damp-proof membrane) and duct tape for overlaps
- Sand blinding: Sharp sand, thin layer to protect the DPM from sharp hardcore edges
Step-by-Step: How to Build a Concrete Shed Base
Step 1: Plan Your Site and Size
Pick a well-drained, level area at least 1 m from fences and boundaries. If you are reading our guide on how to prepare ground for a greenhouse base, the same site selection rules apply here.
Make the base 100-150 mm larger than the building on all sides. This overhang gives you room for drainage and prevents water pooling against the timber frame. Measure twice and mark the corners with wooden pegs.
Check the diagonals are equal. If both diagonal measurements match within 5 mm, your base is square. If they differ, adjust the pegs until they agree.
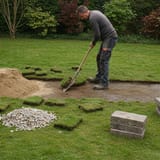
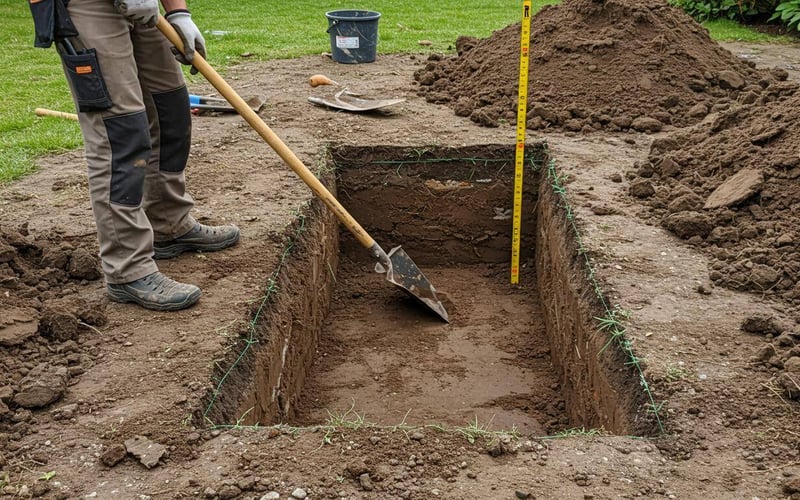
Step 2: Mark Out and Excavate
Run string lines between pegs at ground level. The string marks the exact edge of your formwork.
Dig to a total depth of 150-200 mm across the full area. Keep the base of the excavation as flat as possible. Remove all topsoil, roots, and organic matter. Soft spots under the base cause cracking later.
Step 3: Lay and Compact the Sub-Base
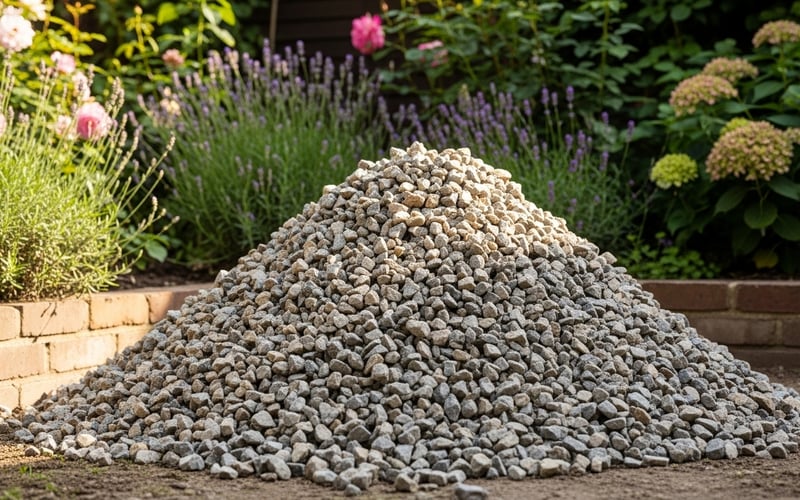
Spread MOT Type 1 hardcore evenly to a depth of 75-100 mm. MOT Type 1 is a graded mix of crushed stone and fines that locks together under compaction. Do not substitute with rubble or broken brick.
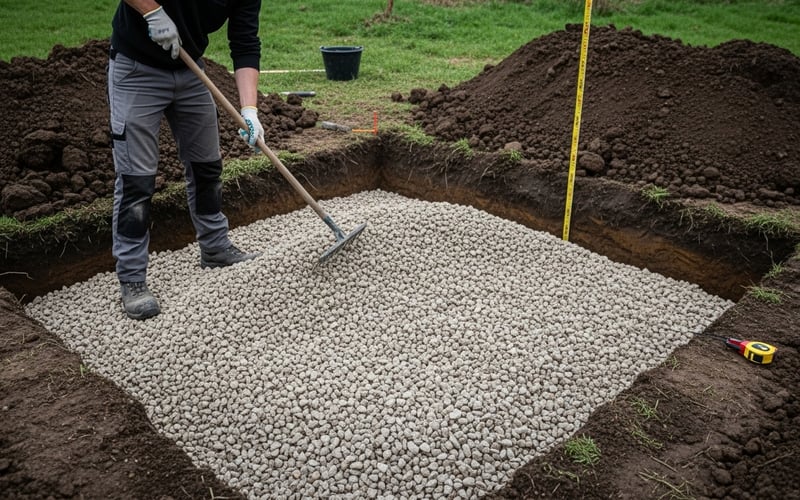
Compact with a wacker plate. Make at least three passes in different directions. The sub-base is ready when you can walk across it without leaving footprints. Add a thin 10-20 mm layer of sharp sand on top to protect the DPM from punctures.
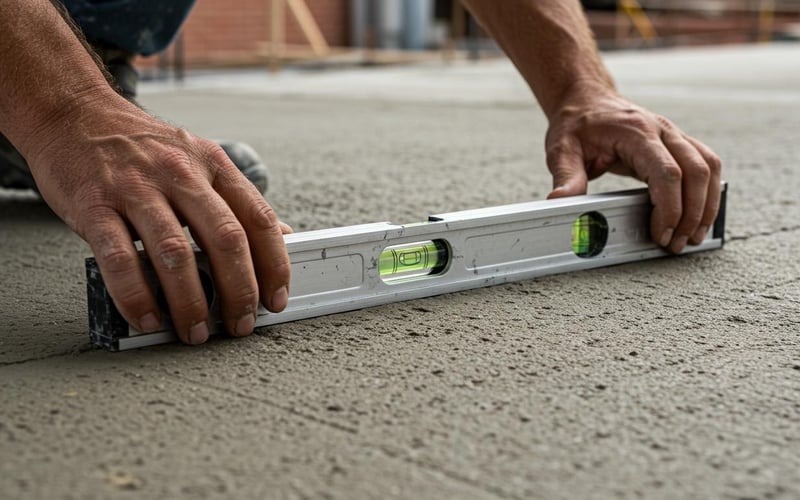
Matt's Tip: Get Your Levels Right
Hire a long spirit level (1.8 m minimum) rather than using a short one. A 300 mm level across a 3 m base hides dips and humps that cause doors to stick. Lay the spirit level diagonally across the base as well as along the edges. If you are within 3 mm across the full length, you are good to go.
Step 4: Build the Formwork
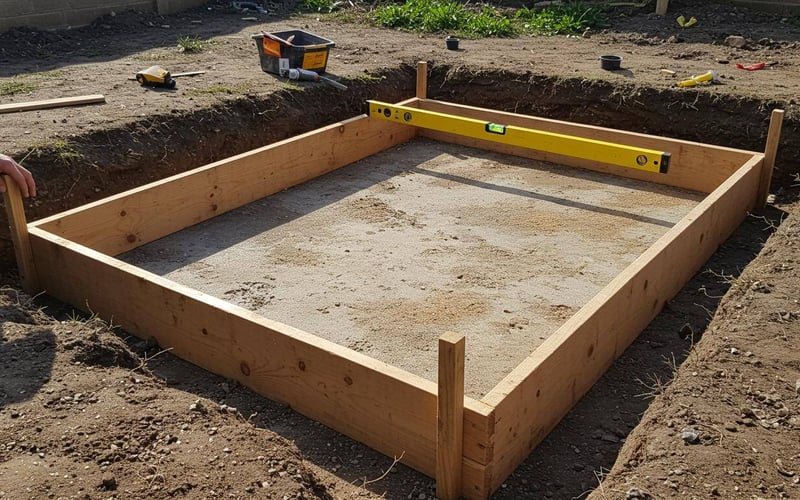
Use 25 mm thick timber cut to the length and width of your base. Pre-drill holes to prevent splitting. Screw the boards to 50 mm x 50 mm stakes driven into the ground every 600 mm.
Check every corner with a builder's square. Check every edge with a spirit level. The top edge of the formwork defines the finished concrete surface. It must be level in all directions.
Step 5: Install the Damp-Proof Membrane
Lay 1000-gauge DPM inside the formwork to create a waterproof tray. Overlap all joints by at least 150 mm and seal them with duct tape. Run the membrane up the inside face of the formwork by 50 mm.
Avoid walking on the membrane once it is laid. Any puncture allows ground moisture to reach the concrete, which can cause damp problems in the building above.
Step 6: Calculate Your Concrete
Concrete Mix Calculator
Calculate exactly how much concrete and materials you need for your base
Pro Tips:
- Always order 10-15% extra concrete for waste and variations.
- Ballast mix (1:4) is easier for beginners than separate materials (1:2:3).
- Consider delivery costs - suppliers often have minimum orders.
- Ready-mix bags are convenient but more expensive for large projects.
Multiply length (m) x width (m) x depth (m) to get cubic metres needed. A 3 m x 2 m base at 100 mm depth needs 0.6 m³ of concrete. Always order 10-15% extra for spillage and depth variations.
The standard mix ratio is 1:2:3. That means one part cement, two parts sharp sand, three parts 20 mm aggregate. For a 0.6 m³ base, you need roughly 6 bags of cement, 12 bags of sand, and 18 bags of aggregate.
The alternative ratio is 1:4 (one part cement to four parts ballast). Ballast is pre-mixed sand and gravel, which saves time measuring separate materials.
Step 7: Mix and Pour the Concrete
Once water touches cement, you have 2 hours to pour, spread, and level the entire base. Plan everything before you start mixing.
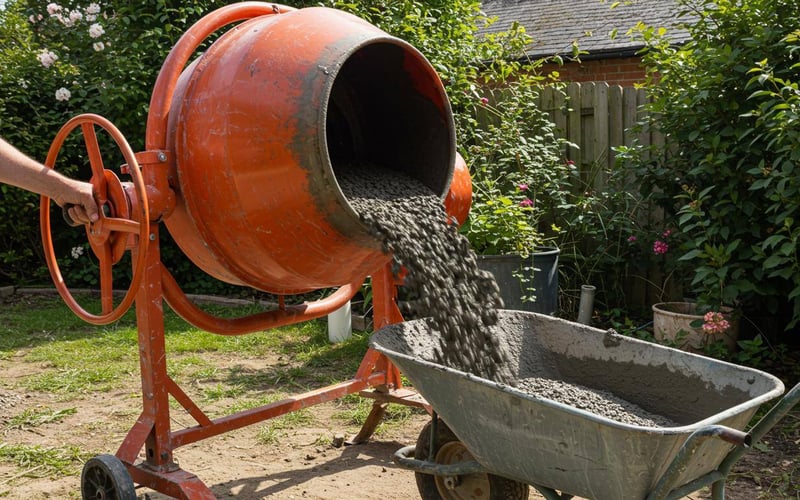
Add the dry ingredients to the mixer first. Add water gradually while the drum turns. Stop when the mix holds its shape when squeezed but is not sloppy. Think thick porridge consistency.
Start pouring at the far corner and work towards the mixer. Tip the wheelbarrow load into the formwork, then spread it roughly level with a rake. Push a spade vertically into the wet concrete every 300 mm to release trapped air bubbles.
Step 8: Tamp and Finish the Surface
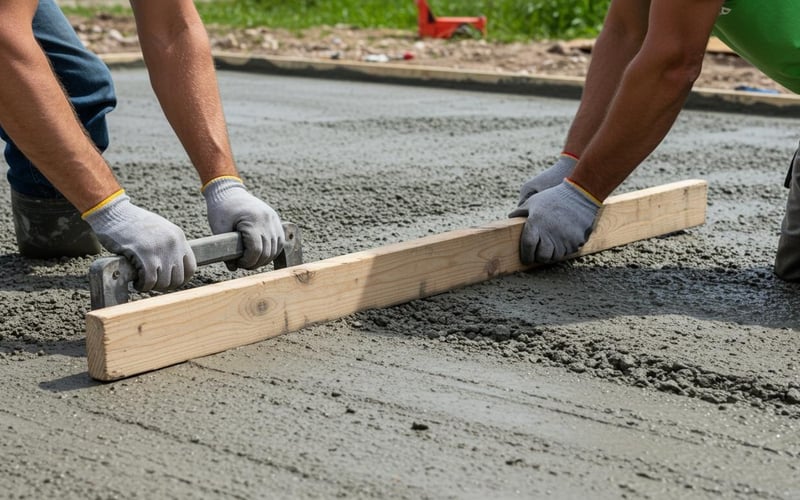
Rest a straight timber beam (tamping beam) across the formwork edges. Use firm downward blows to compact the concrete. Slide the beam back and forth in a sawing motion to level the surface.
Work along the full length in 300 mm passes. Fill any low spots with fresh concrete and tamp again. Repeat until no low spots remain. Finish with a steel float for a smooth surface, or leave it tamped for a non-slip texture.
Step 9: Cure and Protect for 28 Days
Cover the surface with damp hessian sacking or raise plastic sheeting on bricks above it. Concrete gains strength through a chemical reaction that needs water. If it dries out too fast, it cracks.
- 24-48 hours: The surface is walkable with care. Do not drag anything heavy across it.
- 7 days: Remove the formwork carefully. The concrete has reached roughly 65% of its full strength.
- 28 days: Full strength. The base is ready for your building.
Step 10: Prepare for Building Installation
Lay pressure-treated timber bearers (75 mm x 50 mm) across the base, spaced 400-600 mm apart. These bearers raise the building floor off the concrete and allow air to circulate underneath, preventing condensation and damp.
Check the bearers are level in all directions. Shim any low points with thin timber offcuts. The building sits on these bearers, so accuracy here determines whether your doors and windows hang true.
Concrete Base Depth for Different Buildings
The same 10-step process works for all garden buildings. The depth of concrete changes depending on the weight and size of the structure.
| Building Size | Concrete Depth | Reinforcement |
|---|---|---|
| Small (up to 15 m²) | 100-125 mm | Optional |
| Medium (15-25 m²) | 125-150 mm | Recommended |
| Large (25 m²+) | 150-200 mm | Essential (A142 mesh) |
Sheds: A typical loaded shed weighs 200-500 kg. A 100 mm base without reinforcement is sufficient for sheds up to 15 m².
Garden rooms and log cabins: These weigh 2-5 tonnes or more. They need 125-150 mm of concrete with steel reinforcement mesh (A142 minimum). Precision levelling is critical because pre-hung doors and sealed windows cannot absorb even 5 mm of movement. Read our garden rooms buying guide for full specification details.
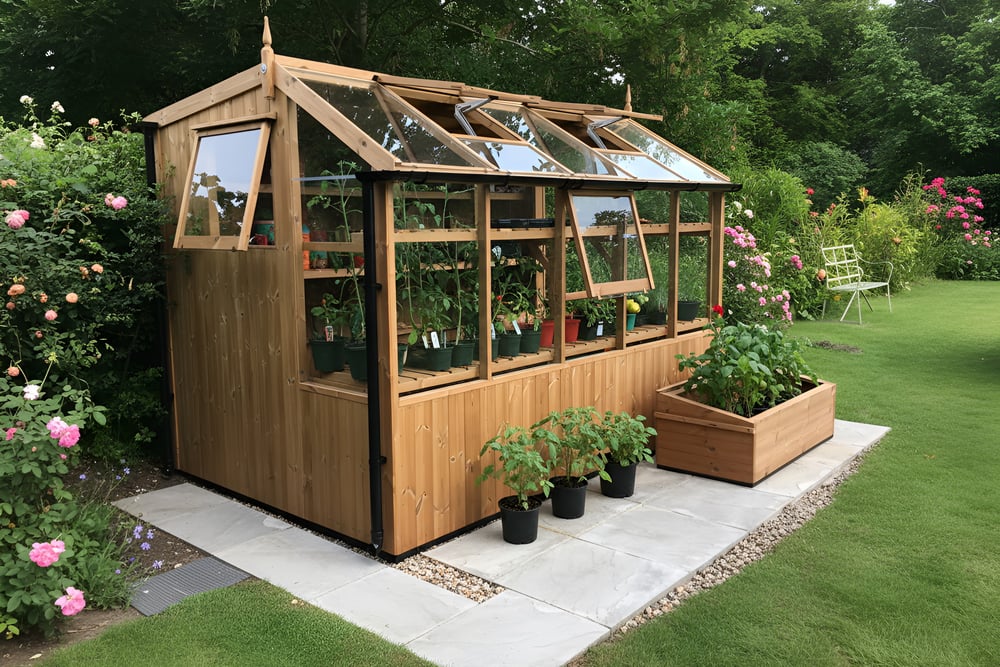
Greenhouses: Aluminium greenhouses are lighter but need drainage around the perimeter for watering runoff. Wooden greenhouses are heavier and benefit from a thicker base.
When to Call a Professional
- Buildings over 30 m²
- Sloping sites with a gradient steeper than 1:10
- Heavy log cabins that may need structural engineering calculations
- Year-round heated buildings that need insulated foundations
Alternative Base Options
Concrete is not the only option. Here is how the alternatives compare.
- Paving slabs: Faster to install and easier for beginners. Individual slabs can settle over time on soft ground, causing an uneven surface. Best for lighter buildings under 10 m². See our guide to paving slab bases for the full method.
- Timber frame: Cheapest option at £50-£150 for materials. Needs replacing every 10-15 years as the timber rots. Not suitable for buildings you want to last.
- Plastic grid systems: Quick to lay and allow drainage. Limited load capacity makes them unsuitable for buildings over 500 kg.
For any building you want to keep for 20+ years, concrete is the right choice. The upfront cost is higher, but you never need to replace it.
Common Mistakes to Avoid
- Skipping the sub-base: Pouring concrete directly onto soil is the number one cause of cracking. The sub-base distributes load and prevents frost heave.
- Rushing the excavation: Uneven digging creates thin spots in the concrete. Thin concrete cracks under load.
- Pouring before rain: Check the forecast for 48 hours ahead. Heavy rain on fresh concrete washes out the cement and weakens the surface.
- Weak formwork: Thin timber or poorly staked boards bow outward under the weight of wet concrete. Use 25 mm timber with stakes every 600 mm.
- Working alone: The pour and tamping stages need two people minimum. One person mixes and transports while the other spreads and levels.
- Building too soon: Putting a building on a base that has not fully cured causes surface damage. It can crack the slab. Wait the full 28 days.
Costs and Timeline
Budget Estimates (UK, 2026)
- Small base (2 m x 3 m): £200-£350 including materials and tool hire
- Medium base (3 m x 4 m): £325-£550 including materials and tool hire
- Large base (4 m x 6 m): £500-£850 including materials and tool hire
Concrete materials cost £80-£300 depending on base size. MOT Type 1 hardcore runs £40-£120. Formwork timber is £20-£50, DPM is £15-£30. Tool hire adds £30-£50 per day for a mixer and £40-£60 for a wacker plate.
Realistic Timeline
- Day 1: Planning, measuring, and marking out
- Day 2: Excavation and sub-base installation
- Day 3: Formwork, membrane, and final checks
- Day 4: Concrete mixing, pouring, and finishing
- Days 5-28: Curing period. No building work on the base.
If you are also choosing the right garden shed, order it during the curing period. It arrives when the base is ready.
|
Matt's Pick: Best Shed for a Concrete BaseBest For: Serious gardeners who need a potting shed that lasts decades Why I Recommend It: The Swallow Jay is a premium wooden potting shed built from Scandinavian redwood. At 6 ft x 10 ft, it is heavy enough to need a proper concrete base. A solid base keeps the timber off damp ground and prevents the frame from twisting. This shed will outlast any flat-pack alternative. Price: £4,041 |
Frequently Asked Questions
How much does a concrete shed base cost?
A typical 3 m x 2 m base costs £200-£350 including tool hire. Larger bases up to 4 m x 6 m cost £500-£850. The main costs are concrete materials, MOT Type 1 hardcore, formwork timber, and mixer hire at £30-£50 per day. Doing the work yourself saves £300-£600 compared to hiring a contractor.
Do I really need to wait 28 days before building?
Yes, 28 days is the minimum for full concrete strength. Concrete reaches roughly 65% strength at 7 days, which is when you can remove formwork. At 28 days it reaches design strength (typically 25-30 N/mm² for a C20 mix). Building on a base that has not fully cured risks surface damage and cracking under load.
Can one person build a concrete shed base?
You need at least two people for the concrete pour. One person mixes and wheels the concrete while the other spreads and levels. The 2-hour working window means there is no time for one person to do both jobs. Excavation, sub-base, and formwork stages can be done alone.
What if it rains during or after pouring?
Light drizzle after pouring is harmless, but heavy rain ruins fresh concrete. Check the weather forecast before scheduling your pour day. If rain starts within 2 hours of finishing, cover the surface with raised plastic sheeting on bricks. The sheeting must not touch the concrete or it leaves marks.
Can I build a concrete base on a sloping garden?
Gentle slopes up to 1:10 gradient are manageable with deeper formwork. Dig deeper on the high side and build up formwork on the low side to create a level surface. Slopes steeper than 1:10 need retaining walls or stepped foundations. These require professional design.
Should I hire or buy a concrete mixer?
Hire a mixer unless you have three or more concrete projects planned. A new mixer costs £300-£500 to buy. Hiring costs £30-£50 per day. For a single base, hiring saves money and avoids storage and maintenance. Most tool hire shops offer weekend rates that cover Friday to Monday.
What concrete depth do I need for different buildings?
Sheds need 75-100 mm, garden rooms need 125-150 mm with reinforcement. Buildings over 25 m² or heavier than 2 tonnes need 150-200 mm with A142 steel mesh reinforcement. The heavier the building, the thicker the base and the more critical the sub-base compaction becomes.