


Verified Customer
Excellent customer service, fast delivery and quality product
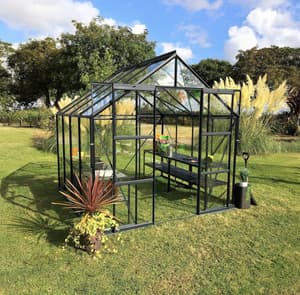
A typical 6x8ft aluminium greenhouse takes two people 6-8 hours to assemble, and you don't need specialist skills to do it well. The key is preparation: a level base, the right tools, and a calm day with no wind. After helping over 150,000 UK customers with greenhouse purchases since 2012, we've put together this DIY guide based on the most common questions and mistakes we see.
Prefer professional installation? Our nationwide service starts from £575 | Call 0800 098 8877
You'll need roughly £50-£100 worth of basic tools, most of which you probably already own. Every aluminium greenhouse we sell from Vitavia, Elite, and Palram uses 10mm bolts that slide into frame channels, so a 10mm spanner is your most important item.
Your base is the most important part of the entire installation. Around 70% of the post-assembly problems customers call us about, jammed doors, cracked glass, frames that won't square up, come down to an uneven base.
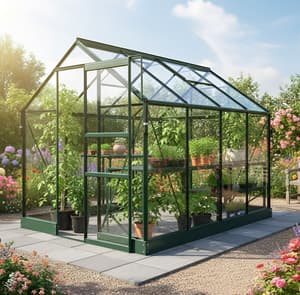
Most popular for DIY
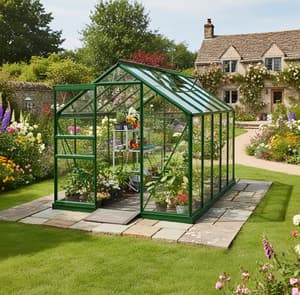
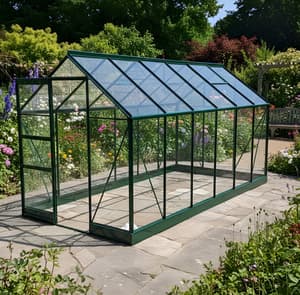
Best for 8ft+ and exposed sites
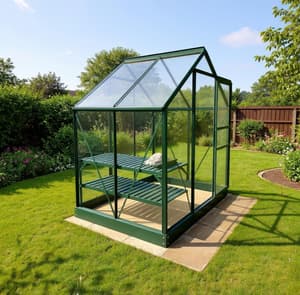
Sheltered sites, up to 6x8ft only
The base needs to be completely level (within 5mm across the full width), square at all four corners, and extend at least 50mm beyond the greenhouse frame on all sides. Use a spirit level across multiple points, not just the corners.
For a detailed walkthrough, read our full base preparation guide.
If you're placing your greenhouse on soil, most Vitavia and Elite models include corner posts. Here's how to use them:
If you're laying a concrete or slab base that's larger than the greenhouse footprint, don't make it dead flat. Give it a 1% fall (roughly 10mm per metre) sloping away from the structure. This stops rainwater pooling against the bottom cill, which causes moss build-up and can seep into your floor space during heavy downpours. It's a small detail that our professional installers always get right, and DIY builders almost always miss.
Allow 6-8 hours for a 6x8ft greenhouse with two people, or 10-14 hours for an 8x10ft or larger model. Don't try to rush it in an afternoon. Most manufacturers' instructions run to 20-40 pages, and it's worth reading them fully before you start.
Lay out every component and check them against the parts list. Aluminium profiles can look very similar, so sort them by length and label them with masking tape. If anything is missing or damaged, call us on 0800 098 8877 before you begin.
Build the base frame first and fix it to your prepared base. Use base clips if you're fixing to concrete or slabs (drill into the base with a masonry bit and use rawlplugs). Check it's level and square before moving on. Every millimetre matters here.
Most manufacturers recommend assembling the gable ends flat on the ground, away from the base. Bolt the frame pieces together finger-tight only at this stage. Don't fully tighten anything until the entire frame is assembled.
With a second person, lift the gable ends onto the base and bolt the side wall bars between them. Fit the eaves bars and then the roof bars. This is where having a helper is non-negotiable, someone needs to hold the structure steady while the other bolts.
Fit the ridge bar along the top and add any diagonal bracing bars. Use your spirit level and builder's square to check everything is level, plumb, and square. This is your last chance to make easy adjustments before glazing locks the structure in place.
Hang the sliding door on its runners. It should glide smoothly with no catching. If it doesn't, your frame isn't quite square, go back and adjust. Fit any roof vents and louvre vents at this stage too.
This is the stage that takes the longest and needs the most care. Start with the roof panes, then move to the sides.
Once all glazing is in place, go around and fully tighten every bolt. Check the door slides smoothly again. Fit any remaining accessories like guttering, downpipes, or automatic vent openers.
Aluminium expands and contracts with temperature changes, roughly 1mm per metre between summer and winter in UK conditions. This means bolts that were perfectly tight in June may have loosened slightly by December. Set a reminder to re-check and re-torque every bolt 6 months after installation, and again annually after that. Pay particular attention to roof bar fixings and the ridge bar, as these take the most wind loading stress. This 30-minute check prevents the slow loosening that causes rattling, water ingress, and eventually structural problems in high winds.
The most common mistake I see is people fully tightening bolts as they go. I get it, it feels like progress. But aluminium greenhouse frames need adjustment room during assembly. If you lock everything tight at step 3, you'll find the roof bars won't align at step 5. Keep everything finger-tight until the full frame is up, then do one final tightening pass at the end. This single change turns a frustrating 12-hour job into a smooth 6-hour one.
| Size | DIY Time (2 People) | Difficulty | Pro Install Cost | Best For |
|---|---|---|---|---|
| 6x4ft | 4-6 hours | Beginner | £575 | Confident first-time builders |
| 6x8ft | 6-8 hours | Beginner-Intermediate | £670 | Most popular DIY size |
| 6x10ft | 8-10 hours | Intermediate | £710 | Experienced DIYers |
| 8x8ft | 8-10 hours | Intermediate | £880 | DIYers with a helper |
| 8x10ft | 10-14 hours | Advanced | £910 | Consider professional install |
| 8x12ft | 12-16 hours | Advanced | £950 | Strongly recommend professional |
| 8x14ft | 14-18 hours | Advanced | £1,000 | Professional install recommended |
For anything 8x10ft or larger, we'd honestly recommend considering our professional installation service. The roof work on larger models involves heavy panels at height, and the time saving alone often justifies the cost.
We offer manufacturer-backed professional installation on Vitavia and Elite greenhouses, with Swallow models including installation as standard. Browse by width below or view our full installation service page for details.
Even 10mm of unevenness across a 6ft span will cause doors to stick and glass not to sit properly. Use a 1m spirit level across multiple points, not just the edges.
Measure diagonally corner to corner. Both measurements must be identical. If they differ by more than 5mm, adjust before proceeding.
Aluminium channels can strip with a power drill. Use a hand spanner or set your drill to the lowest torque. Tighten firmly by hand without forcing.
Glass panes act like sails. A sudden gust can rip a pane from your hands or twist an unglazed frame. Check the forecast and pick a calm day.
You genuinely need two people from step 3 onward. Trying to hold frame sections, align bolt holes, and tighten fixings single-handed is how frames get bent and glass gets broken. Your helper doesn't need experience, they just need to hold things steady.
Why We Chose This Range
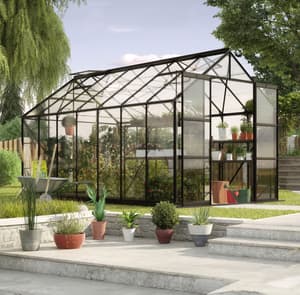
We chose to show the Elite and Vitavia assembly processes in this guide because their use of standardised 10mm bolts and high-tensile aluminium profiles makes them the most forgiving for DIY builders. Unlike cheaper imports that use thin-gauge wrap-around frame systems, these British and European-engineered frames allow for minor adjustments during the build without compromising structural integrity. That's why we recommend them to first-time builders, they're designed to tolerate the small alignment corrections that are a normal part of self-assembly.
, Matt, Co-Founder of Greenhouse StoresWhy We Wrote This Guide
We've been selling greenhouses since 2012 and have shipped over 150,000 orders in that time. The most frustrating calls we get are from customers who've hit a problem three hours into assembly that could have been avoided with better preparation. This guide is based on the real questions and mistakes we see every week. We don't want you to need our professional install service because your DIY attempt went wrong, we want you to choose it because it's convenient, or succeed with DIY because you were properly prepared.
, Matt, Co-Founder of Greenhouse StoresA standard 6x8ft aluminium greenhouse takes 6-8 hours with two people. Smaller 6x4ft models take 4-6 hours, and larger 8x10ft+ greenhouses can take 10-18 hours spread over 2-3 days. Polycarbonate greenhouses like the Palram Canopia range are typically 20-30% faster to assemble than glass models.
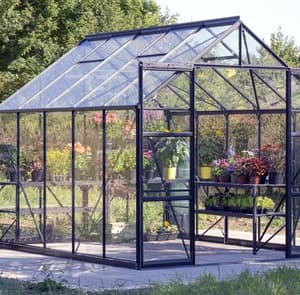
No, but you do need a firm, level surface. Paving slabs are the most popular DIY choice and work well up to 8x10ft. Concrete is recommended for 8ft+ wide greenhouses and exposed locations. Small greenhouses (up to 6x8ft) can use corner posts on compacted soil in sheltered gardens. Read our base preparation guide for full details.
You can manage the base frame and initial sorting alone, but you'll need a second person from the wall assembly stage onward. Lifting gable ends, holding frame sections, and handling glass panes all require two people for safety and accuracy.
DIY saves you £575-£1,000+ depending on size, but you'll need £50-£100 in tools. For a 6x8ft, that works out at roughly £85-£110 per hour of your time. Self-assembly makes good financial sense up to 8x8ft. For larger models, professional installation is often better value.
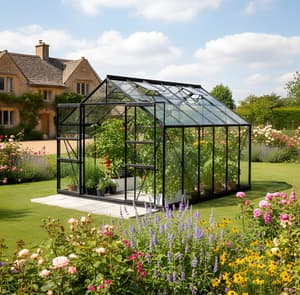
Position on a north-south axis for maximum sunlight. Place the entrance away from the prevailing south-westerly wind. Avoid positions under trees and leave at least 1m clearance on all sides. Read our detailed positioning guide.
Glazing is consistently the most difficult stage. Glass panes can weigh 2-3kg and measure over 1.2m long. We recommend pliers for clip work, rubber-grip gloves, and a glass sucker (£8-£12) for roof panes. Polycarbonate greenhouses avoid this issue entirely.
Browse our full range of greenhouses with free UK delivery:
Greenhouse Stores only provides direct installation when it is offered by the manufacturer, as they use their own factory-trained installers. If you choose to hire a third-party installer, it is entirely at your own risk. For information about shed installation, see our Garden Shed Installation Midlands page.
Most of our ranges are fully customisable. Learn more about our bespoke options.