How to Make Your Own Compost
Homemade compost takes 4–6 months using a hot bin method or 12–18 months in a cold heap. The key is a 50/50 mix of greens (nitrogen) and browns (carbon) by volume. Turn the pile every 7–10 days and keep moisture levels like a wrung-out sponge. Finished compost works in raised beds, pots, greenhouse borders, and open soil.
Key Takeaways
- Save Money: Homemade compost cuts spending on bagged potting mixes and fertilisers.
- The Golden Ratio: Aim for a 50/50 mix of greens (nitrogen) and browns (carbon) by volume.
- Speed Matters: Hot composting in a bin produces results in 4–6 months. Open heaps take 12–18 months.
- Versatile Use: Finished compost is ideal for mulching raised beds, improving clay soil, or mixing with perlite for pots.
- Greenhouse Essential: Compost improves water retention, vital for thirsty crops like tomatoes grown under glass.
Installer's Note
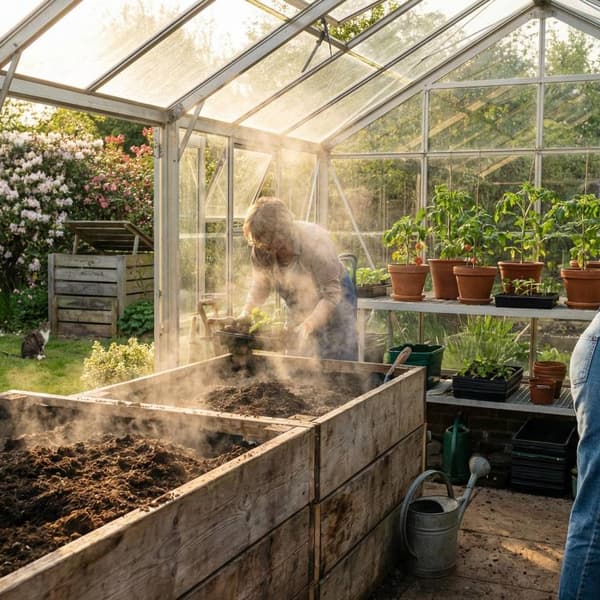
When we fit greenhouses for customers, we always recommend setting up a compost bin nearby. Over 16 years of installations, we have seen the best greenhouse crops come from growers who make their own compost. The soil inside a greenhouse depletes fast with intensive cropping. A steady supply of homemade compost keeps your growing beds productive season after season.
Why Every Vegetable Gardener Needs to Compost
Whether you grow tomatoes under glass or fill raised beds, homemade compost is the most effective way to improve your garden.
For vegetable gardeners, it solves three problems. It feeds hungry crops. It improves water retention in pots and containers. It saves a fortune on bagged compost.
- For Pots and Containers: Compost holds moisture far better than standard soil. Container crops dry out fast in summer, so this matters.
- For Raised Beds: Filling raised beds with bought compost is expensive. Homemade compost provides a bulk, nutrient-dense filler that settles well.
- For Soil Borders: It breaks up heavy clay to improve drainage. It binds sandy soil together to hold nutrients.
- For Greenhouses: It introduces beneficial bacteria that suppress common diseases in intensive growing environments.
Choosing Your Method: Heaps, Bins, or Tumblers
The right setup depends on your space and how quickly you need the result.
The Cold Heap
- Best for: Large soil borders and allotments.
- Pros: Zero maintenance. Just pile it up and walk away.
- Cons: Very slow (12–18 months). Weed seeds often survive the lower temperatures.
The Hot Bin (Plastic or Wooden)
- Best for: Most home growers wanting reliable results.
- Pros: Retains heat, speeds up the process to 4–6 months, and keeps the garden tidy.
- Cons: Requires manual turning every 7–10 days to keep it aerated.
The Tumbler
- Best for: Small patios or urban spaces.
- Pros: Easy to turn (just spin it), rodent-proof, and fast.
- Cons: Limited capacity. Works best for creating small batches of potting compost.
If you are short on space, check our greenhouse staging options to organise your growing area alongside a compact compost bin.
The Perfect Formula: Greens vs Browns
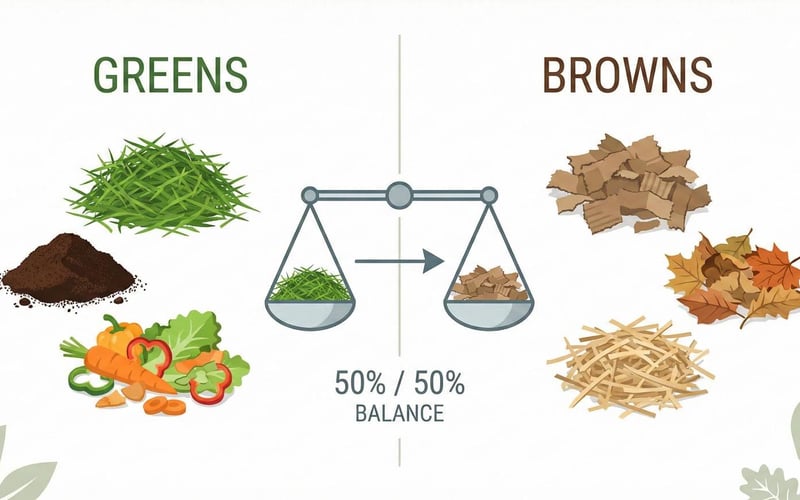
The biggest mistake beginners make is the slimy pile. This happens when there is too much wet nitrogen and not enough dry carbon.
The Golden Ratio: Aim for a 50/50 mix by volume.
The Greens (Nitrogen)
- Grass clippings (mix well to avoid matting into a dense layer).
- Vegetable peelings and fruit scraps.
- Coffee grounds (an excellent natural accelerator).
- Annual weeds (before they set seed).
The Browns (Carbon)
- Cardboard torn into small pieces (remove tape and staples first).
- Woody prunings shredded into 5–10cm lengths.
- Dried leaves and straw.
- Paper and egg cartons.
Coffee grounds are one of the best free compost activators. Read our full guide on using coffee grounds for plants for dosage advice.
How to Make Compost Fast (The Hot Method)
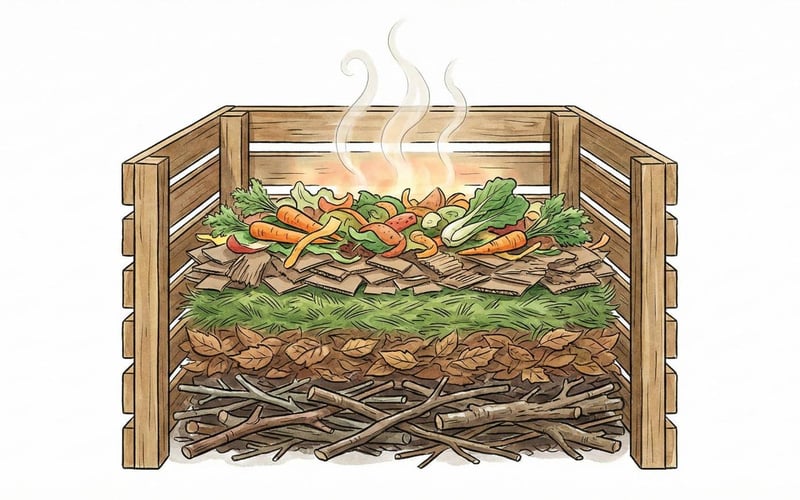
If you want compost ready for the spring sowing season, you need to actively manage the pile. Follow these five steps.
- Chop and Shred: The smaller the pieces, the faster they rot. A garden shredder on woody branches increases the surface area for bacteria.
- Layer It Up: Start with twigs at the bottom for airflow. Alternate layers of greens and browns, each about 10–15cm deep.
- Add an Activator: Use chicken manure pellets, nettle tea, or a commercial activator to kickstart the process.
- Monitor Moisture: The pile should feel like a wrung-out sponge. If it is too dry, water it lightly.
- Turn It: Aerating the pile introduces oxygen, which heats up bacteria. Turn your heap with a fork every 7–10 days.
You can monitor pile temperature using soil thermometers from our greenhouse accessories range. Aim for 55–65°C in the centre.
What NOT to Compost
To keep your vegetable beds safe and pest-free, avoid these items:
- Meat, Fish, and Dairy: These attract rats and foxes.
- Diseased Plants: Tomato blight or clubroot spores survive home composting temperatures. Burn them or use the council bin.
- Perennial Weeds: Bindweed and couch grass roots survive and regrow in finished compost.
- Cat or Dog Waste: Contains pathogens harmful to humans.
- Glossy Magazines: The inks and coatings often contain toxins.
- Citrus Peel: Yes, you can compost it, but in moderation. Too much makes the heap acidic and slows worm activity.
Troubleshooting Common Compost Problems
Is your compost bin misbehaving? Use this table to diagnose the problem.
| Symptom | Probable Cause | The Fix |
|---|---|---|
| Smells of ammonia or rotten eggs | Too much nitrogen (green) and lack of air. | Turn the pile and mix in shredded cardboard or paper. |
| Pile is dry and nothing is rotting | Too much carbon (brown) or lack of moisture. | Add water and mix in fresh grass clippings or veg scraps. |
| Fruit flies swarming | Exposed food waste on the surface. | Cover fresh kitchen scraps with a layer of brown leaves or soil. |
| Slugs in the heap | Perfectly normal. They help break down material. | Pick them out before using the finished compost. |
| Too wet and slimy | Rain getting in or poor drainage at the base. | Cover the bin with a lid or old carpet. Add dry woody material. |
How to Use Finished Compost in Every Garden Type
When is compost ready? It should be dark brown, crumbly, and smell like damp woodland. Once ready, apply it based on where you are growing.
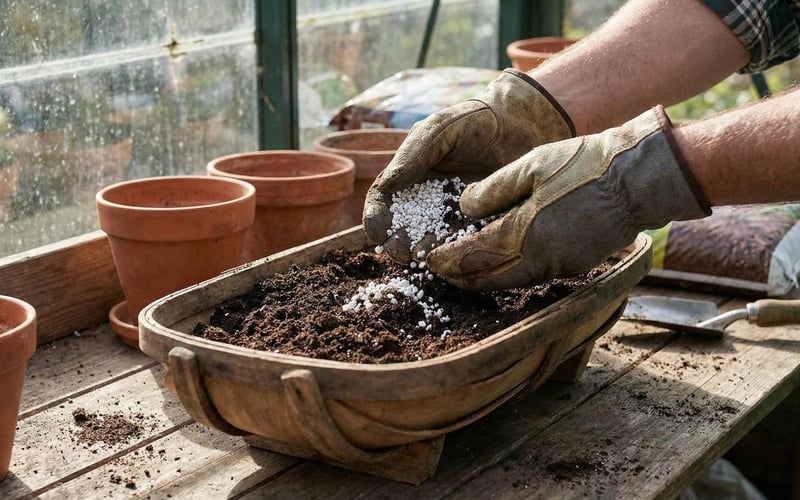
For Pots and Containers (The Potting Mix Recipe)
Garden compost is too rich and dense to use undiluted in pots. Mix it on your potting benches using this ratio:
- 1 Part Sifted Compost: Provides the nutrients.
- 1 Part Garden Soil or Loam: Adds structure and weight.
- 1 Part Perlite or Grit: Ensures drainage so roots do not rot in the container.
For Raised Beds (The No-Dig Mulch)
Raised beds naturally slump over time as soil settles. Instead of digging, use compost to top them up.
- In autumn or early spring, spread a 5–8cm layer of compost on top of the soil.
- Do not dig it in. Let worms pull the organic matter down. This preserves soil structure and feeds the bed for the season.
For Open Soil Borders
- Clay Soil: Dig compost in vigorously. The organic matter forces clay particles apart, improving drainage.
- Sandy Soil: Lay it as a thick mulch to lock in moisture before summer heat.
For Greenhouses
Intensive greenhouse growing depletes soil fast. If you grow in border soil inside your aluminium greenhouses, treat the beds like raised beds. Mulch thickly in autumn to replenish nutrients lost to hungry tomatoes and peppers.
Matt's Tip: The Two-Bin System
After 16 years of greenhouse installations, I always tell customers to set up two compost bins side by side. Fill one while the other finishes. By the time you have filled the second bin, the first is ready to use. It means you never run out of compost during the growing season. I use this system myself and it keeps my greenhouse beds topped up year-round.
|
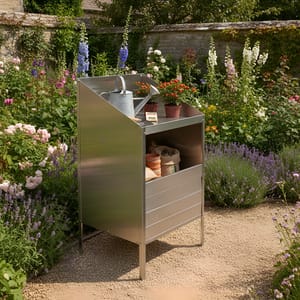
Matt's Pick for Composting WorkspaceElite Potting Bench Best For: Mixing compost with perlite and soil for potting mixes. The built-in soil tray catches mess and the slatted shelf stores bags of grit underneath. Why I Recommend It: I have used one of these for years. When you are sieving compost and mixing potting blends, having a proper bench at waist height saves your back. The metal soil tray means you can scoop and mix without spilling compost everywhere. Price: £179 |
Frequently Asked Questions
How long does it take to make compost?
A cold heap takes 12–18 months; a hot bin takes 4–6 months. The hot method requires chopping materials finely, insulating the bin, and turning it weekly. Cold heaps need no maintenance but take much longer to produce finished compost.
Can I put weeds in my compost bin?
Annual weeds are fine if they have not gone to seed. Avoid perennial weeds with strong roots like dandelions, bindweed, or couch grass. These roots survive composting temperatures and will regrow when you spread the finished compost.
Will my compost bin attract rats?
Not if you avoid adding cooked food, meat, dairy, and bread. Stick to garden waste and raw vegetable peelings. Use wire mesh at the base of the bin for extra protection. Rats are rarely an issue with plant-only compost bins.
Can I compost in winter in the UK?
Yes, but decomposition slows significantly below 5°C. Insulate your bin with bubble wrap or old carpet to retain heat. Keep adding kitchen scraps through winter to feed the bacteria. The pile will speed up again when spring temperatures arrive.
Do I need a compost accelerator?
Accelerators help but are not strictly necessary. They kickstart the process in cooler weather. Natural alternatives include chicken manure pellets, nettle tea, and fresh coffee grounds. These add nitrogen that feeds the composting bacteria.
Making your own compost is one of the most rewarding skills a gardener can learn. It turns kitchen and garden waste into a free, nutrient-rich growing medium for your greenhouse crops, raised beds, and pots.
Related Articles
- Using Raised Beds in a Greenhouse Guide
- Growing Tomatoes in a Greenhouse
- How to Grow Seeds in a Greenhouse
- How to Grow Carrots
- Potting Shed Ideas: Layout, Storage and Organisation Tips
Questions about composting or greenhouse growing? Contact our team at info@greenhousestores.co.uk