How to Use Coffee Grounds for Plants: UK Expert Guide 2025
By Matt W | Updated February 2026
Used coffee grounds contain 1-2% nitrogen, phosphorus, potassium, and trace minerals like magnesium and calcium. After 16 years installing greenhouses and advising customers on growing, we have found composting grounds first is the safest method. Used grounds sit at pH 6.5-6.8, nearly neutral. Applied correctly, they improve soil structure and kill slugs. Applied wrong, they form a waterproof crust that suffocates roots.
Key Takeaways
- Best Practice: Add coffee grounds to compost rather than directly to soil.
- Safe Application: Use no more than 20% coffee grounds in compost mixtures.
- Perfect for: Roses, hydrangeas, azaleas, and blueberries when properly composted.
- Pest Control: A 1-2% coffee solution kills slugs through caffeine poisoning.
- Avoid: Thick layers that create water barriers and harm seedlings.
- Dog Warning: Coffee grounds can be toxic to dogs. Keep them away from treated areas.
Installer's Note
When we install greenhouses, customers often ask what to do with kitchen waste like coffee grounds. We always say the same thing: compost them first. Over 16 years, we have seen dozens of greenhouse beds ruined by raw coffee grounds dumped straight onto soil. The fine particles compact, block drainage, and suffocate roots. A quick composting step makes all the difference.
Why Coffee Grounds Work in Your Garden
Coffee grounds are one of the most misunderstood garden amendments. Most gardeners either swear by them or dismiss them entirely. Both camps are partially right.
Used coffee grounds contain nitrogen (1-2%), phosphorus, potassium, and micronutrients like magnesium and calcium. They have a nearly neutral pH of around 6.5-6.8. The brewing process extracts most acids, so they are far less acidic than people expect.
The problem comes from application method. Raw grounds clump together when wet. They form an impermeable barrier that blocks water and air from reaching roots. We have seen this happen in greenhouse beds where customers tipped spent grounds straight from the cafetiere.
When used correctly, coffee grounds improve soil structure and water retention. They also work as a slug deterrent. The trick is knowing which methods deliver results and which ones damage your plants.
UK coffee shops produce thousands of tonnes of used grounds each year. Rather than sending this to landfill, gardeners can recycle it into useful compost. Coffee grounds slot in perfectly as a nitrogen-rich green material for any compost bin.
The Science Behind Coffee Grounds as Plant Food
The nitrogen content varies depending on coffee type and brewing method. It typically ranges from 1-2%. That feeds soil microorganisms that break down organic matter.
Any pH change coffee grounds bring to soil is short-lived. Do not expect long-term acidification. The brewing process extracts most acids, leaving grounds between pH 6.5 and 6.8.
Coffee grounds have a carbon-to-nitrogen ratio of about 20:1. That is ideal for composting. Compare this to grass clippings (12:1) or sawdust (500:1).
The micronutrients in coffee grounds include:
- Magnesium: Essential for chlorophyll production
- Calcium: Strengthens cell walls and root development
- Potassium: Improves disease resistance and water regulation
- Phosphorus: Supports root development and flowering
Plants in coffee-enriched compost show better drought tolerance and improved soil structure. The grounds help create aggregates that improve drainage while retaining moisture.
One important detail: soil microorganisms temporarily tie up nitrogen when breaking down coffee grounds. You might see slight nitrogen deficiency immediately after application. Add extra nitrogen sources like blood meal or chicken manure pellets when using fresh grounds.
Research has shown that a 2% caffeine solution applied to growing medium killed 95% of orchid snails. It outperformed liquid metaldehyde. This makes coffee a genuine natural pesticide option, not just a folk remedy. For more on managing pests naturally, see our greenhouse pest control guide.
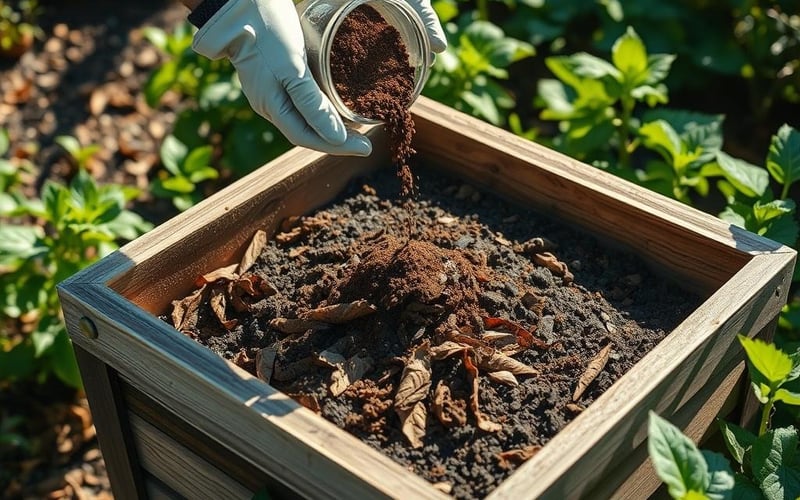
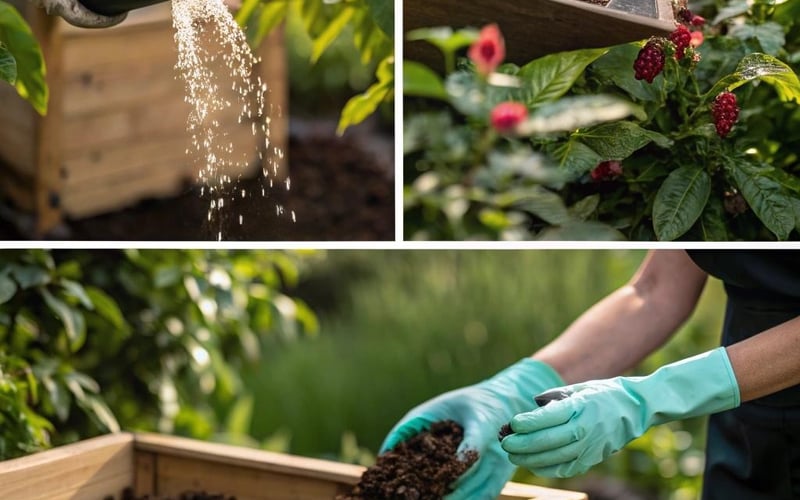
Adding Coffee Grounds to Your Compost Bin
Composting is the safest and most effective way to use coffee grounds. It transforms a tricky amendment into reliable plant food.
Coffee grounds count as "green" material. They are nitrogen-rich and moist. Balance them with "brown" materials like dried leaves, shredded cardboard, or wood chips. Use a 3:1 ratio of browns to greens. Coffee grounds should make up no more than 25% of your green materials.
Layering method:
Layer 1: 6 inches of coarse brown material (twiggy prunings, cardboard)
Layer 2: 2 inches of coffee grounds mixed with other green materials
Layer 3: 4 inches more brown material
Layer 4: Sprinkle of garden soil or finished compost
Coffee filters can go straight in. They break down quickly. Always break up clumps of grounds before adding them. Clumped grounds can survive months in the heap without decomposing.
Turn the pile every 2-3 weeks. Keep it as moist as a wrung-out sponge. You will have finished compost in 3-6 months. A raised beds and planters setup is ideal for using this finished compost.
Do not add too many grounds at once. A 5-gallon bucket dumped in one go creates anaerobic conditions and a terrible smell. Add grounds gradually, a couple of cups at a time.
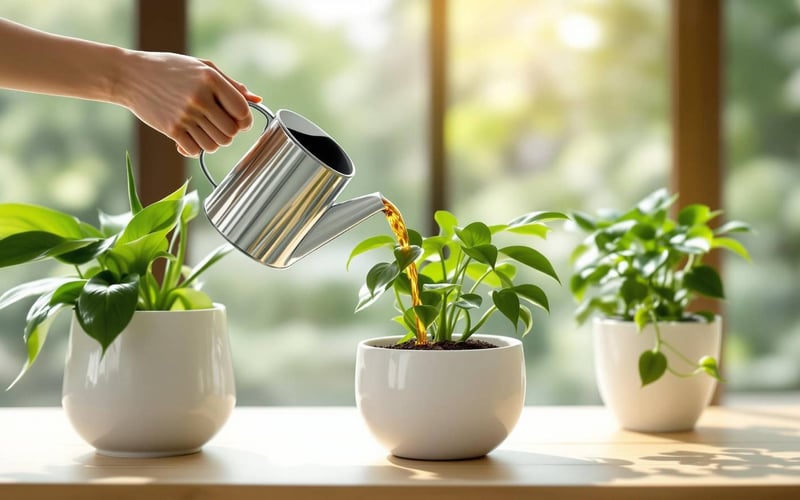
How to Use Coffee Grounds for Indoor Plants
Indoor plants can benefit from coffee grounds, but you need extra care with quantities. Always compost the grounds first or use them to make liquid fertiliser. Never sprinkle raw grounds on indoor plant soil. They will develop mould and smell terrible.
Coffee Ground Tea Method:
- Add 2 cups used grounds to 5 gallons of water
- Steep for 12-24 hours, stirring occasionally
- Strain through fine mesh or cheesecloth
- Dilute 1:1 with clean water before applying
- Use monthly during growing season (March-October)
This liquid fertiliser works well for pothos, peace lilies, and ferns.
Mixing with Potting Compost:
For container plants, mix finished coffee compost (not raw grounds) into potting mix at a ratio of 1:4. This provides slow-release nutrients and improves water retention.
Indoor plants that respond well to coffee treatments:
- Peace lilies: Appreciate the slight acidity
- Pothos: Benefit from improved soil aeration
- Rubber plants: Respond to slow-release nitrogen
- Fiddle leaf figs: Respond well to monthly coffee tea
Never use coffee grounds on succulents, cacti, or Mediterranean herbs like lavender or rosemary. These plants prefer alkaline, well-draining conditions.
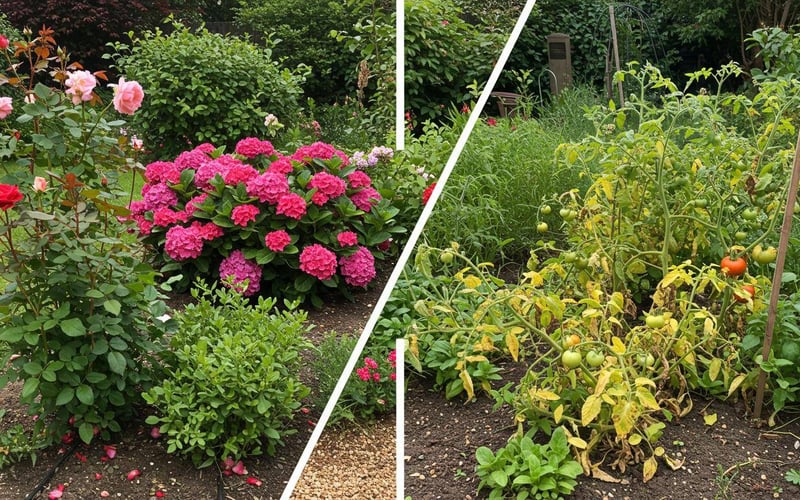
Which Plants Like Coffee Grounds (And Which Do Not)
Some plants thrive with coffee ground treatments. Others will sulk or die. Here is what we have found from years of testing soil around greenhouse installations.
Plants That Love Coffee Grounds:
| Plant Type | Why They Benefit | Application Method |
|---|---|---|
| Roses | High nitrogen needs, tolerates slight acidity | Composted grounds as mulch |
| Hydrangeas | Appreciates organic matter, blue varieties like acidity | Coffee tea monthly |
| Azaleas and Rhododendrons | Acid-loving, shallow roots benefit from organic mulch | Light dusting, well-composted |
| Blueberries | Requires acidic soil, heavy feeder | Composted grounds worked into soil |
| Carrots | Benefits from improved soil structure | Mixed into soil before sowing |
| Camellias | Acid-loving, appreciates organic matter | Composted grounds as top dressing |
Plants That Hate Coffee Grounds:
| Plant Type | Why They Suffer | What Happens |
|---|---|---|
| Tomatoes | Caffeine inhibits growth | Stunted growth, poor fruit set |
| Seedlings | Caffeine prevents germination | Seeds fail to sprout |
| Succulents | Prefer alkaline, well-draining soil | Root rot, poor drainage |
| Lavender | Mediterranean plant, hates wet feet | Fungal problems, death |
| Rosemary | Prefers alkaline soil, drought conditions | Yellowing, root rot |
| Sage | Needs well-draining, alkaline conditions | Poor growth, disease issues |
Caffeine residues in spent coffee grounds suppress germination and slow growth in sensitive plants. For vegetables like courgettes, beans, and brassicas, use coffee grounds only in compost form. The composting process breaks down caffeine while preserving nutrients.
How to Apply Coffee Grounds to Your Lawn
Lawn care with coffee grounds requires a different approach to garden beds. Done right, coffee grounds green up grass nicely. Done wrong, they create dead patches.
The Right Way to Feed Your Lawn:
Mix coffee grounds with equal parts fine compost or topsoil. This prevents the grounds from forming a waterproof crust. Apply at 1-2 pounds per 1000 square feet, maximum twice per growing season.
Spring Application (March-April):
- Rake lawn to remove winter debris
- Mix coffee grounds with compost (1:1 ratio)
- Spread mixture evenly using a broadcast spreader
- Water thoroughly but gently
Autumn Application (September-October):
- Apply after final mow before dormancy
- Mix grounds with leaf mould if available
- Apply at lighter rate (1 pound per 1000 sq ft)
- Rake lightly to work into thatch layer
Coffee grounds work well for lawns suffering from compaction. The organic matter helps break up clay soils and improves drainage. After a coffee application is a good time to consider scarifying your lawn to remove excess thatch.
What NOT to do:
- Never apply thick layers of pure coffee grounds
- Do not use on newly seeded areas (wait 6 months)
- Avoid application during drought conditions
- Never apply fresh, wet grounds directly
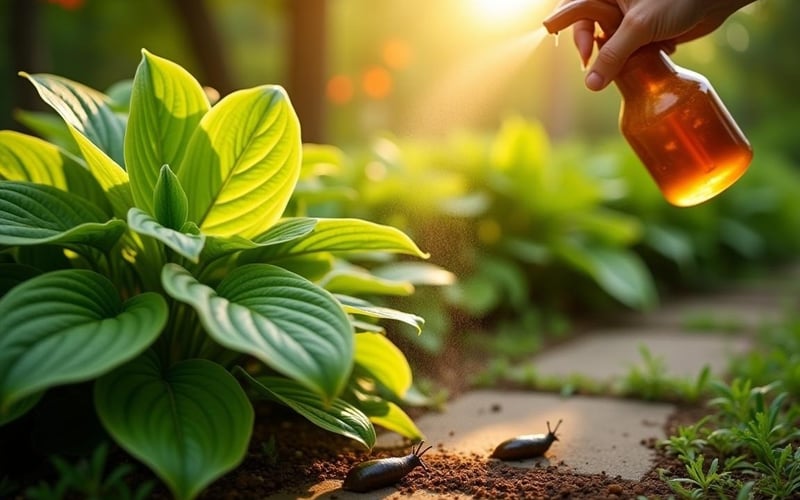
Coffee Grounds for Pest Control
This is where coffee grounds genuinely deliver. Most gardening advice gets the method wrong. The key is liquid coffee, not dry grounds.
Slug and Snail Control:
Research shows a 1-2% caffeine soil drench caused 100% of slugs to leave and die. This is genuine caffeine poisoning, not texture.
Slug-Killing Recipe:
- 2 cups strong brewed coffee (not grounds)
- 1 cup water
- Apply as soil drench around affected plants
- Reapply weekly or after rain
This method saves hosta beds from slug devastation. Within 24 hours, slugs either leave or die. It outperforms beer traps and copper strips.
For foliar application, use a weaker solution: 1 part coffee to 9 parts water. This prevents slugs from climbing plants without burning leaves. Test on a few leaves first during cool, cloudy weather.
What does not work:
- Dry coffee grounds scattered around plants (slugs cross them easily)
- Old, weak coffee (insufficient caffeine content)
- Mixing grounds with other materials (dilutes effectiveness)
Cat Deterrent: Fresh coffee grounds work moderately well. Refresh every few days. Mix fresh grounds with citrus peels around vulnerable areas. About 60% effective. For a more thorough approach, see our guide to keeping cats out of your garden.
Ant Control: Coffee grounds have minimal effect on ants. They cross coffee barriers without hesitation. Save your grounds for slug control instead.
Matt's Tip: Collect Grounds From Local Coffee Shops
Most independent coffee shops will save used grounds for you if you ask. We pick up a bucket every week from our local cafe. One shop produces enough grounds to keep a 6x8 greenhouse bed composted all season. Take a sealed bucket with a lid so it does not smell on the drive home. The grounds keep for a week in the bucket before they need adding to the compost.
Common Mistakes and How to Avoid Them
Mistake 1: Creating Coffee Ground Carpets
This is the number one plant killer. Coffee grounds form impermeable crusts when applied thickly. A 2-inch layer of pure grounds around annual flowers will kill them through dehydration despite regular watering.
Fix: Never apply more than 6mm of grounds. Always mix with coarser materials like leaf mould or compost.
Mistake 2: Using Grounds on Seedlings
Coffee grounds contain allelopathic compounds that prevent seed germination. Excess grounds applied before composting suppress germination and slow growth.
Fix: Wait until plants are 15cm tall before any coffee treatment. Use only composted grounds near young plants.
Mistake 3: Forgetting About Your Dog
Coffee grounds contain enough caffeine to poison dogs. Even a mouthful of fresh grounds can require emergency veterinary treatment.
Fix: If you have dogs, use coffee grounds only in secure compost bins. Or bury them deep in soil where pets cannot reach.
Mistake 4: Expecting Instant Soil Acidification
Used coffee grounds will not dramatically lower soil pH. The changes are minimal and temporary.
Fix: If you need acidic soil, use sulphur or specific acidifying products. Use coffee grounds for nutrients and soil conditioning, not pH adjustment.
Mistake 5: Overloading the Nitrogen Cycle
Too many coffee grounds tie up soil nitrogen as microorganisms break them down. This causes temporary nitrogen deficiency: yellowing leaves and stunted growth.
Fix: Balance coffee grounds with finished compost. Add extra nitrogen sources like blood meal when using fresh grounds.
Coffee Ground Fertiliser Tea Recipe
Liquid coffee fertiliser works brilliantly for container plants and greenhouse crops. Here is the method we recommend to customers.
Ingredients:
- 2 cups used coffee grounds
- 5 gallons rainwater (or tap water left to stand 24 hours)
- Large plastic bucket with lid
- Fine-mesh strainer or cheesecloth
Method:
- Steeping: Combine grounds and water in bucket. Cover and leave 24-48 hours, stirring twice daily.
- Straining: Pour through fine mesh to remove all particles. Remaining grounds clog watering equipment.
- Dilution: The liquid should be light brown, like weak tea. If dark, dilute with equal parts water.
- Application: Use within one week. Apply to soil, not leaves.
For extra nutrients, add banana peels or comfrey leaves during steeping. Potassium from banana peels complements the nitrogen from coffee perfectly.
Application Schedule:
- Outdoor containers: Weekly during growing season
- Houseplants: Monthly, bi-monthly in winter
- Greenhouse crops: Bi-weekly, alternating with regular liquid feed
- Established garden plants: Monthly as supplemental feeding
Store finished tea in a cool, dark place. It keeps for up to one week. This works particularly well for hungry plants like peppers and leafy greens. A small greenhouses setup is perfect for trialling coffee tea on greenhouse crops before scaling up.
Using Coffee Grounds in Containers and Pots
Container gardening with coffee grounds requires extra care. Drainage issues are magnified in pots.
Small Containers (under 5 gallons): Use only liquid coffee tea, never solid grounds. Small containers cannot handle the drainage restrictions.
Large Containers (5+ gallons): Mix composted coffee grounds into potting mix at 10% maximum. Never use fresh grounds in containers. They compact and kill root systems.
Container Coffee Mix Recipe:
- 60% quality peat-free compost
- 20% perlite or vermiculite
- 10% composted coffee grounds
- 10% leaf mould or bark chips
This mixture provides excellent drainage while retaining moisture and nutrients. If you have a potting sheds setup, mixing batches in advance saves time during the growing season.
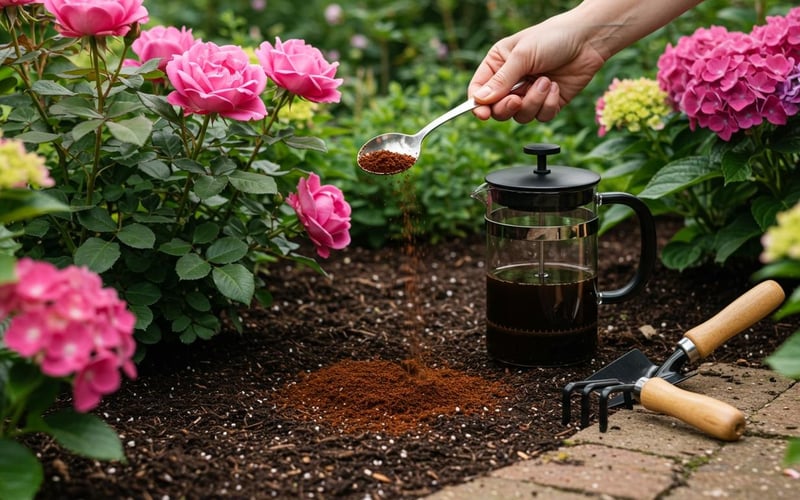
Acid-loving plants (azaleas, camellias, pieris): use coffee tea monthly during the growing season. Apply in the morning when temperatures are cool. Water thoroughly after application.
Foliage plants (hostas, ferns, heucheras): coffee grounds improve soil structure for better root development. Mix composted grounds into the top 50mm of container soil. Refresh annually when repotting.
Flowering plants (begonias, impatiens): use weak coffee tea every 2-3 weeks. Stop applications 6 weeks before expected first frost.
What never works in containers: Pure coffee grounds, thick applications, or fresh uncomposted grounds. These create waterlogged conditions that kill plants within weeks.
Always check container drainage after coffee applications. Water should drain from holes within 10-15 minutes. If it takes longer, refresh the potting mix.
|
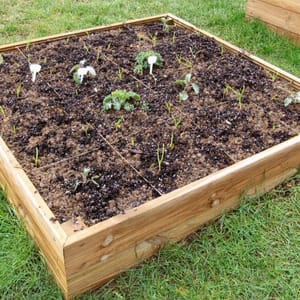
Matt's Pick for Coffee Ground CompostingBest For: dedicated coffee ground composting bed Why I Recommend It: I use one of these beds next to our workshop specifically for composting coffee grounds. The 4x4 size suits a household's coffee output. The raised sides keep dogs away from the compost. Price: £129 |
Seasonal Application Guide
Timing matters with coffee grounds. Here is a condensed guide based on UK growing conditions.
Spring (March-May): Prime time. Soil microorganisms are active and can process grounds efficiently. Add winter-collected grounds to compost bins. Begin coffee tea applications for houseplants. Apply composted grounds to established shrubs from April.
Summer (June-August): Switch to liquid applications only. Avoid solid grounds during hot weather. They stress plants when water is limited. Maintain compost bins with regular turning. Reduce applications by half in August.
Autumn (September-November): Light coffee ground applications around perennials in September. Add autumn leaves to coffee compost bins. Stop all direct applications by October. Continue adding grounds to compost only.
Winter (December-February): No direct applications. Continue adding grounds to compost bins. Plan your strategy for next year. This is the time to collect and stockpile grounds from coffee shops.
Coffee Ground Myths vs Reality
Myth: "Coffee Grounds Make Soil Acidic"
After brewing, grounds sit between pH 6.5 and 6.8. Nearly neutral. We have tested soil pH after heavy applications and found minimal changes. In clay soils, there is often no measurable difference. If you need acidic soil, use elemental sulphur instead.
Myth: "Fresh Grounds Work Better Than Used"
False. Fresh grounds contain higher caffeine levels that harm plants. Used grounds have most caffeine removed while retaining beneficial nutrients. Always use spent grounds.
Myth: "Coffee Grounds Repel All Garden Pests"
They work well against slugs as a liquid application. They do not reliably repel ants, aphids, or other common pests. Slugs are the only pest consistently affected.
Myth: "More Grounds Means Better Plants"
Compost should not exceed 20% coffee grounds by volume. More is not better. It is often lethal. Stick to the recommended ratios.
Myth: "All Plants Benefit"
Mediterranean plants, succulents, and alkaline-loving species actively dislike coffee grounds. Always check plant preferences before applying any amendment.
Frequently Asked Questions
Can I just sprinkle coffee grounds on plants?
No. Raw grounds create a waterproof crust on soil. Always mix grounds with other organic matter or compost them first. The fine particles clump together when wet, blocking water and air from reaching roots.
What plants do not like coffee grounds?
Mediterranean herbs, succulents, cacti, and tomatoes. Lavender, rosemary, and sage prefer alkaline, well-draining conditions that coffee grounds disrupt. Tomatoes are particularly sensitive to caffeine and suffer reduced growth and poor fruit production. Seedlings can be killed by coffee ground applications.
Where should coffee grounds not be used in the garden?
Avoid newly seeded areas, young vegetable beds, and succulent gardens. Do not use them around Mediterranean herb gardens or anywhere your dog has access. Heavy clay soil without amendments is also a poor choice, as grounds worsen drainage.
What pests do coffee grounds repel?
Slugs and snails respond to liquid coffee solutions. A 1-2% caffeine concentration as a soil drench is the proven method. Fresh grounds work moderately as a cat deterrent when refreshed every few days. Dry grounds have minimal effect on ants or aphids.
How often can I use coffee grounds on my plants?
Apply composted grounds 2-3 times per growing season maximum. Coffee tea can be used monthly for container plants, bi-weekly for heavy feeders like roses. Never exceed 20% coffee grounds in any compost mixture. Allow 6-8 weeks between direct soil applications.
Do coffee grounds work for all types of soil?
They work best in sandy soils where they improve water retention. In clay soils, they can worsen drainage if not properly composted first. Sandy loam responds well to coffee amendments. Chalk soils show minimal benefit. Always test a small area first.
How long do coffee grounds take to break down?
Raw grounds take 6-12 months to decompose in soil. In compost bins with proper management, they break down in 3-6 months. Fine espresso grounds decompose faster than coarse French press grounds.
Related Articles
- How to Make Your Own Compost
- The Ultimate Guide to Slug Control
- Soil Types: A Complete Guide to UK Garden Soils
- The Complete Guide to Creating Your Perfect Herb Garden
- Homemade Weed Killers: Natural Solutions That Actually Work
Need growing advice? Email our team at customerservice@greenhousestores.co.uk.