How to Fix a Lean-to Greenhouse on an Uneven Wall
To fix a lean-to greenhouse on an uneven wall, screw a goalpost frame of pressure-treated 2x2 inch timber to the wall and pack it level with offcuts. This creates a flat, plumb mounting surface that bridges bumps, dips, mortar joints and protruding pipes. Seal every gap with outdoor silicone. The timber framework method handles wall irregularities up to 50mm and works on brick, block, rendered and pebbledash surfaces.
Key Takeaways
- Timber frameworks are the most reliable solution for mounting lean-to greenhouses on uneven walls.
- Use 2x2 inch pressure-treated timber posts with packing pieces to create a perfectly plumb surface.
- The plinth area must be flat and square or you'll get water ingress, frame stress and door misalignment.
- Seal all gaps with outdoor silicone sealant to prevent water penetrating behind the frame.
- Get professional assessment for walls with irregularities over 50mm or timber-framed buildings.
Installer's Note
We fit lean-to greenhouses against uneven walls at least twice a month. The timber goalpost method works on everything from Victorian brick to 1970s pebbledash. The key is getting the verticals dead plumb before you touch the greenhouse frame. I always fix the two end posts first, run a string line between them, then pack the middle posts to match. If you rush the framework stage, the greenhouse door will not close properly and you will be taking it apart again. Spend the extra hour getting it right.
Matt's Tip: Check the Wall Before You Order
I always tell customers to hold a 6ft straight edge against the wall before they buy their lean-to. If you can see daylight gaps bigger than about 20mm, you'll need the timber framework method described below. If the gaps are under 10mm, most lean-to frames will pull tight against the wall with the standard fixings. Knowing this upfront saves a wasted weekend and an extra trip to the timber merchant.
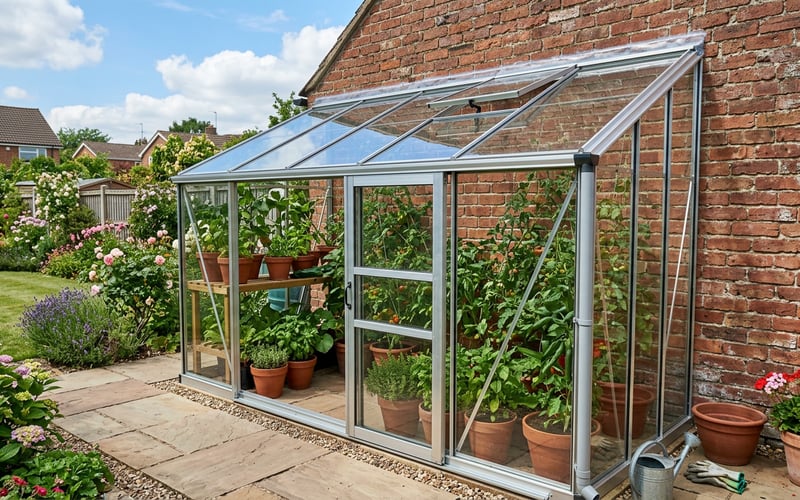
Installing a lean-to greenhouse against an uneven wall is one of the most common challenges we see on installations. Your wall might have protruding pipes, irregular render, or the natural bowing that comes with older properties. Achieving a secure and level fit requires specific techniques.
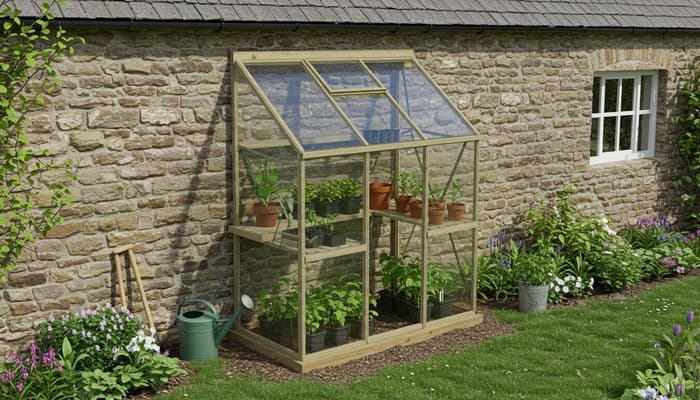
Modern small lean-to greenhouses offer excellent growing space when properly installed, but success depends on addressing wall irregularities from the outset. This guide covers the timber framework method that professional installers use on nine out of ten uneven wall jobs.
Understanding wall irregularities and their impact
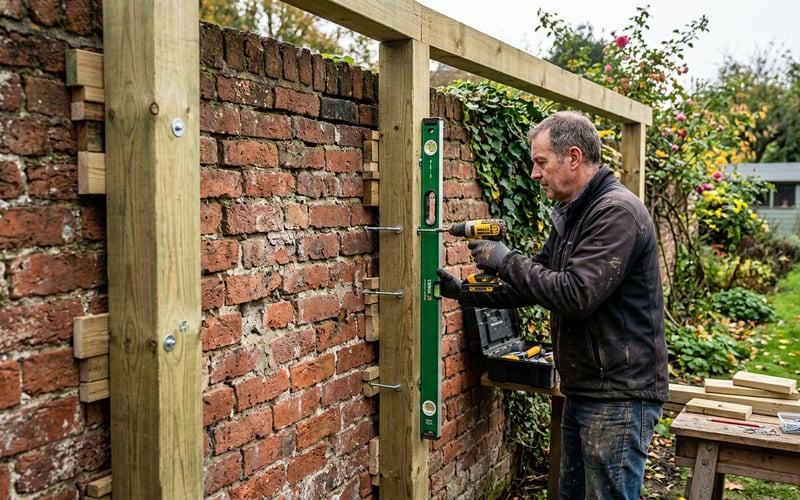
Most exterior walls have some degree of unevenness, whether from settling, weathering, or original construction variations. These irregularities show up as bumps, dips, protruding pipes, or window cills that interfere with direct greenhouse attachment. The proven solution is to screw a goalpost of timber to the wall. Use 2x2 inch or 2x1 inch timber as your mounting frame.
The consequences of ignoring wall irregularities go beyond looks. Uneven mounting causes structural stress that can compromise the greenhouse frame and lead to glass breakage or door misalignment. Gaps between greenhouse and wall also create pathways for water ingress, potentially damaging both structures.
The plinth area must be flat and square. Uneven or irregular bases increase the risk of water getting in. Before beginning any installation, consult the greenhouse buyers guide to understand your specific model's requirements. The same principle applies to wall mounting, where irregularities must be addressed before you start building.
Common wall challenges for lean-to installations
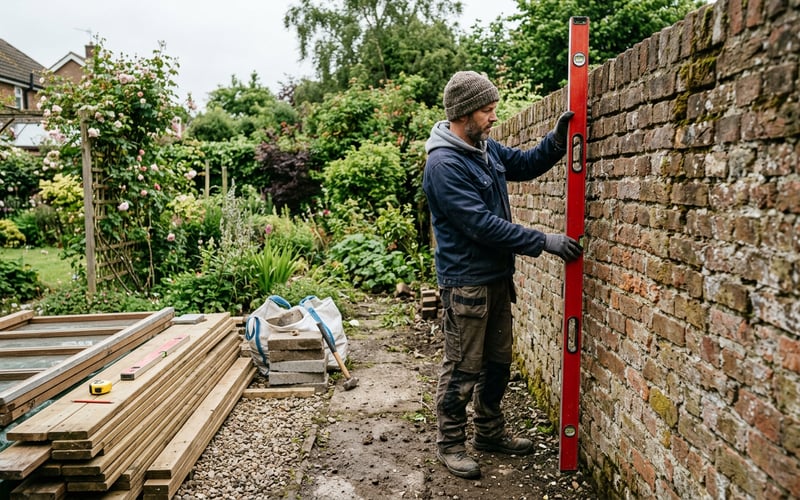
Brick walls often present mortar joints that create an uneven surface. Rendered walls may have patches or textural variations. Period properties frequently have walls that have settled over time. You only spot bows and dips when you hold a straight edge against the wall during greenhouse installation. Modern buildings might have protruding services like gas meters, external taps, or electrical fixtures.
Tools and materials you need for an uneven wall installation
Successful installation begins with proper preparation and the right materials. The timber framework method, used by professional installers, requires specific components chosen for durability and weather resistance.
Primary Materials:
- Pressure-treated timber posts (2x2 inch or 2x1 inch)
- Assorted packing pieces (various thicknesses)
- Stainless steel screws (2 inch minimum length)
- Outdoor-grade silicone sealant
- Wall plugs appropriate for your wall material
Essential Tools:
- Spirit level (minimum 600mm length)
- Drill with masonry bits
- Circular saw or handsaw
- Measuring tape
- String line for alignment checks
The timber framework approach provides flexibility whilst maintaining structural integrity. Our greenhouse installation service uses this method on most challenging wall conditions. Pack the vertical posts out with small timber offcuts until they are completely vertical. Use outdoor silicone sealant to seal up any gaps.

Step-by-step wall preparation process
Initial assessment and planning
Begin by thoroughly examining your wall using a straight edge or string line to identify high and low points. Mark areas requiring attention, including protruding elements that might interfere with installation. Measure the greenhouse mounting points to determine the exact positions for your timber framework.
Create a detailed plan before beginning work. Note pipe locations, check for underground services, and ensure adequate drainage around the installation area. Choosing the right position for your greenhouse is just as important as the wall preparation. Attach pressure-treated timber and flashing to bridge uneven places in the wall.
Creating the timber framework
The framework is an intermediary mounting surface that compensates for wall irregularities. Start by cutting your main vertical posts to the required height. They should extend slightly beyond the greenhouse mounting points.
Position the first vertical post at one end of the installation area. Use a spirit level to ensure perfect vertical alignment. Where the wall curves away from the post, insert packing pieces to maintain contact. Cut these from the same treated timber for consistent weathering.
Secure each post with appropriate wall fixings. Fixings must penetrate at least 50mm into solid material. For brick walls, use expanding bolts in mortar joints where possible. For concrete block, ensure fixings penetrate the block rather than just mortar.
Levelling and alignment techniques
Once vertical posts are positioned, install horizontal rails to support the greenhouse frame. Use a water level or laser level to check horizontal alignment across the entire framework. Any deviation here transfers directly to the greenhouse structure.
The framework must accommodate greenhouse mounting points whilst providing stability. Set piers evenly spaced and screw short posts into brackets on the low side. Connect the posts in each row with pressure-treated 2x6 inch timber. Level before attaching. If you are preparing the ground area at the same time, our guide on preparing the ground for a greenhouse base covers foundation options.
Mounting solutions for different wall types
Brick and block walls
Masonry walls offer excellent fixing potential but require careful planning. Position fixings in mortar joints where possible, using masonry anchors sized for the load. For solid brick walls, expanding bolts provide the most secure attachment.
For cavity walls, ensure fixings reach the inner leaf or use specialised cavity fixings rated for the load. Hollow blocks need particular attention. Standard fixings may not hold without additional reinforcement.

|
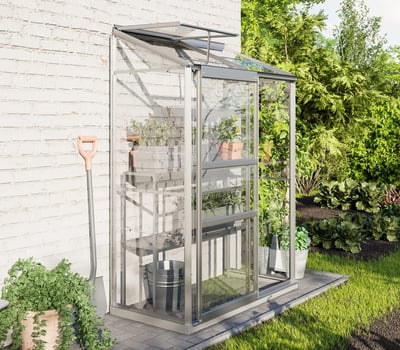
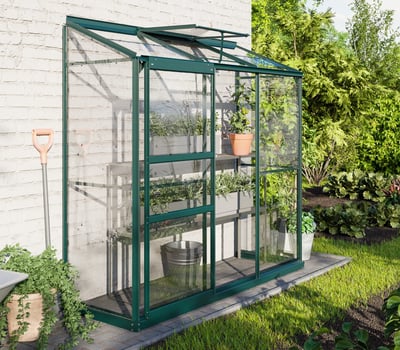
Matt's Pick for Uneven WallsBest For: Tight spaces and tricky wall installations where a full-size lean-to won't fit Why I Recommend It: I've fitted the Harlow against some properly rough walls and it works a treat. The compact 2x3 frame means less wall contact area, so you need fewer timber packing points. Toughened glass throughout and a solid aluminium frame. It's the lean-to I recommend when customers are worried about their wall surface. Price: £349 |

Rendered and textured surfaces
Rendered walls present unique challenges. Render thickness may vary significantly across the surface. Use longer fixings that penetrate through render into the substrate. Check render condition before installation. Repair any loose or cracked render before proceeding.
Textured renders like pebbledash create an inherently uneven surface. The timber framework approach bridges texture variations whilst providing multiple secure fixing points across the wall.
Timber frame buildings
We do not recommend attaching a greenhouse to a timber-framed house. The load and movement can cause damage over time. If you have a timber building, our mini greenhouses include freestanding options that need no wall attachment. When attachment is unavoidable, ensure fixings penetrate to structural members rather than cladding.
Weatherproofing your installation
Once the framework is in place and the greenhouse mounted, weatherproofing the joint is the final step. Apply a continuous bead of outdoor silicone sealant along the top edge. For walls with larger gaps, install lead or aluminium flashing over the joint.
Check the seal from inside the greenhouse during heavy rain. Water tracking is easier to spot from the inside. It tells you exactly where additional sealant is needed. If you have persistent moisture issues, our article on whether a greenhouse should be watertight explains what is normal and what needs fixing.
Frequently asked questions
Can I attach a lean-to greenhouse to any wall?
Most solid walls can support a lean-to greenhouse with proper preparation. Brick, block and rendered walls all work well with the timber framework method. Timber-framed buildings, very uneven walls, or structurally damaged walls may require professional assessment before installation.
What's the maximum wall irregularity that can be accommodated?
The timber framework method handles irregularities up to 50mm. Larger variations may require more extensive preparation, a custom sub-frame, or alternative mounting solutions. For anything over 50mm, get a professional to take a look before ordering.
How often should I check the weatherproofing seals?
Inspect seals annually, particularly after severe weather. Plan for a full seal renewal every 3-5 years depending on exposure and sealant quality. Catching small gaps early prevents water damage to both the greenhouse and your wall.
Do I need planning permission for a lean-to greenhouse?
Most lean-to greenhouses fall within permitted development rights. Check with your local planning authority if your property is listed, in a conservation area, or if the installation exceeds standard size limits. Rules differ in Scotland and Northern Ireland.
What should I do if water continues to penetrate despite proper sealing?
Persistent water ingress usually means you need formal flashing rather than sealant alone. Lead or aluminium flashing over the wall-to-greenhouse joint provides a physical barrier. If the problem continues after flashing, get a professional assessment to identify hidden problems.
Can I install a lean-to greenhouse on a fence instead of a wall?
Fences are less stable than solid walls for greenhouse mounting. If using a fence, ensure it's structurally sound and add extra support posts to handle the greenhouse load and wind forces. A freestanding mini greenhouse may be a safer option.
What's the best wall orientation for a lean-to greenhouse?
South-facing walls provide maximum light and warmth for growing. East or west-facing installations also work well for most plants. North-facing walls get the least light but can still suit shade-tolerant plants and storage.