How to grow mushrooms in a Greenhouse
Key Takeaways: Mushroom Growing Essentials
- ✅ Humidity is King: Mushrooms need 80-95% humidity, making a greenhouse the ideal environment compared to a dry centrally-heated home.
- ✅ Winter is Productive: Unlike tomatoes, many mushroom varieties (like Blue Oysters) actually thrive in cooler UK winter temperatures.
- ✅ Use the "Dead Zone": The shaded area under your greenhouse staging is wasted space for plants, but perfect for fungi.
- ✅ Avoid Direct Sun: Mushrooms don't photosynthesise; direct sunlight dries them out. Indirect light or shade is best.
- ✅ Start with a Kit: If you are a total beginner, start with a "spray and grow" kit before moving to spawn and substrate mixing.
While most UK gardeners are winding down for the winter, cleaning their tools and dreaming of spring, I'm usually busy harvesting one of the most rewarding crops available: mushrooms.
For years, there’s been a misconception that mushrooms must be grown in total darkness in a cellar. This isn't entirely true. While they don't need light for energy (photosynthesis), many varieties actually need a little ambient light to trigger fruiting. This makes your greenhouse, specifically the shady spots, a surprisingly effective environment.
In my 12+ years at Greenhouse Stores, I've seen customers use their glasshouses for everything from orchids to cacti, but fungi are often overlooked. Yet, growing mushrooms in a greenhouse is an incredibly efficient way to utilise space during the colder months. According to recent data, interest in home-grown fungi has surged, with the market growing by roughly 14% as gardeners look for sustainable winter crops.
Let's look at how you can turn your glasshouse into a mushroom factory this winter.
Why Your Greenhouse is Better Than Your Windowsill
Most mushroom growing kits sold in the UK are marketed for kitchen counters. The problem? Our homes are often too dry (especially with central heating on) and too warm for certain varieties.
Mushrooms require high humidity—often between 80% and 95%. In a kitchen, you might struggle to hit 50%. A greenhouse, however, naturally retains moisture. Even in an unheated structure, the relative humidity is generally higher than indoors.
Furthermore, you can create "micro-climates" easily. By using cold frames inside the greenhouse, or simply placing a plastic humidity tent over your growing block, you can maintain that critical moisture level without the mushrooms drying out.
Choosing the Right Mushroom for the UK Climate
Not all mushrooms are created equal. Some tropical varieties (like Pink Oysters) will die instantly in a British January. Others, however, love the shock of cold air.
Here is a breakdown of the best varieties to try in your greenhouse:
| Mushroom Variety | Difficulty | Temp Range | Best For | Notes |
|---|---|---|---|---|
| Grey/Blue Oyster | Beginner | 10°C - 20°C | Winter/Spring | Very aggressive grower. Tolerates cooler temps well. High yield. |
| Wine Cap (King Stropharia) | Beginner | 10°C - 25°C | Bedding | Can be grown directly in woodchip beds on the greenhouse floor. |
| Shiitake | Intermediate | 12°C - 20°C | Logs | Takes longer (months) to fruit but flavour is superior. Needs hardwood logs. |
| Button / Portobello | Advanced | 15°C - 20°C | Trays | Needs composted manure and distinct temperature controls. Prone to disease. |
| Lion's Mane | Intermediate | 15°C - 24°C | Medicinal | Needs very high humidity. Best for warmer months or heated greenhouses. |
The "Two-Stage" Approach: Using Your Potting Shed
This is the secret to success that most guides miss: Mushrooms have two distinct life phases, and they require different environments.
- Incubation (The Spawn Run): The mycelium (root network) colonises the substrate. This needs to be dark and steady in temperature.
- Fruiting: The mushrooms pop out. This needs fresh air, high humidity, and a little light.
This is where a combination of garden buildings works perfectly. I highly recommend using one of our potting sheds for the incubation phase. The timber construction offers better insulation than glass, keeping the temperature steadier, and it's easy to keep dark.
Once the bag or block is fully white (colonised), you then move it into the greenhouse for fruiting. This rotation system ensures you always have a crop ready to go.
Step-by-Step: From Spawn to Harvest
If you aren't using a pre-made kit, here is the process for growing Oyster mushrooms using low-tech methods suitable for a home grower.
1. Prepare Your Substrate
Oyster mushrooms love straw. You can also use cardboard, coffee grounds, or hardwood pellets.
- Pasteurisation: You must kill off competitive bacteria. Chop wheat straw into 2-inch pieces. Submerge the straw in hot water (65°C-80°C) for an hour.
- Drain: Let it drain until it's damp but not dripping (like a squeezed sponge).
2. Inoculation
Mix your mushroom spawn (the "seeds") with the cooled, pasteurised straw. A ratio of roughly 10% spawn to 90% straw works well.
- Stuff this mixture tightly into clear plastic bags or buckets with holes drilled in them.
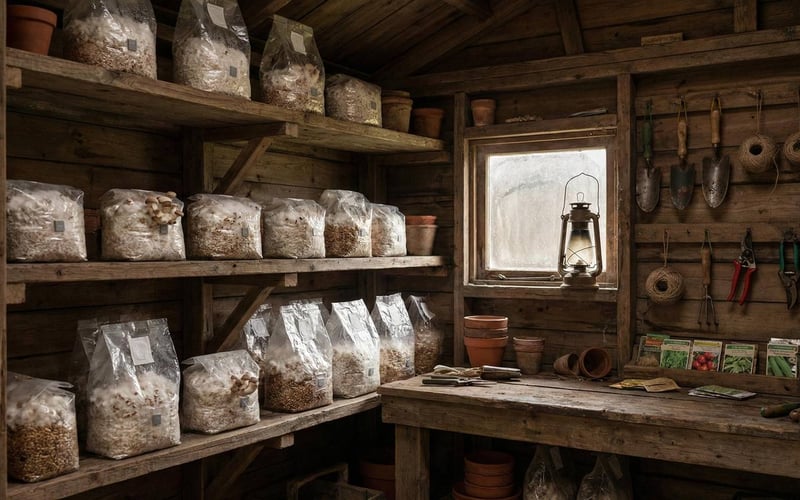
3. Incubation (The Potting Shed Phase)
Place the bags in your potting shed or a warm cupboard (20-24°C is ideal for speed, but they will grow slower in cooler temps). Keep them dark.
- After 2-4 weeks, the straw should look completely white. This is the mycelium taking over.
4. Fruiting (The Greenhouse Phase)
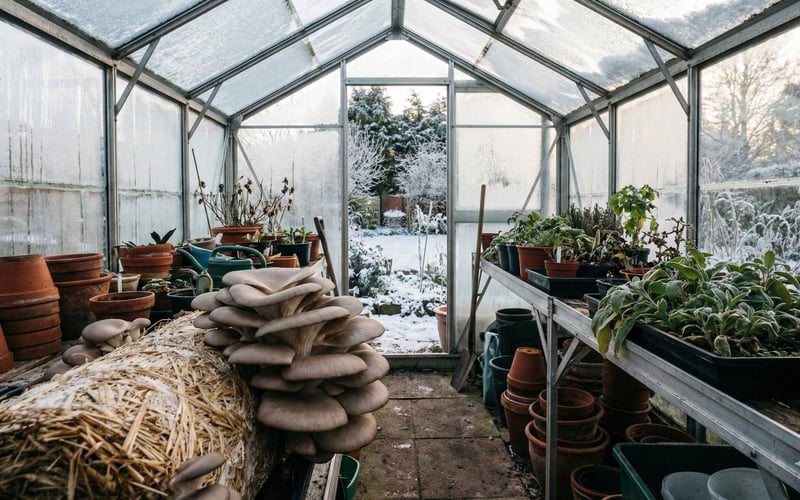
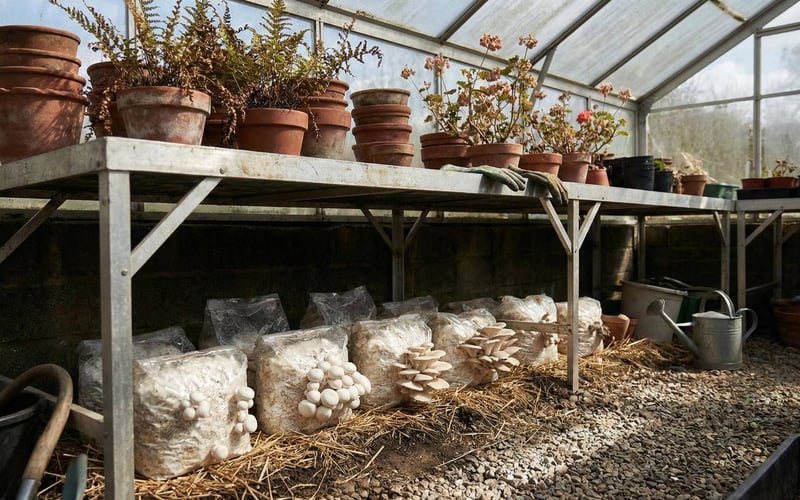
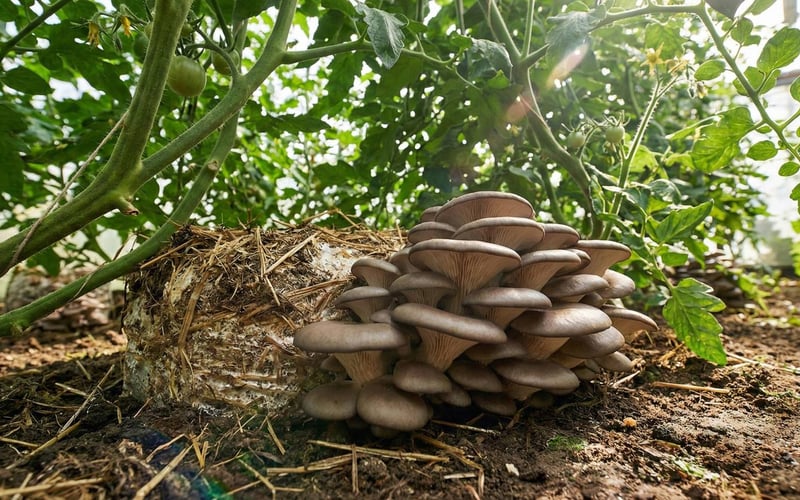
Move the white blocks into your aluminium greenhouse.
- Placement: Place them under the staging. This protects them from direct sunlight (which dries them) while providing the indirect light they need to navigate upwards.
- Shock: The drop in temperature and introduction of fresh air signals the fungi to produce mushrooms.
- Mist: Spray the blocks with water 2-3 times a day to keep humidity high.
The Symbiotic Benefit: Why Tomatoes Love Mushrooms
Here is a fascinating biological trick for you. We often talk about companion planting, like growing garlic near roses to deter aphids. But mushrooms offer a different kind of companion benefit: Carbon Dioxide.
Plants breathe in CO2 and breathe out Oxygen. Mushrooms do the reverse; they breathe in Oxygen and breathe out CO2.
By placing mushroom blocks on the floor or under the staging of your greenhouses for sale, you are creating a natural CO2 generator. While this is less critical in winter when plant growth is slow, if you time your spring mushroom crop to coincide with your young growing tomatoes, the extra CO2 can actually boost plant growth rates. It’s a perfect closed-loop system.
Winter Care & Troubleshooting
Growing in winter presents unique challenges, primarily temperature drops and ventilation.
Dealing with the Cold
While Blue Oysters tolerate cold, freezing solid will damage the mycelium.
- If a frost is forecast, cover your mushroom blocks with horticultural fleece.
- Alternatively, place the blocks inside small greenhouses or propagators inside your main greenhouse for a "double glazing" effect.
The "Green Mould" Enemy
Trichoderma (green mould) is the bane of the mushroom grower. It looks like green dust on your white mycelium.
- Cause: Poor hygiene or unsterilised substrate.
- Cure: If you see a small spot, salt it (literally put table salt on the spot) to stop it spreading. If the bag turns mostly green, discard it immediately—do not open it inside the greenhouse or the spores will spread.
Long, Spindly Stems
If your mushrooms have long, thin stems and tiny caps, they are "stretching" for fresh air.
- Fix: Your humidity tent or container is too sealed. Increase ventilation. Mushrooms need to breathe!
What Else Can You Do With the Waste?
Once your mushroom block has stopped producing (usually after 3 "flushes" or harvests), don't throw it away.
Spent mushroom substrate is essentially "super-compost". The mycelium has broken down the straw or wood into easily accessible nutrients.
- Mulch: Crumble the block over your potato beds. If you are reading our guide on growing potatoes, you'll know they love rich organic matter.
- Soil Improver: Dig it into your borders. It improves water retention and soil structure.
Summary and Next Steps
Growing mushrooms in a greenhouse is the perfect bridge between the autumn harvest and the spring sowing season. It keeps your greenhouse productive, provides you with Vitamin D-rich food during the dark months, and produces excellent compost for your garden.
If you are just starting out, I recommend clearing a space under your staging, buying a ready-to-go Oyster mushroom kit, and monitoring the humidity. Once you harvest that first cluster of home-grown fungi, you'll be hooked.
For more advice on setting up your growing space, check out our comprehensive greenhouse buyers guide or explore our beginner's guide to greenhouse growing for more crop ideas.
Frequently Asked Questions
-
Do mushrooms grow better in the dark or light?
While the mycelium (roots) prefers the dark to colonise, the actual mushrooms (fruit) usually need some indirect light to form properly. Total darkness often leads to deformed mushrooms.
-
Can you grow mushrooms in an unheated greenhouse?
Yes, absolutely. Varieties like Blue Oysters, Winter Enoki, and King Stropharia are cold-tolerant. Just protect them from hard frosts using fleece or a cold frame.
-
How long does it take to grow mushrooms from a kit?
Kits are very fast. Once you open them and start spraying, you can often see "pinning" (baby mushrooms) within 7-10 days, with a full harvest ready in under 2 weeks.
-
What is the best mushroom for beginners to grow?
Oyster mushrooms (Pleurotus ostreatus) are by far the easiest. They are aggressive colonisers, resistant to many competitor moulds, and grow quickly on simple substrates like straw or cardboard.
-
Is mushroom growing dangerous to other plants?
Generally, no. The fungi grown for food (saprophytic fungi) eat dead organic matter, not living plants. In fact, the CO2 they release is beneficial to your living plants.