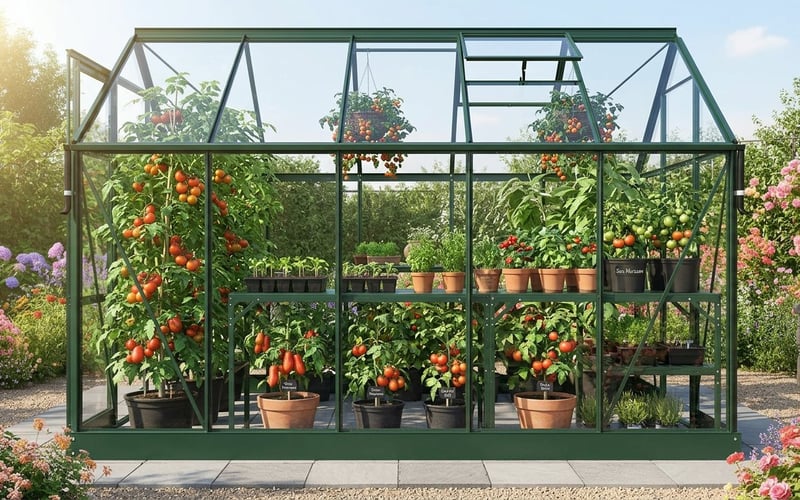
Growing Tomatoes in a Greenhouse
Greenhouse tomatoes produce 3-5kg of fruit per plant when grown in large pots or growbags with regular feeding. Sow seeds in February or March at 18-21°C and transplant to final positions in late April. Cordon varieties need vertical support and weekly side shoot removal. Feed with high-potash liquid fertiliser every 7 days once the first truss sets fruit. Water daily in summer at the base. Expect first harvests from July through to October.
Key Takeaways
- Start early: sow seeds in February or March on a heated propagator or warm windowsill at 20°C. Germination takes 7-10 days with bottom heat.
- Hit the temperature range: aim for 21-24°C during the day and 15-18°C at night. Above 30°C, pollen goes sterile and flowers drop.
- Use big pots: containers at least 30-45cm wide give healthy root systems and prevent splitting from water stress.
- Tap daily: gently tap flowering trusses every day around noon to release pollen and improve fruit set across every truss.
- Control humidity: keep it below 90% with auto vents open daily to prevent mould and mildew.
Shop the Vitavia Apollo 5000 in Green →
Installer's Note
Growing tomatoes is the number one reason our customers buy their first greenhouse. In 16 years of installing greenhouses across the UK, we have seen the difference a glass barrier makes. You get a harvest that starts four weeks earlier and ends four weeks later than outdoor crops. The biggest mistake we see is overheating. If your greenhouse hits 30°C, pollen goes sterile and flowers drop without setting fruit.
Growing tomatoes in a greenhouse extends the UK harvest by eight weeks compared with outdoor crops. You swap a battle against the elements for a controlled, high-yield hobby. Ideal temperatures are 21-24°C during the day and 15-18°C at night. In a greenhouse, you also get a physical shield against Late Blight, which wipes out outdoor plants in wet British summers.
This guide covers the full process from seed packet to salad bowl. We explain varieties, timing, containers, feeding, and temperature control. Every tip comes from real installs across the UK. If you are still choosing a greenhouse, these growing tips will help you pick the right size and spec.
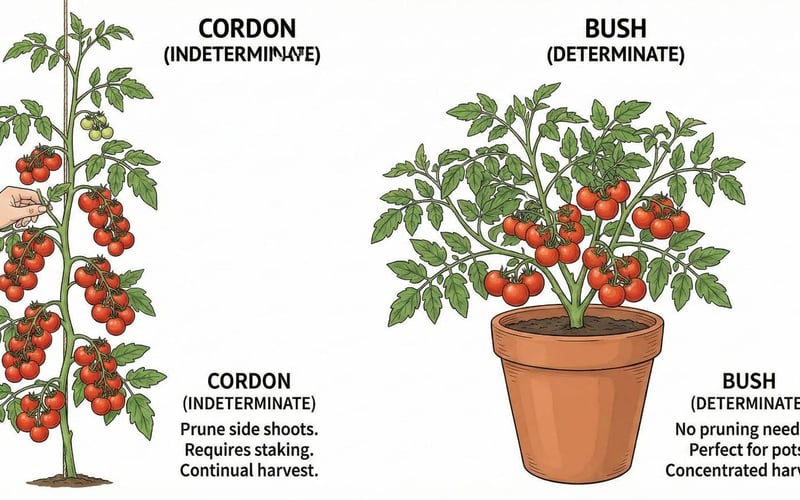
Choosing your varieties: cordon vs bush
Before you sow a single seed, choose the right plant for your space. Tomatoes fall into two categories with very different pruning needs.
Cordon (indeterminate)
These are the most common greenhouse varieties. They grow as a single stem up to 2m or more and need support.
- Yield: Cordon plants produce the biggest crop per plant over a long season.
- Pruning: High maintenance. You must pinch out side shoots (the small shoots between the main stem and leaf branches). Remove lower leaves as the plant grows to improve airflow.
- Popular varieties: Gardener's Delight, Moneymaker, Sungold.
Bush (determinate)
These stop growing at a set height and form a bushy habit.
- Yield: Individual plants produce less than a cordon. However, bush varieties give more fruit per square metre because they are compact and you can fit more in.
- Pruning: Low maintenance. No pinching out needed.
- Popular varieties: Tumbler, Red Alert, Tiny Tim.
The UK growing timeline
Getting your timing right matters. Start too early without heat and seedlings turn leggy and weak. Start too late and you miss the best sun.
General rule: Start seeds six weeks before the last frost date in your area.
| Month | Activity | Location |
|---|---|---|
| Feb-Mar | Sow seeds in trays or modules. | Heated propagator or warm windowsill (20°C). |
| April | Pot on into 10cm pots. | Greenhouse (if heated) or indoors. |
| Late April | Plant into final position. | Heated greenhouse only. |
| May | Plant into final position. | Unheated greenhouse (check for frost). |
| Jul-Oct | Harvest time. | Greenhouse. |
Staggered sowing tip: Sow a few seeds every two weeks through spring. This gives a continuous supply rather than a single glut.
For a detailed breakdown on timing, read our guide on when to plant tomatoes in an unheated greenhouse.
Getting started: sowing and propagation
We recommend starting seeds in a propagator. Fill small pots or seed trays with high-quality seed compost. Sow seeds thinly and cover with a light dusting of vermiculite or compost.
Heat mats: A heat mat placed under the trays provides consistent bottom heat. This speeds up root development compared with a cold windowsill. We see germination rates jump from around 60% to over 90% with bottom heat at 20°C.
Once seedlings show their first pair of true leaves, move them into 10cm individual pots on your greenhouse staging. Keep them at 15-18°C and water from below to encourage strong roots. Our seed starting guide covers propagation in more detail.

Shop the Vitavia 2 Tier Green Staging →
Planting out and support strategies
Once frost risk has passed and the first flowers appear, plant your tomatoes into their final positions. Your choice of container and compost matters for the long season ahead.
Containers and compost
- Large pots: We recommend pots at least 30-45cm wide and deep. That gives roughly 15-20 litres of compost. Stick to one plant per pot. This volume ensures roots have enough room to support a heavy crop.
- Growbags: A UK favourite. Bags often suggest three plants, but we recommend only two plants per bag. Less competition means deeper roots and bigger trusses. For even better results, try ring culture with growbags.
- The compost: Use a high-quality peat-free, loam-based, or multi-purpose compost. Loam-based options like John Innes No. 2 or 3 retain moisture better than standard multi-purpose. You can also learn how to make your own compost for a cost-effective growing medium.
Vertical support
Cordon varieties need strong support from planting day.
- Canes: The traditional method. Push a bamboo cane into the compost next to the root ball.
- String training: This is the professional greenhouse method. Tie soft string loosely around the plant base and attach the other end to a roof glazing bar. Twist the plant around the string as it grows. We use this method in most installs because it keeps the canopy tidy and makes side-shoot removal easier.
The perfect environment: temperature and airflow
This is where many beginners struggle. A greenhouse traps heat well, but you must manage the microclimate to prevent disease and ensure pollination.
Temperature targets
Tomatoes thrive within a specific range. Outside it, growth slows or stops entirely.
- Ideal day temp: 21-24°C (28°C absolute maximum).
- Ideal night temp: 15-18°C.
- The danger zone: If temperatures hit 30°C, pollen becomes sterile. Flowers drop without setting fruit.
Ventilation and humidity
- Ventilation: Open vents or doors daily to allow air circulation. Good airflow prevents diseases like mildew. We strongly recommend installing auto vent openers to manage this automatically while you are at work. Our ventilation guide covers sizing, positioning, and when to open everything.
- Humidity: Keep it below 90%. High humidity causes oedema (blisters on leaves) and encourages mould growth.
- Fans: In a very still greenhouse, a small solar or electric fan circulates air. This strengthens stems and stops fungal spores settling. For more protection against pests in warm, humid conditions, see our greenhouse pest control guide.
The "greenhouse tap"
Outdoors, wind shakes tomato flowers and releases pollen. In a greenhouse, this does not happen naturally. To ensure a full crop, gently tap the flowering trusses every day around noon. This shakes the pollen loose and improves fruit set across every truss.

Shop the Bayliss MK7 Auto Vent Opener →
Matt's Tip: Two per growbag
I always plant two tomato plants per growbag, never three. Growbag manufacturers suggest three, but in our trials the two-plant bags produce 30% more fruit per plant. Less competition means deeper roots, bigger trusses, and less splitting from water stress.
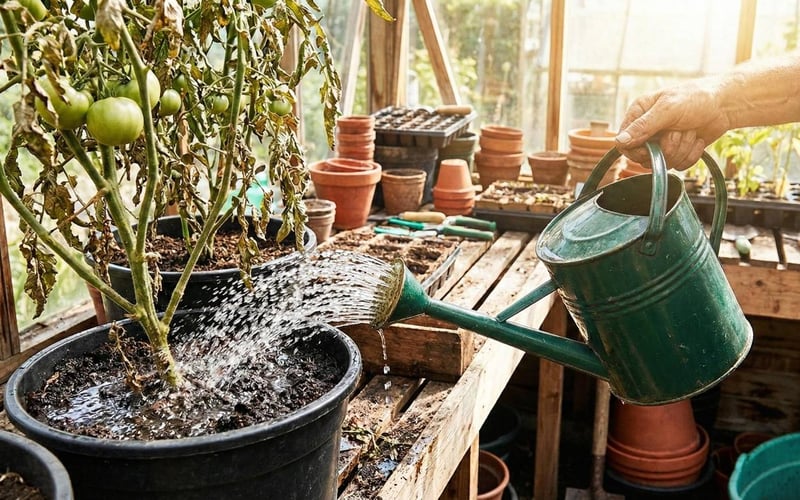
Feeding and watering: the secret to flavour
Consistency is the secret to perfect tomatoes.
Watering: Water thoroughly after planting. Tomatoes hate erratic watering. If the compost dries out and is then flooded, fruit swells too fast and the skin splits.
Maintain a regular schedule. Some growers let the compost surface dry slightly between waterings in early weeks. This encourages deep root growth. Once fruit sets, consistency is everything. Our watering and irrigation guide covers drip systems and capillary matting if you want to automate.
Feeding: Start feeding with a high-potash liquid feed once the first truss of fruit has set. Tomorite or homemade comfrey tea both work well. Wait until you see tiny green tomatoes forming. Do not feed before this point. Early feeding produces leafy growth and no fruit.
We feed twice a week during peak season (July and August). Dilute to the manufacturer's instructions. Overfeeding causes leaf curl and blossom end rot.
Companion planting for tomatoes
Basil planted at the base of tomato plants is the classic greenhouse combination. The basil repels whitefly and aphids, and some growers believe it improves tomato flavour. Marigolds (especially French marigolds) planted between growbags deter whitefly with their scent. Avoid planting tomatoes near brassicas or fennel, which inhibit their growth. Read our full companion planting guide for more pairings.
Extending the season: winter growing
One of the biggest benefits of a greenhouse is the late shift. As autumn arrives and outdoor plants are killed by early frosts, your greenhouse tomatoes keep producing.
To get the most from October and November, consider using greenhouse heaters. A simple gas heater or thermostatically controlled electric tube heater keeps night temperatures within the 15-18°C range. This allows the final trusses to ripen on the vine. Our heating costs guide breaks down the running costs by fuel type.
Lighting for late crops: For an autumn or winter crop, UK natural light will not be enough. Supplement with grow lights timed to run 12-16 hours per day. High-pressure sodium (HPS) lights suit flowering and fruiting. Modern full-spectrum LEDs are equally effective and more energy-efficient.

|
Matt's Pick for Tomato GrowersBest For: Automatic temperature control in any greenhouse growing tomatoes Why I Recommend It: I fit the Bayliss MK7 in almost every greenhouse we install. It opens the roof vent automatically when temperatures rise above your set point. For tomato growers, this is the single best accessory you can buy. It prevents overheating past 30°C while you are at work, and that saves your crop from pollen sterility and flower drop. Price: £89 |
Frequently asked questions
When should I start growing tomatoes in a greenhouse in the UK?
Sow seeds in February (heated) or March (unheated). A heated propagator at 20°C gives the fastest germination, typically within 7-10 days. Plant out into final positions in late April for heated greenhouses or May for unheated ones. Night temperatures should stay consistently above 10-12°C before you move plants out of propagation.
What is the best pot size for greenhouse tomatoes?
Use pots at least 30-45cm wide and deep. This gives roughly 15-20 litres of compost per plant. In our experience, undersized pots are the second most common mistake after overheating. Small pots dry out within hours on a hot day. Restricted roots produce smaller trusses and less fruit overall.
How do I prevent mould and mildew on my tomatoes?
Keep humidity below 90% with daily ventilation. Open vents and doors every morning, even in cooler weather. Prune lower leaves to improve airflow around the plant base. A small fan helps in still conditions. Remove any affected leaves immediately and dispose of them outside the greenhouse to stop spores spreading.
Why do greenhouse tomatoes split?
Splitting is caused by irregular watering. When a plant dries out then receives a heavy watering, fruit absorbs water faster than the skin can expand. The skin cracks open. Maintain steady moisture levels throughout the growing season. Mulching the compost surface with straw or bark helps retain moisture between waterings.
Do I need to hand-pollinate tomatoes in a greenhouse?
Yes, hand-pollination improves fruit set significantly. Tomatoes are self-fertile but need vibration to move pollen within the flower. Outdoors, wind handles this. In a greenhouse, gently tap the flowering trusses or the support cane once daily around noon. This is when pollen is driest and most likely to release. You will notice more fruit setting within a week of starting.