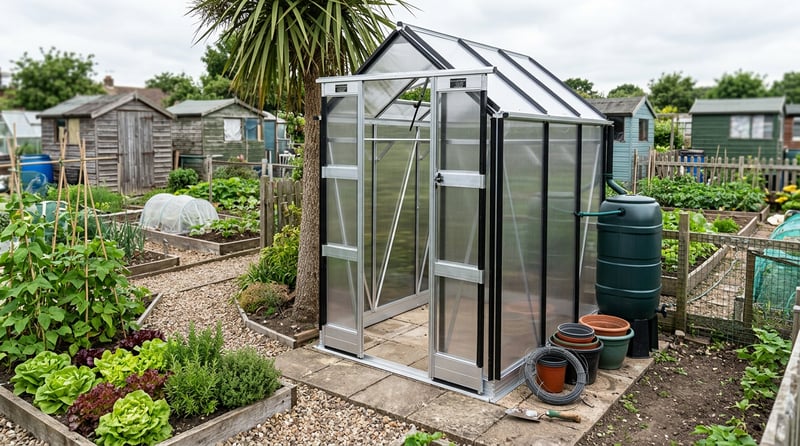
Most UK allotment societies allow greenhouses up to 8x6ft on standard plots, though rules vary by site. Aluminium-framed greenhouses with polycarbonate glazing are the best choice for allotments, they resist vandalism, survive exposed conditions, and cost from £549. We've installed greenhouses on allotments across the UK for over 13 years, so we know exactly what works and what doesn't.
Size Rules
Most sites allow up to 8x6ft, check before buying
Best Glazing
Polycarbonate, vandal-resistant and retains heat
Starting Price
Allotment greenhouses from £605
Expert Advice
13+ years installing on allotment sites
Key Takeaways
- Always check your allotment society's rules before buying, size limits, base types, and placement restrictions vary by site
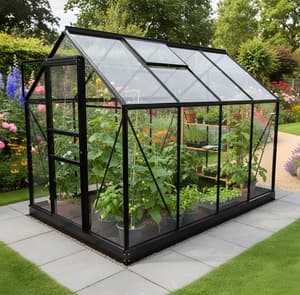
- Aluminium frames with polycarbonate glazing are the best combination for allotments: lightweight, vandal-resistant, and easy to dismantle if you move plots
- Paving slabs on levelled ground are the ideal base, most sites ban poured concrete and brick foundations
- Automatic vent openers are essential, you can't always be at the allotment when temperatures spike, and overheating kills plants faster than cold
- Budget from £549 to £1,050 for a polycarbonate allotment greenhouse that will last 12+ years
Shop the Palram Canopia Hybrid 6x6 Grey, £449 →
Installer's Note
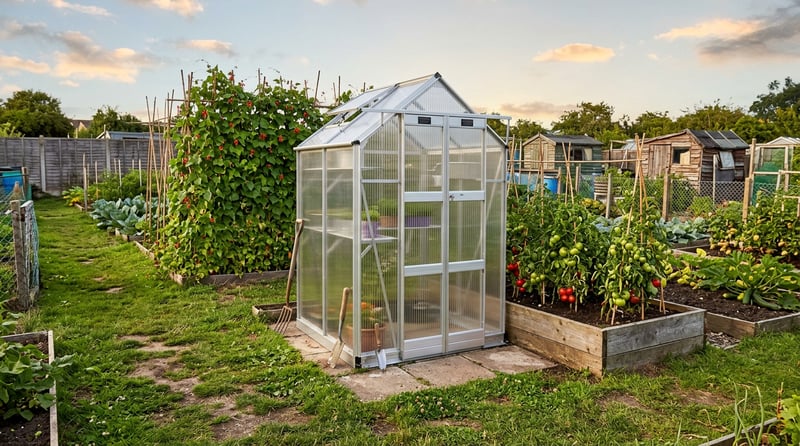
We've fitted greenhouses on allotments from Cornwall to Yorkshire, and the biggest mistake people make is buying too big. Your allotment committee has rules, and your neighbours have opinions. An 8x6 is the sweet spot for most standard plots, big enough to grow a serious crop of tomatoes, cucumbers, and peppers, small enough to fit without dominating your growing space. If your plot is a half-size or you're short on room, a 6x6 or even a 4x6 works brilliantly.
What size greenhouse can you have on an allotment?
Most UK allotment societies allow structures up to 8x6ft (2.4m x 1.8m), though some permit up to 8x10ft on full-size plots. The National Allotment Society doesn't set a universal size rule, it's down to your individual site committee. Before you spend a penny, ask your site manager or check the tenancy agreement for three things:
- Maximum footprint allowed, usually expressed as a percentage of your total plot area (typically 25% maximum for all structures combined)
- Height restrictions, ridge height matters if your plot is near residential boundaries
- Placement rules, many sites require greenhouses to be set back from paths and boundaries by at least 1 metre
If you're not sure what size you need, our greenhouse sizing guide breaks down exactly how much growing space each size gives you. For allotments, these are the most popular sizes:
Top 12 Best Allotment Greenhouses
Best base for an allotment greenhouse
Paving slabs laid on levelled ground are the best allotment greenhouse base, they're stable, removable, and allowed by almost every allotment society. Most allotment tenancy agreements specifically ban poured concrete foundations and brick-built walls, and rightly so. When you leave the plot, the next tenant shouldn't have to hire a jackhammer to reclaim the ground.
We've installed greenhouses on every type of allotment base imaginable. Here's what actually works:
Paving slabs (recommended)
Level the soil, lay weed membrane, blind with sharp sand, then position slabs. For a 6x6 greenhouse, you need 9 standard 600mm x 600mm slabs. For an 8x6, you need 12. The slabs can be lifted and the ground dug over when you leave. Read our full paving slab base guide for step-by-step instructions.
Timber Sleepers
Pressure-treated timber sleepers laid on levelled ground make a solid perimeter base. For a small greenhouse (up to 6x8), use fence posts, they're cheaper and easier to handle. For anything larger, use proper 250mm x 125mm sleepers. Dig a shallow trench, fill with gravel for drainage, then lay the sleepers on top. This stops them sitting in water and rotting.
Steel base frame
Most greenhouse manufacturers sell a steel base frame designed for their models. A Vitavia steel base keeps the greenhouse perfectly square and rigid. If you're building on soft ground, the corner posts can be sunk into the earth and concreted into small post holes, this uses minimal concrete and is usually acceptable to allotment committees.
Whichever base you choose, getting it square and level is critical. Our ground preparation guide explains the 3-4-5 method for checking right angles: measure 3ft along one edge, 4ft along the other, and the diagonal between those points should be exactly 5ft when the corners are square.
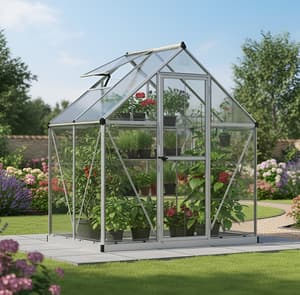
Why aluminium is the best frame for an allotment
Aluminium greenhouses are lighter, cheaper, and far easier to move than wooden frames, all critical factors on an allotment. Having installed both types on allotment sites, we always recommend aluminium for three reasons:
- Weight: An aluminium 6x6 weighs around 35-40kg in pieces. A comparable wooden greenhouse weighs 150kg+. You need to get this to your plot, often by wheelbarrow along narrow paths
- Maintenance: Aluminium doesn't need painting, treating, or preserving. Wood needs annual treatment or it rots, and on an allotment where you're already busy growing, that's time you could spend on your crops
- Portability: If you change plots or leave the allotment, an aluminium greenhouse dismantles in a few hours. We've moved entire Vitavia Venus greenhouses from one allotment to another in a single afternoon
If you do prefer the look of wood, read our material comparison guide, but for pure practicality on an allotment, aluminium wins every time.
What glazing should you choose for an allotment greenhouse?
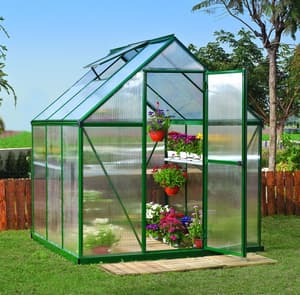
Polycarbonate is the best glazing for allotment greenhouses, it's virtually unbreakable, retains heat better than glass, and costs less to replace. Allotments are sadly more vulnerable to vandalism than back gardens, and polycarbonate panels absorb impacts that would shatter glass.
Polycarbonate twin-wall panels have an air cavity inside, giving them genuine double-glazing properties. On a cold March morning, a polycarbonate greenhouse holds heat noticeably longer than a glass one, your seedlings will thank you. The only downside is that polycarbonate lets in slightly less light than glass (around 80% vs 90%), but for vegetable growing this makes zero practical difference.
Best greenhouses for allotments: our recommendations
After 13 years of installing greenhouses on UK allotments, these are the models we recommend most. Every greenhouse below uses polycarbonate glazing, has an aluminium frame, and fits within standard allotment size limits.
|
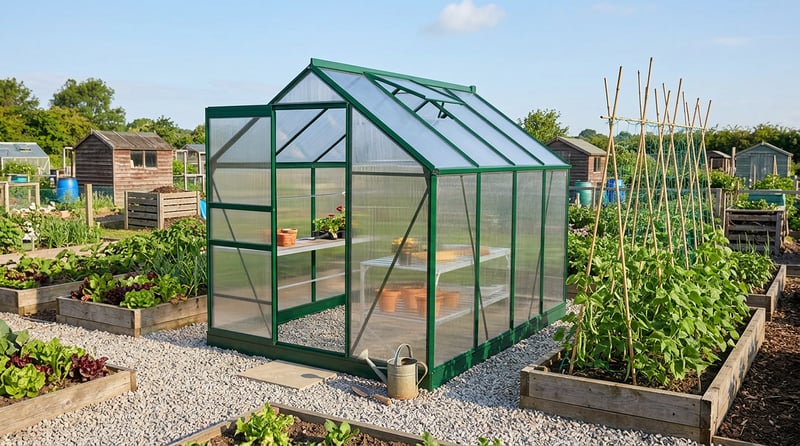
Matt's pick: best all-round allotment greenhouse
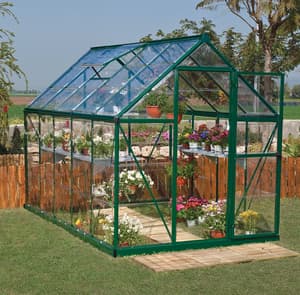
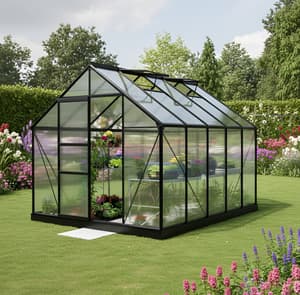
Model: Vitavia 8x6 Green Venus 5000, Polycarbonate Glazing
Best For: Full-size allotment plots, enough room for 8 tomato plants, cucumbers, and a staging bench
Why I Recommend It: We've installed more Venus greenhouses on allotments than any other model. The green frame blends into the plot, the polycarbonate panels handle everything from footballs to hailstones, and the built-in gutters drain straight into a water butt. It's also one of the easiest greenhouses to assemble, two people, one afternoon.
Price: £729
View Product
|
Shop the Vitavia Venus 5000 Green →
Best budget allotment greenhouse
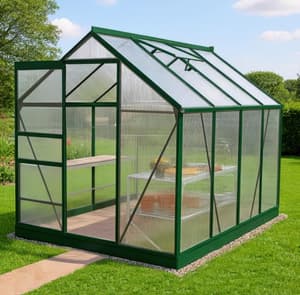
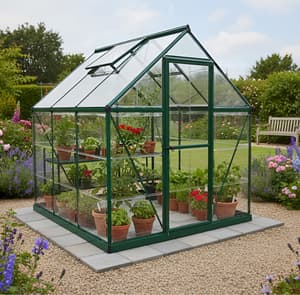
The Vitavia 6x6 Venus 3800 with polycarbonate glazing starts at £605 and gives you 36 square feet of growing space. That's enough for 6 tomato plants, a row of peppers, and a shelf of seedlings. At this price, it's the lowest-cost polycarbonate greenhouse we sell, and it's a proper greenhouse, not a flimsy hobby model. Steel corner bracing, built-in gutters, and a 12-year frame warranty.
Shop the Vitavia Venus 3800 →
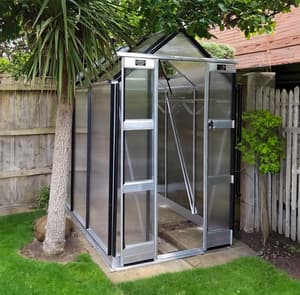
Best for narrow allotment plots
If your plot is narrow or you need to leave a wide path alongside the greenhouse, the Elite Compact 4x6 at £955 is just 4ft wide, barely wider than a garden path. The 6mm twin-wall polycarbonate is thicker than standard 4mm panels, so heat retention is even better. Elite is a UK manufacturer, and the build quality is a step up from budget models. The Elite Streamline 5x4 at £889 is another excellent compact option.
Shop the Elite Compact 4x6 →
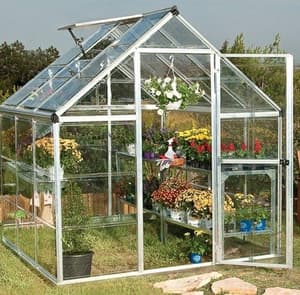
Best for serious growers
If your allotment society allows an 8x6 and you want the strongest build quality, the Elite Craftsman range starts at £899 for a 6x4 and goes up to 6x10 at £1,300. These are heavier-gauge aluminium with reinforced corners, they handle exposed allotment conditions better than lighter models.
Matt's Tip: Don't Forget the Colour
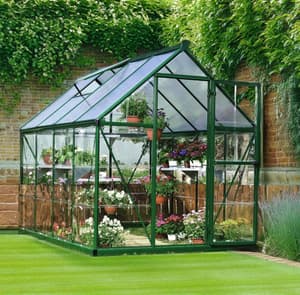
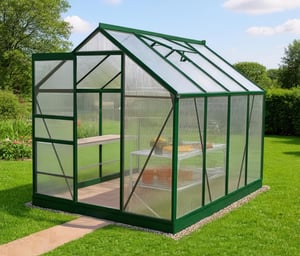
Green-framed greenhouses blend into allotment surroundings much better than silver. Some allotment committees actually prefer green frames because they're less visually intrusive. The Vitavia Venus comes in silver, green, and black. If your allotment is overlooked by houses, a green frame keeps neighbours happy and your committee off your back. If you want something more modern, the black Venus looks sharp at £729.
Essential accessories for an allotment greenhouse
The single most important accessory for an allotment greenhouse is an automatic vent opener, you can't always be at the plot when temperatures spike. On a sunny April day, the temperature inside an unventilated greenhouse can hit 40°C by midday. That kills seedlings in hours. An automatic opener uses a wax cylinder that expands with heat, pushing the vent open, no power needed, no wiring, completely self-contained.
Here's what we recommend for every allotment greenhouse setup:
- Automatic vent opener, from £67 for a Bayliss XL. Fits most aluminium greenhouses. Lasts 3-5 years before the cylinder needs replacing
- Rainwater gutters and a water butt, most Vitavia and Elite greenhouses come with built-in gutters. Add a downpipe kit and a water butt to collect free water. On a busy allotment site where everyone queues for the tap, this is worth its weight in gold
- Staging and shelving, a single tier of staging gives you a potting bench and raises seedlings off the cold ground. Remove it in summer to make floor space for grow bags and tall crops like tomatoes
- A padlock, fit a padlock to the door. It won't stop a determined thief but it deters opportunists and shows your allotment insurance company you took reasonable precautions
For the complete list, read our essential greenhouse accessories guide.
How to secure your allotment greenhouse
Polycarbonate glazing is the single best anti-vandalism measure for an allotment greenhouse. We've seen allotment greenhouses with every pane of glass smashed, it takes one stone and five seconds. Polycarbonate panels flex on impact instead of shattering. We've had customers tell us their polycarbonate greenhouse survived a direct hit from a football and a thrown brick without a single panel cracking.
Beyond the glazing choice, here are practical security steps:
- Anchor the greenhouse to the base, bolt it down. An unsecured greenhouse can be pushed over or lifted by strong winds. Use the manufacturer's base fixings or coach bolts through the base frame into concrete
- Fit a proper lock, a hasp and padlock on the door is the minimum. Some growers add a bolt on the inside too
- Position away from boundaries, the further from the perimeter fence or gate, the less attractive it is to vandals. Place it centrally on your plot if site rules allow
- Consider allotment insurance, many home insurance policies cover allotment structures if you add them. Check with your insurer. The National Allotment Society also offers cover from around £20 per year
If wind is a concern on your exposed allotment, our greenhouse wind damage guide covers anchoring, storm preparation, and repair.
What can you grow in an allotment greenhouse?
An allotment greenhouse extends your growing season by 6-8 weeks at each end, letting you start seeds in February and harvest tomatoes into November. The most popular allotment greenhouse crops are:
- Tomatoes, the main reason most people get an allotment greenhouse. Grow 6-8 cordon varieties in grow bags or large pots from April to October
- Cucumbers, train up strings from a grow bag. Two plants will produce more cucumbers than you can eat from June to September
- Peppers and chillies, need the consistent warmth a greenhouse provides. Sow in February, transplant in May, harvest July to October
- Seed starting, the real power of an allotment greenhouse is starting seeds 6 weeks earlier than outdoors, giving your crops a massive head start
- Overwintering, protect tender plants, garlic, and early broad beans through winter without any heating
For month-by-month growing advice, see our ventilation guide (overheating is the number one killer of allotment greenhouse crops) and our installation guide to get your greenhouse built properly from day one.
Shop the Elite Streamline 5x4, £889 →
Matt's Tip: Start Small, Upgrade Later
If you're new to allotment growing, start with a 6x6 Venus 3800. It's our most affordable polycarbonate greenhouse at £605, and it gives you enough room to grow tomatoes, cucumbers, and start seeds without feeling overwhelmed. Within two seasons, you'll know whether you want to upgrade to an 8x6, and a Vitavia Venus dismantles in a couple of hours, so moving up is easy. We see it happen every year: people wish they'd gone bigger, but they never regret starting.
Frequently asked questions
Can I put a greenhouse on my allotment?
Yes, most UK allotment societies allow greenhouses up to 8x6ft. Check your tenancy agreement or ask your site manager before buying. Some sites restrict the total area of structures to 25% of your plot, and a few require you to submit a plan for approval. Rules vary significantly between councils and private allotment associations.
What is the best greenhouse for an allotment?
An aluminium-framed greenhouse with polycarbonate glazing is best for allotments. We recommend the Vitavia 8x6 Venus 5000 in polycarbonate as the ideal allotment greenhouse. It's affordable at £729, easy to assemble, vandal-resistant, and dismantles if you change plots. The green frame blends into the allotment setting.
Do I need a concrete base for an allotment greenhouse?
No, paving slabs or timber sleepers are better than concrete on allotments. Most allotment societies ban poured concrete because it's permanent. Lay 600mm x 600mm paving slabs on levelled ground with weed membrane and sharp sand. The slabs lift easily if you leave the plot. A steel base frame from the manufacturer is another excellent option.
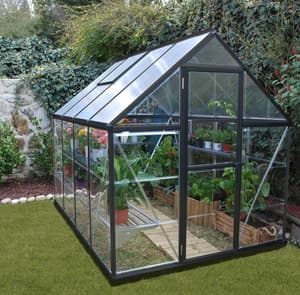
Is polycarbonate or glass better for an allotment greenhouse?
Polycarbonate is better for allotments, it's virtually unbreakable and retains heat better. Allotments face higher vandalism risk than home gardens. Twin-wall polycarbonate panels absorb impacts that would shatter glass, and the air cavity provides natural double-glazing. The only trade-off is slightly less light transmission (80% vs 90%), which makes no practical difference for vegetable growing.
How much does an allotment greenhouse cost?
Allotment greenhouses with polycarbonate glazing start from £549 for a 6x6. A popular 8x6 Vitavia Venus costs £709 to £729 depending on frame colour. Budget from £549 to £1,050 for the greenhouse itself, plus £50-£150 for paving slabs and £30-£70 for accessories (auto vent, padlock, staging). Total cost for a complete allotment greenhouse setup: around £650 to £1,300.
Can I move my greenhouse if I change allotment plots?
Yes, aluminium greenhouses dismantle and relocate in a day. We've moved Vitavia Venus and Elite greenhouses between allotment plots multiple times. Unbolt the glazing panels, disassemble the frame, and re-erect on the new base. If you used a paving slab base, take the slabs too. Wooden greenhouses are much harder to move without damage, which is another reason we recommend aluminium for allotments.
Do I need planning permission for an allotment greenhouse?
No, allotment greenhouses don't normally need planning permission. Greenhouses under 2.5m tall fall within permitted development rights. Your allotment tenancy agreement is the document that matters, the site rules, not the council planning department, determine what you can build. Read our planning permission guide for the full legal position.
Related Guides
More Allotment Greenhouses