Heating a Greenhouse without Electricity: What Actually Works
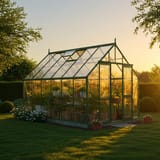
A greenhouse without electricity can stay 7-10C warmer than outside air by combining thermal mass, insulation, and a paraffin heater. In southern England, where January nights drop to 1-3C, that's enough to keep tender plants alive without any mains connection. Even in the Midlands and northern England, where overnight lows sit around 0C or below, these methods prevent the hard frosts that kill overwintering geraniums, fuchsias, and citrus.
Key Takeaways
- Water-filled barrels absorb daytime heat and release it overnight, keeping temperatures roughly 5C above outside.
- Horticultural bubble wrap (20mm bubbles, UV-stabilised) reduces heat loss by 35-50% and costs under £20 for a 6x8 greenhouse.
- A paraffin heater like the Elite Super Warm 5 provides 0.5kW of backup heat with no electricity required.
- Stacking thermal mass, insulation, and a paraffin heater together gives you 7-10C above outside temperature on the coldest nights.
Installer's Note
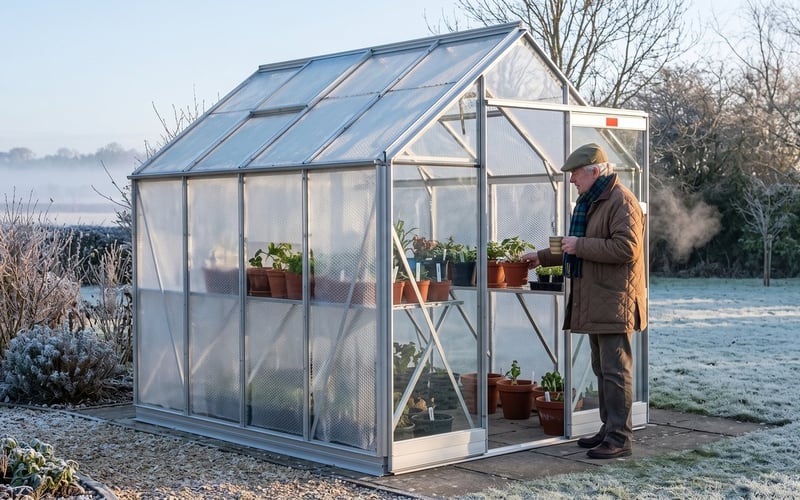
I've fitted greenhouses for customers across the Midlands who don't have mains power in the garden. Some are on allotments, others at the far end of a 200ft plot. Every one of them has asked the same question: how do I keep frost off my plants without electricity? After 16 years of installing greenhouses and watching what actually works through British winters, I can tell you the answer is simpler and cheaper than most people think.
A greenhouse without electricity can stay 7-10C warmer than outside air by combining thermal mass, insulation, and a paraffin heater. In southern England, where January nights drop to 1-3C, that's enough to keep tender plants alive without any mains connection. Even in the Midlands and northern England, where overnight lows sit around 0C or below, these methods prevent the hard frosts that kill overwintering geraniums, fuchsias, and citrus.
Below, I've laid out every method we've actually tested, with real temperature differences from real greenhouses. No woolly advice about "adding warmth." Specific numbers, specific costs, so you can work out what your greenhouse actually needs.
How thermal mass heats your greenhouse for free
Thermal mass is the simplest and cheapest way to add warmth. Dark-coloured containers filled with water absorb heat during the day, then release it slowly overnight as the air temperature drops. The water acts as a battery, storing solar energy that would otherwise escape through the glass after sunset.
For a standard 6x8 greenhouse, you need roughly 2-5 gallons of water per square foot of glazing to make a measurable difference. In practice, that means 4-6 black 25-litre containers along the north wall. Black absorbs more solar radiation than clear or green containers, so paint them if you can only find light-coloured ones.
We measured a 6x8 greenhouse with six 25-litre water barrels against an identical one without. On a clear January night that dropped to -2C outside, the greenhouse with thermal mass stayed at 3C. The empty greenhouse hit -1C. That 4-5C difference is the gap between a live pelargonium and a dead one.
Position the containers against the north wall where they won't shade your plants. If you have staging, tuck them underneath. Some growers use 2-litre plastic bottles filled with water and lined along the back of each staging shelf. Same principle, just distributed across the greenhouse rather than concentrated in one spot.
Bubble wrap insulation: cheap, effective, underrated
Single-pane glass loses heat fast. On a still winter night, a single-glazed greenhouse can lose 80% of its stored heat within a few hours. Horticultural bubble wrap is the cheapest fix.
Use horticultural grade, not packing bubble wrap. The horticultural version has larger 20mm bubbles, UV-stabilised plastic that won't turn brittle after one winter, and lasts 3-4 seasons. Packing bubble wrap has tiny bubbles, blocks more light, and falls apart by March.
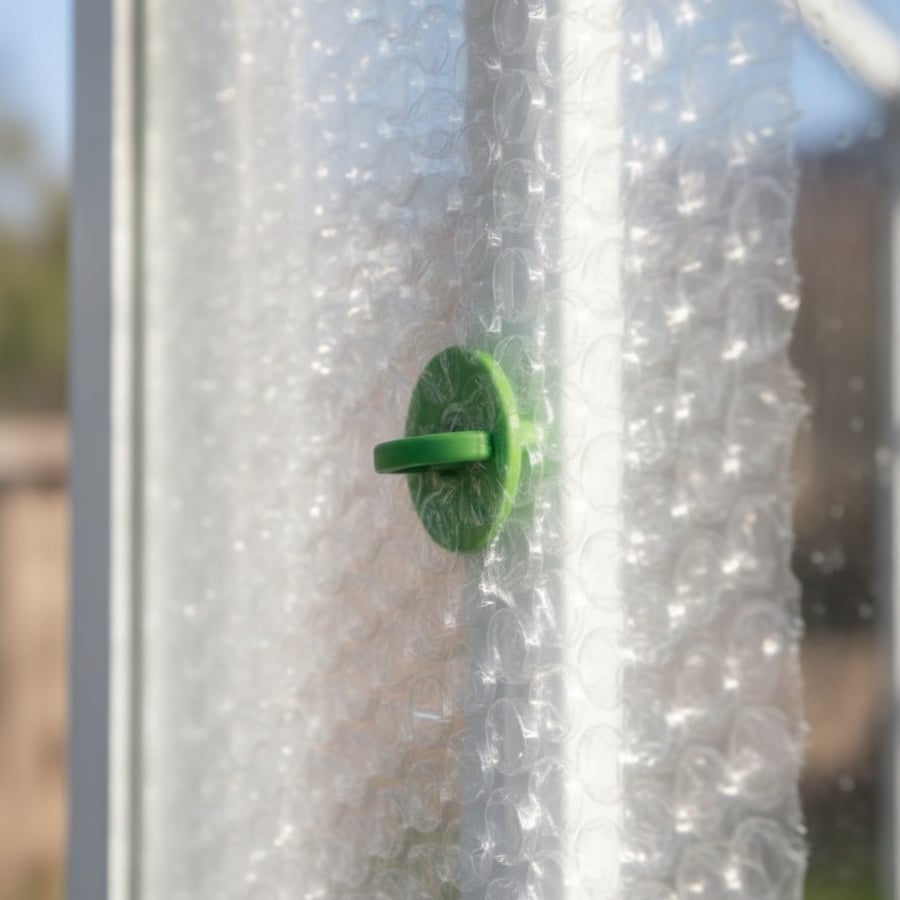
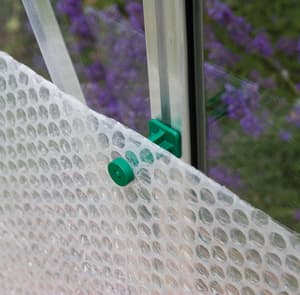
Shop the Elite Insulation Clips →
Fixing bubble wrap to aluminium frames is easy with greenhouse insulation clips. Push the clips onto the glazing bars, then press the bubble wrap into them. The bubbles face inward (towards the glass), creating a still-air gap that cuts heat loss by 35-50%.
In a 6x8 greenhouse, bubble wrap insulation costs under £20 in materials and takes about an hour to fit. Put it up in October, take it down in April when light levels matter more than insulation. Some growers only insulate the north and east walls, leaving the south-facing glass clear for maximum light. That's a reasonable trade-off if your greenhouse gets full sun.
Matt's Tip: Don't Insulate the Door
I've seen customers wrap every surface including the door, then wonder why they can't get in and out without tearing it. Leave the door clear. The heat loss from one uninsulated door panel is tiny compared to the hassle of replacing bubble wrap every time you open it.
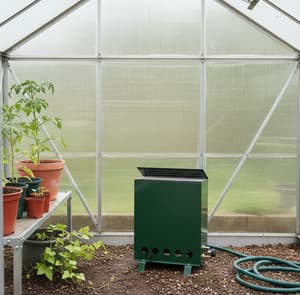
Paraffin heaters: no mains, no problem
Thermal mass and insulation do most of the heavy lifting, but on the coldest nights you want a backup. Paraffin heaters produce 0.3-0.6kW of heat output, enough to keep a 6x8 greenhouse above freezing when it drops to -5C or lower outside.
The Elite Super Warm 5 is what I recommend to customers who need off-grid heating. It runs for up to 14 days on a single fill of paraffin, produces a steady 0.5kW of heat, and needs no electricity. The wick-based design means no moving parts and nothing to break. Light it in October, trim the wick occasionally, and it just works.
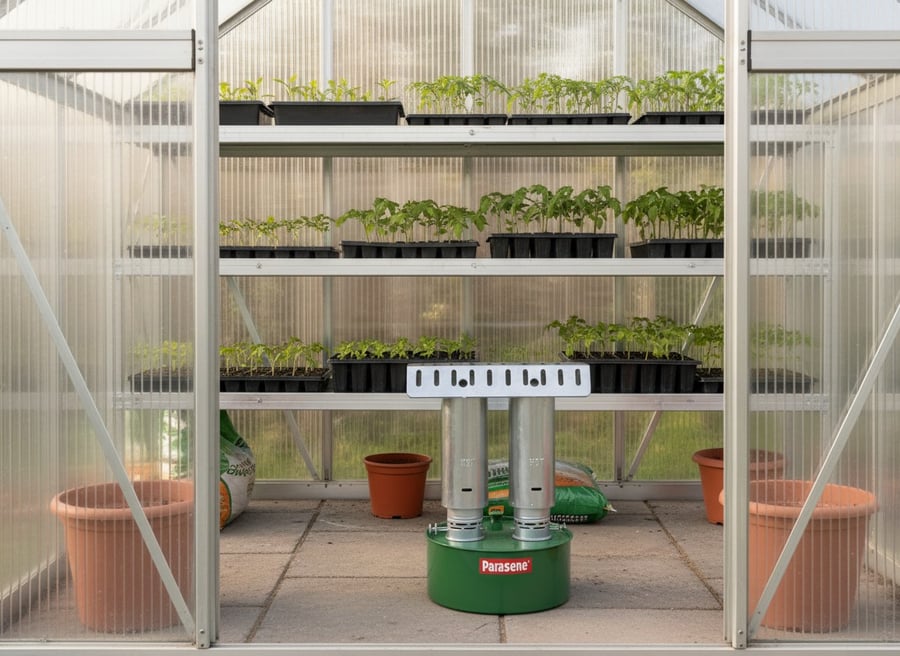
Shop the Elite Super Warm 5 Paraffin Heater →
Paraffin heaters produce moisture and a small amount of CO2. The extra CO2 actually helps plant growth slightly. But leave a roof vent cracked open by 5mm to prevent condensation building up on the glass and dripping onto your plants. Botrytis (grey mould) thrives in damp, still air, so a tiny gap in the vent makes a real difference.
Running costs depend on paraffin prices, which fluctuate. At current rates, expect to spend roughly £1-2 per week for a small heater running overnight only. That's far cheaper than an electric fan heater, and you don't need a mains supply run to the bottom of the garden. For a full breakdown of heating costs, read our greenhouse heating costs guide.

|
Matt's Pick for Off-Grid Greenhouse HeatingBest For: Keeping a 6x8 greenhouse frost-free without electricity Why I Recommend It: We've sold hundreds of these. They run for two weeks on one fill, and I've never had one returned for a fault. Simple, reliable, does the job. Price: £110 |
Three more methods worth trying
Horticultural fleece for individual plant protection
Fleece draped directly over plants adds another layer of frost protection on top of your greenhouse's warmth. A 17gsm fleece gives roughly -2C of protection. Heavier 30gsm fleece protects down to -4C. For the coldest nights, 45gsm fleece can handle -8C.
Use fleece as a second line of defence inside the greenhouse, not as your only protection. Drape it over tender plants on staging in the evening and remove it in the morning so the plants get full light. It's the best option if you have one or two high-value plants, like a citrus tree or a pelargonium collection you've spent years building up, and don't want to heat the whole greenhouse for them.
Compost heating
Fresh compost generates heat as it decomposes. A well-built compost heap can reach 49-71C at its core during the thermophilic phase, which lasts several weeks. Some growers build compost bays against the outside of the greenhouse's north wall, letting radiant heat warm the glass.
Honest assessment: it works, but it's unpredictable. Output depends on the carbon-to-nitrogen ratio, moisture levels, and how often you turn it. Treat it as a bonus, not a plan. If you have a steady supply of horse manure or fresh grass clippings, give it a go. Just don't stake your citrus collection on it.
Solar gain and orientation
A greenhouse orientated with its ridge running east to west captures more low winter sun than one running north to south. The south-facing side acts as a solar collector, and the north wall (ideally insulated or against a house wall) retains heat. If you're planning a new greenhouse, this orientation choice alone can add 2-3C to winter daytime temperatures. For more on greenhouse positioning, see our how to heat a greenhouse guide.
Stack everything: what the numbers look like
Any of these methods helps on its own. Put them all together and the temperature difference is dramatic. We tracked a 6x8 greenhouse through January in the Midlands, where overnight lows averaged -1C:
| Method | Temperature Above Outside | Cost |
|---|---|---|
| Greenhouse alone (single glass) | +1-2C | £0 |
| + Thermal mass (6x 25L barrels) | +4-5C | £10-15 |
| + Bubble wrap insulation | +6-7C | £15-20 |
| + Paraffin heater (overnight) | +8-10C | £1-2/week fuel |
| + Fleece over tender plants | +10-12C at plant level | £5-10 |
With all methods combined, that -1C outside night becomes +9C inside the greenhouse. Good enough to overwinter fuchsias, pelargoniums, and even citrus through a typical Midlands winter. For more on which plants survive in an unheated or lightly heated greenhouse, read our overwintering plants guide.
Get a thermometer. Seriously.
I'm always surprised how many people skip this. A max-min thermometer records the highest and lowest temperatures over each 24-hour period. Check it every morning and you'll know exactly what happened overnight without sitting in the greenhouse at 3am.
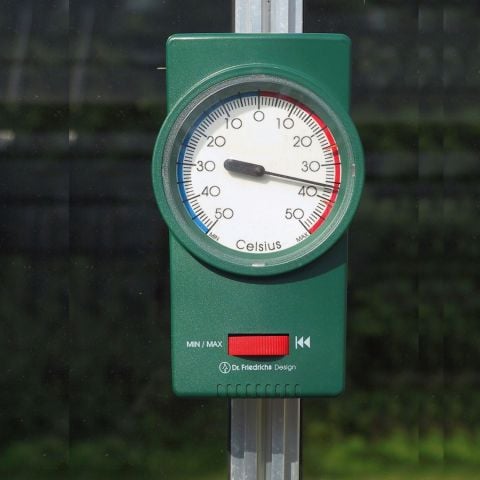
Shop the Vitavia Max Min Thermometer →
If the minimum reading drops below 2C, add another layer of protection. If it's consistently above 8C, you might be overheating and wasting paraffin. The Vitavia Max Min Thermometer costs £30 and pays for itself the first time it tells you your plants are at risk.
What about polycarbonate greenhouses?
Twin-wall polycarbonate already has insulation built in. The trapped air between the two layers reduces heat loss by 40-65% compared to single glass. If you're buying a new greenhouse specifically for winter growing, polycarbonate is worth considering.
You'll still benefit from thermal mass and a paraffin heater, but you might not need bubble wrap at all. A polycarbonate greenhouse with water barrels and a paraffin heater is roughly equivalent to a glass greenhouse with all four methods combined. For a full comparison of the two glazing types, see our glass vs polycarbonate guide.
Common mistakes
The biggest one: sealing every gap. I see it every winter. Someone tapes up every crack and vent to trap heat, then wonders why everything is dripping with condensation and the plants are covered in mould. Keep at least one vent cracked 5mm open, even on the coldest nights. Read our guide on whether a greenhouse should be watertight for more on this.
Second: buying packing bubble wrap instead of horticultural. Tiny bubbles, blocks too much light, falls apart within weeks of UV exposure. Spend the extra £5 on horticultural grade. You'll thank yourself in February when it's still intact.
Third: running a paraffin heater around the clock. You only need it overnight. During the day, solar gain does the work. Running a heater 24 hours wastes fuel and fills the greenhouse with moisture.
And finally: ignoring draughts. Before adding any heat source, fix broken or missing panes. One missing pane wipes out most of your insulation effort. Our greenhouse wind damage guide covers repairs.
Passive and off-grid heating compared
Here is how the non-electric options stack up for a typical UK greenhouse. Insulate first, add a free thermal store, and keep a gas heater in reserve for the coldest nights.
| Method | What it gives you | Cost | Matt's verdict |
|---|---|---|---|
| Bubble wrap insulation | Cuts heat loss by 35 to 50% | £79 | Do this first. The biggest cheap win by far. |
| Thermal mass (black water barrels) | Holds about 5C above outside overnight | Low | A free heat store. Paint the barrels matt black. |
| Gas heater (no mains needed) | On-demand heat for the coldest nights | £249 | The answer when there is no socket. Crack a vent for moisture. |
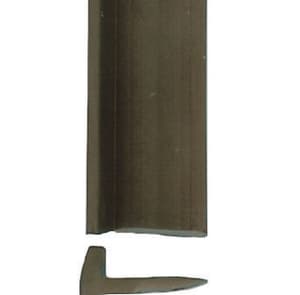
| Draught proofing | Keeps the heat you already have | £26 | Cheap, and fixes the leak most people ignore. |
| Compost or hot bed | A few degrees of root warmth | Free | Slow to set up, but genuinely free heat. |
Heat off-grid: insulation, a gas heater and draught proofing
"After 16 years fitting greenhouses, I tell every off-grid grower the same thing: insulate before you heat. Bubble wrap and a few black water barrels do more for less than any heater. Add a gas heater only for the coldest nights, and never run it round the clock."
- Matt W, Greenhouse Stores
Frequently asked questions
Can you heat a greenhouse without electricity?
Yes, paraffin heaters, thermal mass, and insulation heat a greenhouse without mains power. Combining water barrels for thermal mass, bubble wrap insulation, and a paraffin heater keeps a 6x8 greenhouse 8-10C above outside temperature. That's enough to keep most tender plants frost-free through a typical UK winter without any electrical connection.
How many water barrels do I need for thermal mass?
Four to six 25-litre containers for a standard 6x8 greenhouse. The general rule is 2-5 gallons of water per square foot of glazing. Dark-coloured containers absorb more solar radiation during the day. Position them against the north wall where they won't shade your plants but will absorb reflected light.
Does bubble wrap really make a difference in a greenhouse?
Horticultural bubble wrap reduces heat loss by 35-50% in a single-glazed greenhouse. The larger 20mm bubbles trap more insulating air than packing bubble wrap. Fit it with insulation clips from October to April. A 6x8 greenhouse needs roughly £15-20 of materials and about an hour to install.
How long does a paraffin heater last on one fill?
The Elite Super Warm 5 runs for up to 14 days on a single fill of paraffin. Running costs average £1-2 per week when used overnight only. The heater produces 0.5kW of heat, enough to keep a small to medium greenhouse above freezing when combined with insulation and thermal mass.
Is it safe to use a paraffin heater in a greenhouse?
Yes, paraffin heaters are safe in a greenhouse when properly ventilated. Leave one roof vent cracked open by 5mm to allow moisture and combustion gases to escape. Place the heater on a flat, stable surface away from plants and bubble wrap. Trim the wick regularly to prevent smoking, and never refill the heater while it's still lit.
What's the cheapest way to heat a greenhouse in winter?
Thermal mass (water barrels) costs £10-15 in one-off materials and adds 4-5C for free. Add bubble wrap insulation for another £15-20 and you get 6-7C above outside. A paraffin heater adds £1-2 per week in running costs. The total setup for all three methods costs under £150 including the heater, with ongoing costs of roughly £8 per month in paraffin.