Auto Vent Opener Installation UK: How to Fit and Adjust
An automatic vent opener fits to a greenhouse roof vent in 5-10 minutes with a single Phillips screwdriver and lifts the vent automatically when the air inside warms past 15C. There are three brands worth knowing in the UK market - Bayliss (MK7 and XL), Vitavia auto vent opener, and the Univent original. After fitting greenhouses for 16 years, the Bayliss XL is the model we install on most exposed sites; the lighter Bayliss MK7 is the right call for sheltered gardens. This guide covers exactly how the wax cylinder works, the step-by-step fitting process, the temperature adjustment, brand compatibility, and the three fitting mistakes we see most often.
Key takeaways
- Fits any aluminium greenhouse with a universal clamp-on bracket - Vitavia, Elite, Palram and most other UK frames. Wooden greenhouses need a screw-fix bracket.
- Wax cylinder is the engine. Expands as the cabinet air warms, pushes a piston, lifts the vent. Replacement cylinder is £15-£25 every 4-6 years.
- Vent opens at 15C, fully open by 25C. The opening temperature is adjustable on most models by twisting the dial 8-12mm in either direction.
- Bayliss XL for exposed UK sites. Triple-spring 14kg lift force handles 40mph gusts. Standard 7kg openers fail in 12-18 months on exposed coastal and hill plots.
- Remove the wax cylinder in winter. November-February in most of the UK. Frozen wax in a snow-locked vent can burst the cylinder.
- Three common fitting mistakes: over-tightening the clamp (warps the bar), fitting the linkage upside down, and not testing the lift before walking away.
Shop the autovents and openers range →
Installer’s Note
The single most expensive mistake I see on customer follow-ups is people manually opening and closing the vent every day for a whole growing season. Most never bother. Result: a vent that gets opened in the morning if anyone’s home, closed at random in the evening, and stays shut all day if you go away for a weekend. By August the tomatoes have bolted and the greenhouse is full of botrytis. A £25-£55 auto vent opener fits in ten minutes and pays for itself in the first heatwave by saving the crop. If you only fit one accessory to a new greenhouse, fit this.
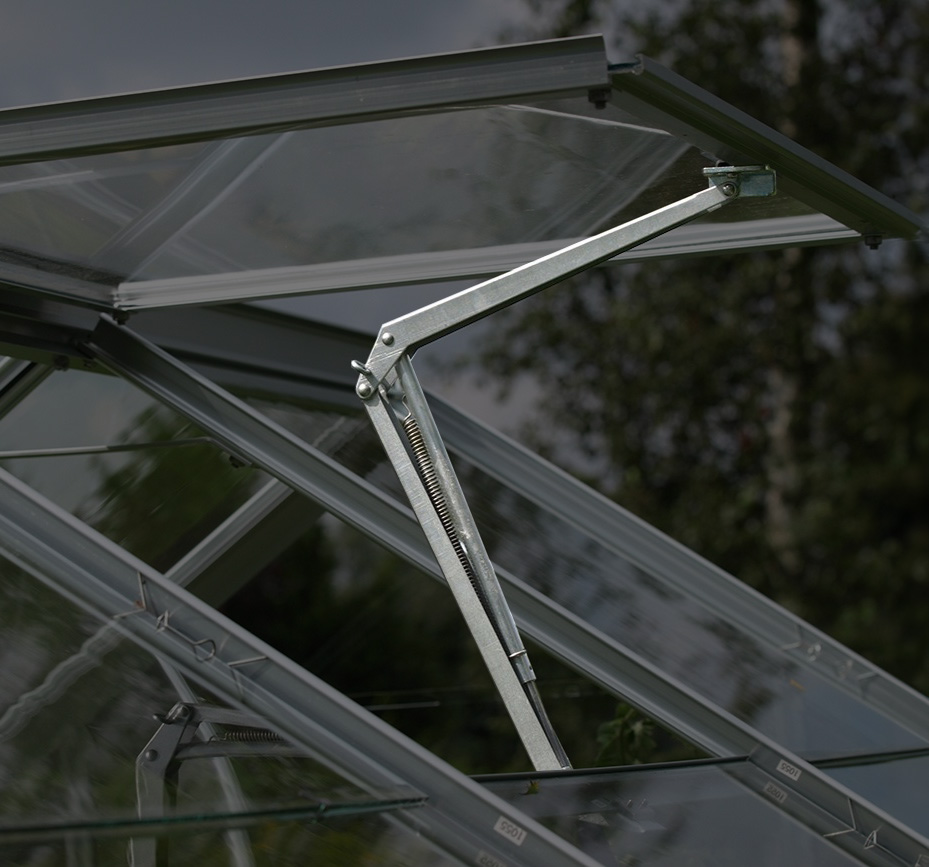
How an automatic vent opener works
An auto vent opener is a sealed metal cylinder containing a temperature-sensitive wax. As the air inside the greenhouse warms, the wax expands. The expansion drives a piston out of the cylinder, the piston pushes a linkage arm, and the arm lifts the vent. As the air cools in the afternoon, the wax contracts, the piston retracts, and the vent closes under its own weight.
No electricity. No batteries. No timer. No programming. The whole system runs on a kilogram of mineral wax and basic thermodynamics. The only moving parts are the piston and a return spring (or three, on heavy-duty models).
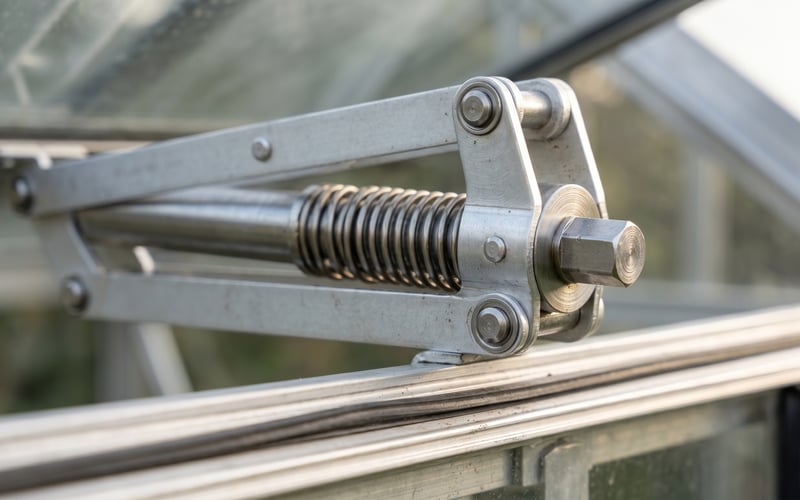
The opening temperature is set by the relationship between the wax volume, the spring tension, and the linkage geometry. Out of the box, a standard opener starts lifting at around 15C and reaches fully open by 25C. The dial at the top of the cylinder lets you tune the start temperature up or down by 4-6C - useful for adjusting around different crop preferences (tomatoes prefer slightly later opening than lettuce).
Which auto vent opener to buy
Three brands cover 90% of UK installations. The choice between them comes down to lift force, build quality, and price.
Bayliss MK7 - the standard sheltered-garden choice
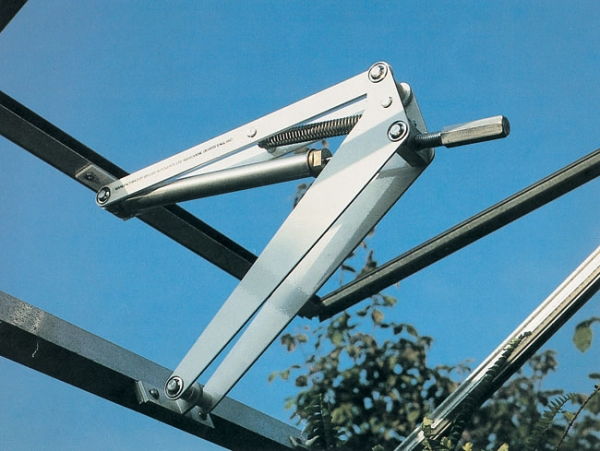
Bayliss MK7 - the workhorse single-spring opener for normal UK conditions.
The Bayliss MK7 is the UK standard for sheltered gardens and small-to-medium greenhouses. Single-spring construction, 7kg lift force, polished aluminium cylinder. Universal clamp-on fitting accepts most UK aluminium glazing bars from 12mm to 25mm wide. The MK7 has been in production in essentially the same form since 1979 - longer than most greenhouses last.
Lifespan: 3-5 years before the wax cylinder needs replacement. Replacement cylinders cost £44.
Bayliss XL - the heavy-duty triple-spring choice
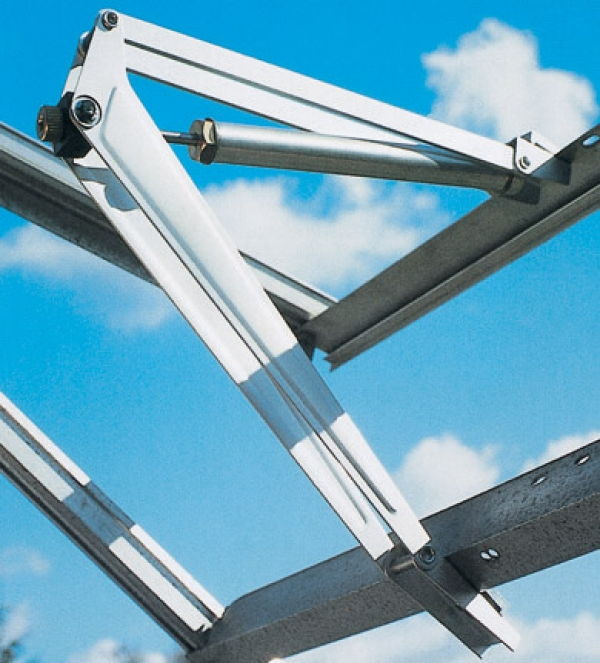
Bayliss XL - three parallel springs deliver 14kg lift force for exposed coastal and hillside gardens.
The XL is the upgrade for any garden that catches more than light wind. Three parallel springs share the lift load, giving 14kg of total lift force - double the MK7. The benefit is twofold: it can lift heavier polycarbonate or twin-wall vent panels (where the MK7 struggles), and it holds the vent firmly open against wind gusts that would otherwise slam it shut against the spring and snap the linkage.
We install the XL by default on any greenhouse within 5 miles of the UK coast, on any hillside garden above 200m elevation, and on any site where the customer mentions wind problems with previous greenhouse damage.
Lifespan: 5-7 years before the wax cylinder needs replacement.
Vitavia Auto Vent Opener - the matched-brand option
Vitavia auto vent opener - matched fitting and colour for Vitavia greenhouses.
The Vitavia branded opener uses the same wax-cylinder mechanism as the Bayliss MK7 but with mounting brackets specifically dimensioned for Vitavia glazing bars. The fit is tighter and the cylinder body is colour-matched (silver, green or black) to common Vitavia frame finishes. If you bought a Vitavia greenhouse and want the cleanest visual integration, this is the obvious choice. Performance is identical to the MK7.
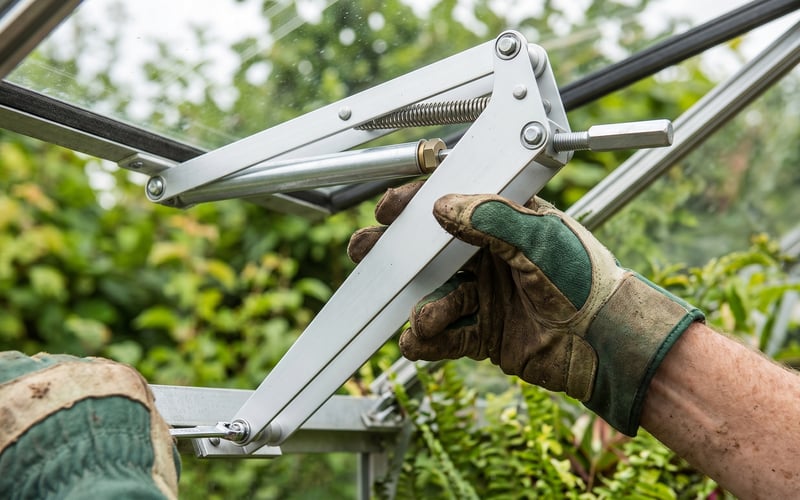
Step-by-step: fitting an automatic vent opener
The fit takes 5-10 minutes with a single Phillips screwdriver. The greenhouse roof vent should already be hinged at the top with an existing manual stay - the auto opener replaces the manual stay.
- Open the vent fully and prop it. A piece of timber or a tin of compost holds the vent open while you fit the opener. This stops the vent dropping on your hand during the install.
- Remove the existing manual stay. One or two screws hold it to the glazing bar. Pop them out and remove the old stay completely - it doesn’t play any further role.
- Mount the clamp bracket on the glazing bar. The bracket clamps around the vertical glazing bar immediately below the vent hinge. Slide the clamp onto the bar, position so the cylinder body will hang vertically when fitted, and tighten the clamp screws gently. Don’t over-tighten - finger-tight plus a quarter turn with a screwdriver is right. Over-tightening warps the glazing bar.
- Bolt the cylinder body into the bracket. The cylinder has a threaded stud at one end that screws into the bracket. Hand-tighten until snug. The cylinder should hang freely - no leaning, no contact with adjacent glass.
- Fit the linkage arm to the vent. The arm has two ends - one bolts to the piston coming out of the cylinder, the other clips or screws to the underside of the vent. Make sure the arm is the right way up (the curve faces away from the cylinder).
- Test the lift. Remove the prop. Push the cylinder body down gently with one hand - the vent should close. Release - the vent should stay closed under spring tension. Now warm the cylinder body in your hands for 30-60 seconds. The cylinder should start to extend and the vent should begin to lift. If nothing happens, recheck the linkage geometry.
- Adjust the opening temperature using the dial at the top of the cylinder (covered in the next section).
Temperature adjustment - getting the opening point right
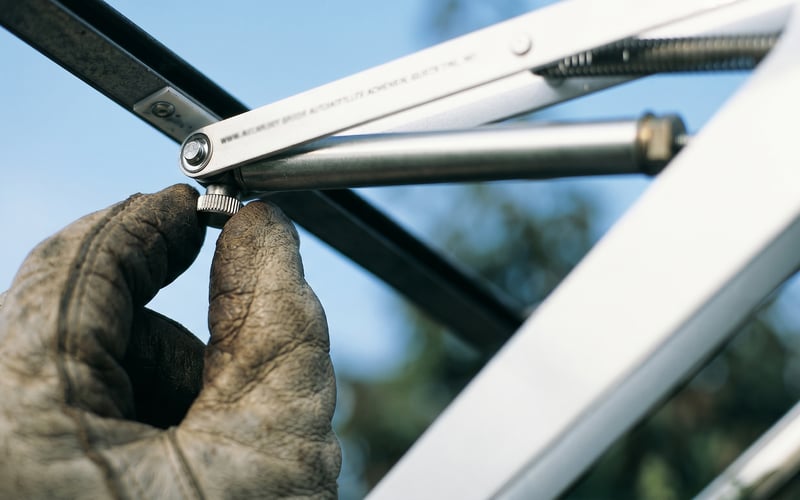
Most auto openers have a small adjustment dial at the top of the cylinder. Turning it clockwise raises the opening temperature; anti-clockwise lowers it. The adjustment range is typically ±4-6C around the factory default of 15C.
Practical settings by crop:
- Lettuce, brassica seedlings, cool-season crops: Set the opener to start lifting at 12-14C. These crops bolt above 22C, so early venting matters.
- Tomatoes, peppers, cucumbers: Set the opener to start lifting at 18-20C. These crops want warmth at the start of the day and venting only when the temperature genuinely needs management.
- Mixed crops (the realistic answer for most gardens): Leave the opener at the factory default of 15C. The vent fully opens by 25C either way, so the crop temperature ceiling is the same; only the morning behaviour differs.
Adjust the dial in 90-degree increments and test the next sunny day. Most owners settle on a final position within the first 2-3 weeks of fitting and never touch it again.
Brand compatibility - what fits what
| Greenhouse brand | Best opener | Fit notes |
|---|---|---|
| Vitavia | Vitavia or Bayliss MK7 | Vitavia branded opener gives matched colour. Bayliss MK7 universal clamp fits identically. |
| Elite | Elite or Bayliss XL | Elite branded opener available. Bayliss XL recommended for the heavier Elite glazing. |
| Palram Canopia | Palram dedicated opener | Palram polycarbonate bars need the Palram opener with its specific bracket profile. |
| Robinsons | Bayliss XL | Heavy frame profile - the triple-spring XL handles the load best. |
| Swallow wooden | Bayliss MK7 with screw-fit bracket | Bracket screws directly into timber rather than clamping a bar. |
| Older / unbranded aluminium | Bayliss MK7 | Universal clamp fits any 12-25mm vertical glazing bar. |
Common fitting mistakes
Mistake 1: Over-tightening the clamp. The clamp grips the glazing bar by friction, not by crushing it. Tighten until finger-tight plus a quarter turn with a screwdriver. More force than that bends the bar inward, and the bar then warps the glazing pane next to it. Cracked panes from over-tightened clamps are the most common after-install callback we see.
Mistake 2: Fitting the linkage arm upside down. The arm has a deliberate curve. The curve must face away from the cylinder body so the linkage clears the cylinder as it extends. Reversed fitting jams the linkage at half-open and either snaps the piston or burns out the wax through repeated heating cycles.
Mistake 3: Skipping the lift test. 20% of openers we install in customer follow-ups had a linkage issue at first fit that the owner didn’t notice because they didn’t test it. By the time they noticed (usually a 35C July day with a bolted lettuce), the damage was done. Always warm the cylinder by hand and confirm the vent rises before declaring the job finished.
Mistake 4: Leaving the cylinder in over winter. The wax in a frost-locked vent can’t expand against a frozen-shut vent. When the sun comes up and warms the cylinder, the wax expands inside a sealed body and bursts the cylinder. £15-£25 of avoidable damage. Remove the cylinder November-February in most of the UK.
Matt’s Tip: replace the cylinder before it fails
The wax cylinder has a finite lifespan - 3-5 years for single-spring, 5-7 for triple-spring. After 4-6 years the wax slowly loses its expansion characteristics. The vent opens later in the morning each year, closes earlier each afternoon, and eventually fails entirely on a hot August day. Replacement cylinders cost £15-£25 and bolt into the same bracket in two minutes. Diary the replacement for year 5 and swap it before failure rather than after. A cylinder that fails on a hot day usually does so with the vent stuck shut, not stuck open - and the resulting cook-off can wipe out an entire summer of crops.
Matt’s Pick: Bayliss XL Automatic Roof Vent OpenerBest for: Any UK greenhouse on an exposed site, and any greenhouse with heavy polycarbonate or twin-wall vent panels. Why I recommend it: The standard single-spring openers handle 7kg of vent weight at zero wind. Real UK gardens have wind. The Bayliss XL’s three parallel springs deliver 14kg of lift force, hold the vent open against 40mph gusts, and last 5-7 years versus the 2-3 I typically see from single-spring openers on exposed sites. The extra £25-£30 upfront pays back inside three years of avoided replacements. Price: £67 |
Frequently asked questions
How does an automatic greenhouse vent opener work?
A temperature-sensitive wax cylinder expands as the air warms and pushes a piston that lifts the vent through a mechanical linkage. The vent starts opening at around 15C and reaches fully open by 25C. As the air cools, the wax contracts and the vent closes under spring tension and its own weight. No electricity required.
What temperature does an automatic vent opener open at?
Most UK auto vent openers start lifting at 15C and reach fully open by 25C. The opening temperature is adjustable on most models by twisting the dial on top of the cylinder - typically ±4-6C either side of the factory default.
Do automatic vent openers fit all greenhouses?
Yes for almost every UK aluminium greenhouse. Universal clamp-on openers like the Bayliss MK7 fit Vitavia, Elite, Robinsons, and most other aluminium frames with a 12-25mm vertical glazing bar. Wooden greenhouses need the bracket screwed into the timber instead. Polycarbonate-bar greenhouses (Palram) need the brand-specific opener.
How long does an automatic vent opener last?
Single-spring openers last 3-5 years in normal UK conditions; triple-spring openers like the Bayliss XL last 5-7 years. The wax cylinder is the wear part - the rest of the mechanism is aluminium and steel and lasts 15-20 years. Replacement cylinders cost £15-£25 and bolt directly into the existing bracket.
Do I need to remove the auto vent opener in winter?
Remove the wax cylinder for November-February in most of the UK. If the wax freezes inside a vent locked shut by ice or snow, expansion when the morning sun arrives can burst the cylinder. The cylinder unbolts in two minutes - keep it in a frost-free shed and refit in March.
Which is better - Bayliss MK7 or Bayliss XL?
Bayliss MK7 for sheltered gardens; Bayliss XL for exposed sites. The MK7’s single 7kg spring handles standard toughened-glass vents in normal wind. The XL’s triple-spring 14kg system handles heavier polycarbonate vents and resists the wind gusts that wreck single-spring openers within 2 years on exposed coastal or hilltop gardens.
Can I install an automatic vent opener myself?
Yes - fitting takes 5-10 minutes with a single Phillips screwdriver. The opener clamps to the existing glazing bar and the linkage clips or screws to the vent. The most important step is testing the lift afterwards - warm the cylinder by hand for 30-60 seconds and confirm the vent rises before walking away.