How to Winter Prune Apple and Pear Trees: UK Guide
Winter pruning is the single most important job you can do for apple and pear trees. Prune between December and February when the tree is fully dormant and leafless. Spur-bearing varieties like Cox, Gala, and Conference pear need side shoots shortened to 3-4 buds. Tip-bearing varieties like Bramley and Discovery need whole-branch thinning instead. Get this wrong and you remove every fruit bud.
Key takeaways
- Prune December to February on a dry, frost-free day above -5°C
- Always start with the 3 D's — remove Dead, Diseased, and Damaged wood first
- Identify spur vs tip-bearing before shortening any shoots — wrong cuts lose your entire crop
- Never remove more than 25% of the canopy in one winter season
- Pear trees grow more upright than apples and need wider branch angles (55-60°)
- Disinfect blades between cuts on diseased wood to stop canker spreading through your orchard

Installer's Note
Matt Ward, 12 years installing and maintaining garden structures across the UK
We fit greenhouses next to fruit trees every week. The number of neglected apple trees we see is shocking. Most haven't been pruned in years and produce tiny, scabby fruit. One customer in Sheffield had a Bramley that hadn't been touched in eight years. We helped them with a three-year renovation plan while installing their new lean-to greenhouse. By year three, that tree was producing 40kg of clean cooking apples. Winter pruning made the difference.
When should you winter prune in the UK?
The dormant pruning window runs from late November through early March across most UK regions. December through February gives the most reliable conditions. Trees are fully dormant, wounds heal faster when spring growth resumes, and bare branches let you see the structure clearly.
Prune on a dry, frost-free day when temperatures stay above -5°C. Cutting during hard frost splits wounds and exposes heartwood. Wet weather spreads fungal spores, particularly bacterial canker, which enters through fresh cuts.
| Tree Type | Best Pruning Window | Why This Timing |
|---|---|---|
| Mature apple (spur-bearing) | December – February | Fully dormant, sap not flowing |
| Mature apple (tip-bearing) | December – January | Earlier timing reduces water shoot response |
| Young apple (under 5 years) | February – early March | Reduces winter damage to tender growth |
| Mature pear | December – February | Pears tolerate earlier pruning well |
| Young pear (under 5 years) | Late January – February | Slightly delayed controls excessive vigour |
| Neglected tree (renovation) | Mid-January | Most dormant period for heavy cuts |
For neglected trees requiring heavy renovation, tackle the work in mid-January when the tree is at peak dormancy. Spread renovation over three winters rather than doing it all at once.
What tools do you need for winter pruning?
Three cutting tools cover every pruning job on apple and pear trees: bypass secateurs, long-handled loppers, and a curved pruning saw. Buy the best you can afford. Cheap tools blunt quickly and crush stems instead of cutting cleanly.
| Tool | Cuts Up To | Best For | Budget |
|---|---|---|---|
| Bypass secateurs | 1.5cm diameter | Side shoots, spurs, small growth | £25-60 |
| Long-handled loppers | 3cm diameter | Medium branches, reaching higher | £30-70 |
| Curved pruning saw | 10cm+ diameter | Main branches, renovation work | £20-45 |
| Tripod ladder | — | Stable on uneven ground, safer than lean-to ladders | £80-200 |
| Disinfectant spray | — | Cleaning blades between diseased cuts | £5-10 |
Always use bypass secateurs, not anvil types. Bypass blades make a scissor-action cut. Anvil secateurs crush the stem, leaving ragged wounds that heal slowly and invite disease.
Sharpen your secateurs every 2-3 hours of active pruning. A small diamond sharpening stone takes 30 seconds per blade. Maintain the original bevel angle (usually 20-25 degrees) with smooth, even strokes.
Keep a spray bottle of disinfectant ready. A 10% bleach solution or methylated spirits works well. After every cut through diseased wood, spray your blades and wipe clean. This stops you carrying canker spores from branch to branch.
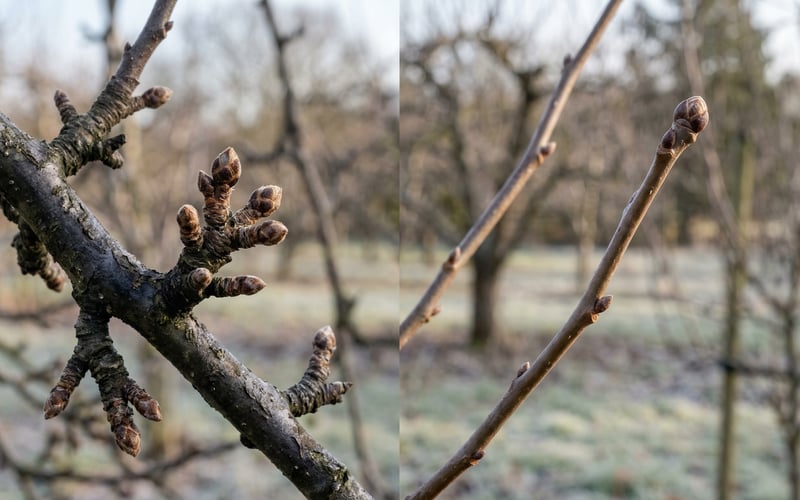
Spur-bearing vs tip-bearing: the cut that decides your crop
This single distinction determines your entire pruning strategy — get it wrong and you cut off all next year's fruit. Most pruning guides skip this detail. It's the reason so many gardeners prune correctly yet still get no apples.
Spur-bearing varieties produce fruit on short, stubby spurs that develop along older wood. These spurs look like knobby clusters on two-year-old and older branches. You can safely shorten side shoots to 3-4 buds, which encourages more spur development.
Tip-bearing varieties fruit on the ends of last year's growth. The fruit buds sit at the tips of long, whippy shoots. If you shorten these tips following spur-bearing advice, you remove every flower bud. Instead, thin out entire branches to open the canopy but leave the tips intact.
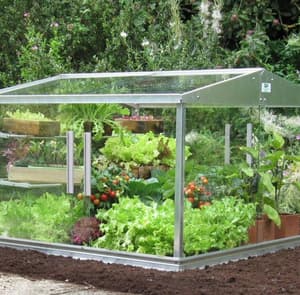
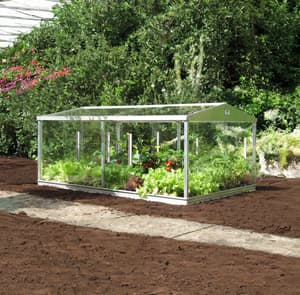
Shop the Access 6x4 Coldframe →
| Bearing Type | Apple Varieties | Pear Varieties | How to Prune |
|---|---|---|---|
| Spur-bearing | Cox, Gala, Braeburn, Egremont Russet, James Grieve | Conference, Comice, Williams, Beth | Shorten laterals to 3-4 buds |
| Tip-bearing | Bramley, Worcester Pearmain, Discovery, Irish Peach | Jargonelle, Josephine de Malines | Thin whole branches, keep tips |
| Partial tip-bearing | Sunset, Lord Lambourne, Blenheim Orange | — | Prune conservatively, mix of both |
How to tell which type you have: Look at where last year's fruit grew. If it clustered on short spurs along older branches, it's a spur-bearer. If fruit appeared at the ends of long shoots, it's a tip-bearer. When in doubt, prune conservatively and thin rather than shorten.
Matt's Tip: the scratch test for dead wood
Before cutting a branch you think might be dead, scratch the bark with your thumbnail. Green cambium underneath means it's alive. Brown or dry underneath means it's dead and needs removing. I've seen gardeners cut out perfectly healthy branches because they looked bare in winter. They all look bare in winter. The scratch test takes two seconds and saves you removing productive wood.
Step-by-step winter pruning for apple trees
Follow these steps in order. Each step builds on the previous one. Don't skip ahead to shaping until you've dealt with problem wood first.
Step 1: Remove dead, diseased, and damaged wood (the 3 D's)
Every pruning session starts here, regardless of tree age or variety. Dead wood feels brittle and shows no green cambium when scratched. Cut back to the nearest healthy junction or main trunk, just outside the branch collar.
For diseased wood, look for cankers — sunken, cracked, discoloured bark. Cut at least 15cm beyond visible discolouration into clean, healthy wood. Burn or bin diseased prunings. Never compost them.
Damaged wood from wind, snow, or poor previous pruning leaves torn bark and slow-healing wounds. Cut back to a healthy side branch or the trunk with a clean angled cut.
Step 2: Cut out crossing and rubbing branches
Where two branches cross or rub against each other, remove the weaker or more awkwardly positioned one completely. Rubbing creates wounds that become entry points for disease. Keep the branch that maintains the best overall shape.
Step 3: Open the centre (goblet shape)
The open goblet shape lets light and air reach the centre of the tree, improving fruit quality and reducing fungal disease. Aim for 4-5 main scaffold branches radiating outward at 45-60 degrees from the trunk. Remove strongly upright growth (water shoots) from the centre.
Prefer thinning cuts (removing a branch entirely at its origin) over heading cuts (shortening a branch). Thinning maintains an open structure. Heading cuts trigger dense regrowth right where you don't want it.
Step 4: Shorten side shoots (spur-bearers only)
On spur-bearing varieties, shorten lateral branches to 3-4 buds from the base. Cut at a 30-degree angle, about 5mm above an outward-facing bud. This concentrates the tree's energy into fruit production.
For tip-bearing varieties, skip this step entirely. Focus on removing whole branches that crowd the canopy. Leave the tips of remaining shoots untouched — that's where your fruit buds are.
Step 5: Thin congested spurs (mature trees)
On older spur-bearing trees, spur systems become congested clusters that produce small, poor-quality fruit. Thin these by removing the weakest spurs, leaving 2-3 healthy buds per cluster. This redirects energy into fewer, better fruit.
Shop the Elite Slimline Greenhouse Heater →
How to winter prune pear trees: the key differences
Pear trees follow the same basic pruning principles as apples, but their more vigorous upright growth requires firmer management. Pears naturally grow vertical, columnar canopies that trap moisture and harbour disease. You need to actively spread branches outward.
| Factor | Apple Trees | Pear Trees |
|---|---|---|
| Natural growth habit | Spreading, moderate vigour | Upright, vigorous |
| Target branch angle | 45-60° from trunk | 55-60° from trunk (wider) |
| Response to pruning | Moderate regrowth | Vigorous regrowth, more water shoots |
| Spur production | Moderate spur density | Heavy spur production, thin more often |
| Canker susceptibility | Moderate | Lower, but fire blight risk in south |
| Renovation tolerance | Responds well | Responds aggressively — take it slowly |
Young pear trees often need branch-angle training with ties or weights to achieve the wider angles. Left to their own devices, pears will grow straight up. Use soft ties to pull branches down to 55-60 degrees during the growing season, then maintain those angles with winter pruning.
Pear trees also produce spurs more freely than apples. This means older pear trees often need more aggressive spur thinning to keep fruit size up. A congested pear spur system produces dozens of tiny pears instead of a manageable crop of full-sized fruit.
Pruning by tree age: different stages need different approaches
| Tree Age | Pruning Type | Goal | How Much to Remove |
|---|---|---|---|
| Year 1 | Formative | Select 3-4 scaffold branches at correct angles | Remove all other branches |
| Years 2-4 | Formative | Build secondary framework, maintain open centre | Remove inward and crossing growth |
| Years 5-15 | Regulated | Steady crops, prevent biennial bearing | 10-20% per winter |
| Years 15+ | Maintenance | Replace ageing fruiting wood gradually | 10-15% per winter |
| Neglected (any age) | Renovation | Restore structure over 3 years | Max 25% per winter |
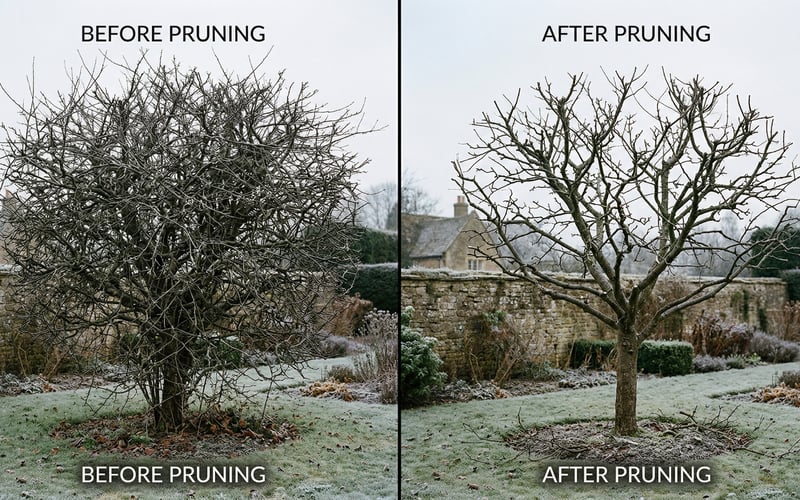
Renovation pruning for neglected trees works in three stages spread over three winters. Year one: remove the 3 D's and the worst congestion. Year two: open the centre and reduce height to strong lateral branches. Year three: refine the shape and manage the water shoots that sprouted from earlier cuts.
Never remove more than 25% of the canopy in one year. Cutting harder triggers masses of water shoots and biennial bearing, where the tree crops heavily one year and produces nothing the next. If your tree is growing in a greenhouse or near one, you might find our guide to growing fruit at home useful for combining outdoor trees with indoor growing.
Training fruit trees against a greenhouse wall
A south-facing lean-to greenhouse wall is one of the best positions in the UK for trained fruit trees. The wall absorbs heat during the day and radiates it back overnight, creating a microclimate 2-3°C warmer than open ground. This is enough to ripen peaches, nectarines, and late-season pears reliably in most UK regions.
Espalier pears and fan-trained stone fruit thrive against warm walls. The key is winter pruning to maintain the trained shape. Cut back side shoots to 3 buds for espaliers, and remove any growth that breaks away from the flat plane of the fan.
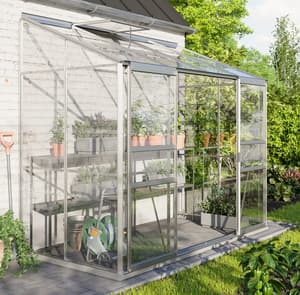
A lean-to greenhouse extends this principle. The glass traps warmth while the house wall provides thermal mass. We've seen customers grow fan-trained peach trees on the back wall inside a lean-to, harvesting ripe fruit in August that would never ripen outdoors in the North.

|
Matt's Pick for Wall-Trained Fruit TreesBest For: Fan-trained peaches, espalier pears, and greenhouse grapes against a house wall Why I Recommend It: The IDA lean-to sits flush against any wall and the 4x8ft footprint gives enough depth for two trained trees. I've installed dozens of these and the thermal benefit from the house wall is measurable. Price: £449 |
A cold frame beside your fruit trees is also useful. Use it to harden off grafted rootstock in spring, or to overwinter tender plants that would otherwise die in a hard UK frost.
Five common winter pruning mistakes
| Mistake | What Happens | The Fix |
|---|---|---|
| Treating all trees the same | Shortening tip-bearer shoots removes every fruit bud | Identify bearing type before cutting — thin whole branches on tip-bearers |
| Removing more than 25% of canopy | Masses of water shoots, biennial bearing | Spread renovation over 3 winters |
| Pruning in wet or frosty weather | Frost splits wounds, moisture spreads canker | Wait for a dry day above -5°C |
| Leaving stubs or making flush cuts | Stubs die back and rot; flush cuts breach the branch collar | Cut just outside the branch collar for fastest healing |
| Using blunt or dirty tools | Crushed stems heal slowly, disease spreads tree to tree | Sharpen every 2-3 hours, disinfect between diseased cuts |
The biggest mistake we see in gardens is over-pruning. Gardeners panic at the amount of growth and hack half the tree away. The tree responds with explosive water shoot growth the following spring, and you end up with more congestion than you started with. Patience beats aggression every time.
Late pruning (after bud break in April) is another common error. Once sap is flowing, cuts bleed heavily. The tree wastes energy healing wounds instead of producing fruit. If you've missed the winter window, wait until next winter rather than pruning in spring.
What to do after pruning
Clear all prunings from under the tree and dispose of diseased wood by burning or council green waste collection. Leaving diseased prunings on the ground reinfects the tree. Healthy prunings can be shredded for mulch or added to compost.
Do not paint or seal pruning wounds. Research from East Malling Research Station showed that wound paint traps moisture and slows healing. Clean cuts made with sharp tools heal fastest when left open to the air.
Feed the tree in late February or early March with a balanced fertiliser. Scatter a handful of blood, fish, and bone around the drip line (the area under the outer edge of the canopy). This gives the tree nutrients ready for spring growth. A 5-10cm mulch of well-rotted compost around the base helps retain moisture and feeds soil organisms.
Check your pruning results in late April when blossom appears. If the canopy looks open with good air circulation and sunlight reaching inner branches, you've pruned well. A lean-to greenhouse positioned nearby lets you start your fruit growing season early with container-grown strawberries and figs.
Frequently asked questions
When is the best month to prune apple trees in the UK?
January is the ideal month for most UK apple trees. The tree is fully dormant and you can see the branch structure clearly without leaves. December and February also work well, but avoid pruning during hard frost or wet weather when canker spores spread easily through fresh cuts.
Can you prune apple and pear trees at the same time?
Yes, both species share the same dormant pruning window. Prune them in the same session if you like. The only difference is technique: pear trees grow more upright and need firmer management to spread branches to 55-60 degree angles. Always disinfect your tools when moving between trees, especially if either shows signs of disease.
What happens if you prune apple trees too late?
Pruning after bud break causes heavy sap bleeding and wastes the tree's energy. Cuts made in April or May heal slowly because the tree is diverting resources into new growth. You also risk removing developing flower buds, reducing that year's crop. If you've missed the dormant window, wait until next December.
How do you prune a neglected apple tree that hasn't been touched in years?
Spread renovation over three winters, removing no more than 25% per year. Year one: take out all dead, diseased, and damaged wood plus the worst crossing branches. Year two: open the centre and reduce height. Year three: refine the shape and manage water shoots. Rushing this triggers excessive regrowth and biennial bearing.
Should you seal pruning cuts with wound paint?
No, research shows wound paint traps moisture and slows healing. Work done at East Malling Research Station demonstrated that unpainted wounds heal faster and develop fewer fungal infections. Make clean, angled cuts with sharp tools and let the tree seal itself naturally through callus formation.
What is the difference between spur-bearing and tip-bearing apple trees?
Spur-bearers fruit on short stubby spurs along older wood; tip-bearers fruit at shoot ends. Common spur-bearers include Cox, Gala, and Braeburn. Common tip-bearers include Bramley and Worcester Pearmain. The distinction matters because shortening side shoots on a tip-bearer removes all the fruit buds, while the same cut on a spur-bearer encourages more fruit.
Do you prune pear trees the same way as apple trees?
The same principles apply, but pear trees need firmer management of upright growth. Pears grow more vigorously vertical and produce spurs more freely than apples. You'll need to train branches to wider angles (55-60 degrees) using ties, and thin congested spur systems more aggressively. Pears also produce more water shoots after heavy pruning.