How to Set Up a New Greenhouse: First-Time Owner's Checklist
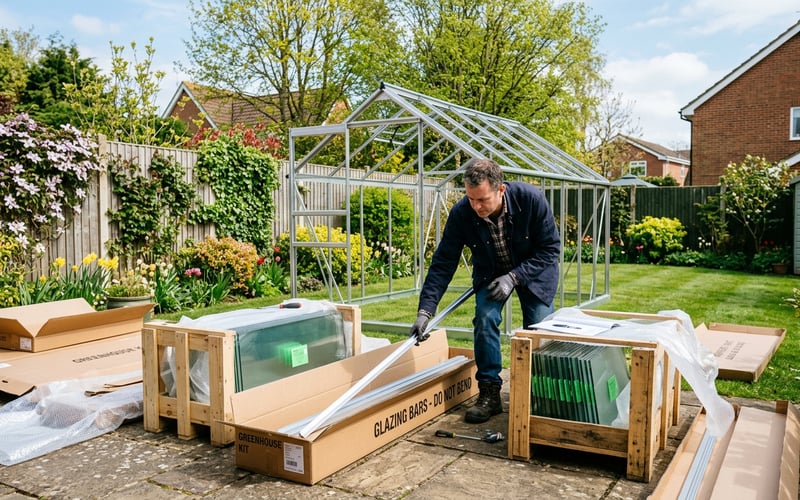
A new greenhouse arrives as a flat-pack of aluminium bars, glass panels and fittings. Setting it up properly in the first week determines how well it grows for the next 20 years. This guide walks you through bases, floor surfaces, staging and accessories, based on 16 years of greenhouse installation across the UK. We install over 200 greenhouses a year, and the mistakes we see most often happen before a single seed goes in.
A new greenhouse arrives as a flat-pack of aluminium bars, glass panels and fittings. Setting it up properly in the first week determines how well it grows for the next 20 years. This guide walks you through bases, floor surfaces, staging and accessories, based on 16 years of greenhouse installation across the UK. We install over 200 greenhouses a year, and the mistakes we see most often happen before a single seed goes in.
Key takeaways
- Orient the ridge east to west so both sides of the roof receive equal sunlight through the day.
- Build a proper base first, 75mm hardcore topped with 100mm concrete, or 50mm sand bed with 600x600mm paving slabs.
- An auto-vent opener is your most important accessory, it prevents overheating when you are away from home.
- Position at least 2 metres from fences and trees to avoid shading and wind turbulence.
- Start growing within the first week, lettuce, radishes and herbs give quick results while you learn.
Installer's note
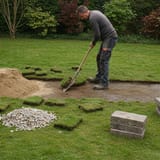
I have installed greenhouses on every surface you can imagine: concrete, slabs, gravel, bare soil, and once on a wooden deck that flexed with every gust. The single best thing you can do for your greenhouse is get the base right. A level, solid base stops the frame from twisting, prevents glass cracking along the bottom edge, and keeps the door sliding properly for years. If you only take one thing from this article, let it be this: spend the time on the base.
Where should I put my greenhouse?
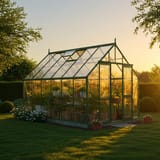
Position your greenhouse where it receives at least 6 hours of direct sunlight per day, especially during winter when the sun sits low in the sky. A south-facing spot gives the most light in UK gardens. Avoid placing it under trees or in the shadow of a building, fence or wall.
Keep the greenhouse at least 2 metres from buildings and trees. This prevents shading and avoids fallen branches landing on the glass during storms. Leave 1 metre of clear space around every side for cleaning and replacing glass panels.
If you have read our best position for a greenhouse guide, you will know that the ridge should run east to west. This means both sides of the roof get equal sunlight through the day. The exception is lean-to greenhouses attached to a south-facing wall, where the ridge naturally runs parallel to the house.
Matt's tip: wind protection
Wind is a bigger problem than most people expect. I have seen brand-new greenhouses lose roof vents in their first autumn because the owner positioned it on an exposed hilltop. Use a hedge, fence or wall as a windbreak, but place it 3-4 metres away from the greenhouse rather than right next to it. A windbreak too close creates turbulence that is worse than open wind. If your garden is very exposed, look into our greenhouse wind damage prevention guide.
What base does a greenhouse need?
Every greenhouse needs a level base. The three main options are concrete, paving slabs and a steel base frame sitting on compacted ground. Each has advantages depending on your budget and DIY confidence.
Concrete base
The strongest option. Dig out 200-250mm deep, lay 75-100mm of compacted MOT Type 1 hardcore, then pour 100-150mm of concrete on top. A damp-proof membrane between the hardcore and concrete stops moisture wicking up into the frame. Allow 3-7 days for the concrete to cure before building on it. Full instructions are in our concrete base guide.
Paving slab base
Use 600x600mm slabs on a 50mm sand bed over compacted hardcore. This is the most popular DIY option because you can work in sections and do not need to mix concrete. Paving slabs also allow water to drain between the joints, which prevents puddles forming inside the greenhouse. See our paving slab base guide for the full method.
Steel base frame
Most manufacturers sell a steel base frame that bolts directly to the greenhouse. These sit on levelled, compacted ground and raise the greenhouse off the soil by 100-150mm. A steel base is faster to install than concrete or slabs, but the ground underneath still needs to be level and firm. Anchor the base frame to the ground with rawlbolts into concrete pads at each corner.

|
Matt's pick for new greenhouse ownersBest For: The single best accessory you can buy when setting up a new greenhouse Why I Recommend It: An automatic roof vent opener costs less than a takeaway dinner and saves more plants than any other accessory. I fit one on every greenhouse we install, no exceptions. Price: £46 |
What floor surface works best inside a greenhouse?
Gravel is the best all-round floor surface for a greenhouse. It drains well, retains some moisture that raises humidity, and stops your feet getting muddy. Lay 50-75mm of 10-20mm pea gravel over a weed membrane. The gravel also provides thermal mass, absorbing heat during the day and releasing it slowly overnight.
If you plan to grow directly in the ground, leave a soil border along one or both sides and use gravel or slabs for the central path. Soil beds give deeper root space for tomatoes, cucumbers and peppers. Raised beds built inside the greenhouse with treated timber or galvanised steel sides work well too, our guide to using raised beds in a greenhouse covers the details.
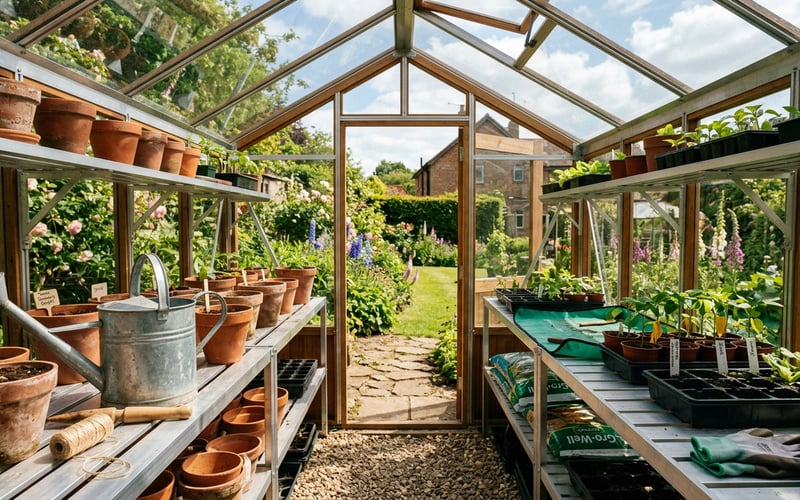
How do I set up staging and shelving?
Staging is a workbench that runs along one or both sides of the greenhouse. Set the working height at 750mm to prevent back strain during potting and pricking out. This is slightly lower than a kitchen worktop, and matches the standard height of most greenhouse staging products.
For most greenhouses, two-tier staging works best. The lower shelf sits at 750mm for working, and the upper shelf at around 1200mm for seed trays and smaller pots. Position shelving high up near the roof where warm air collects. That warmth is well suited to germinating seeds.
Aluminium staging is maintenance-free and does not rot. Wooden staging looks attractive but needs treating annually. We sell staging from several manufacturers, with prices starting at £79 for a basic two-tier unit.
What accessories do I need first?
You do not need to buy everything at once. This is the order we recommend to every customer who buys a new greenhouse from us.
Priority 1: auto-vent opener (essential)
An automatic roof vent opener is the single most important accessory. It opens the vent when the temperature rises above 15-20°C and closes it again when it cools. Without one, your greenhouse will overheat on any sunny day between April and September, even when outside temperatures are moderate. Prices start at £46. Every greenhouse we install gets at least one.
Priority 2: max-min thermometer
A max-min thermometer records the highest and lowest temperatures in a 24-hour period. This tells you whether your greenhouse is overheating, getting too cold, or sitting in the right range. Aim for 18-25°C during the day and above 5°C at night in spring. Prices start at £24.
Priority 3: staging
At least one length of staging gives you a proper work surface. Position it along the sunniest side of the greenhouse. Start with a two-tier unit and add more as you fill the space. The Palram Canopia 2 Tier Staging at £79 is a solid starter option. Our full accessories guide covers everything else you might add later.
Priority 4: watering equipment
A long-necked watering can (8-10 litres) is better than a hose for greenhouse watering. The fine rose delivers water gently without disturbing seedlings or splashing soil onto leaves. If your greenhouse is far from a tap, install a water butt to collect rainwater from the greenhouse gutter.
Should I run electricity and water to my greenhouse?
Electricity opens up heated propagators, fan heaters, grow lights and automatic watering. If you plan to use your greenhouse year-round, it is worth running a supply from the house.
The key requirements for greenhouse electrics:
- RCD protection, mandatory for any outdoor electrical circuit in the UK.
- IP65-rated sockets and switches, splash-proof for the humid greenhouse environment.
- Armoured cable (SWA), buried at least 450mm deep in a trench from the house to the greenhouse.
- Qualified electrician, outdoor electrical work must comply with Part P of the Building Regulations. This is not a DIY job.
For water, an outside tap with a garden hose is the simplest option. Run the hose from the nearest tap and coil it inside the greenhouse doorway. A more permanent setup uses alkathene pipe buried alongside the electrical cable in the same trench.
Neither electricity nor water is essential in year one. Many experienced growers manage perfectly well with a watering can and a paraffin heater for frost protection. See our greenhouse heating costs guide for winter running costs.
What are the most common new greenhouse mistakes?
After 16 years of installing greenhouses and talking to customers, these are the errors we see most often.
1. Not ventilating enough
A greenhouse can reach 50°C on a sunny spring day with the vents closed. Plants start suffering above 30°C. Open roof vents and the door by 9am on sunny days, and fit an auto-vent so the greenhouse looks after itself when you are at work.
2. Overwatering seedlings
More seedlings die from overwatering than underwatering. The surface of the compost should dry slightly between waterings. Water in the morning so excess moisture evaporates during the day. Watering in the evening leaves damp conditions overnight, which encourages grey mould (botrytis).
3. Ignoring the base
A greenhouse built on uneven ground will twist. Doors stop closing, glass cracks at the corners, and the whole structure becomes less rigid in wind. Every millimetre matters when you are bolting together a 3-metre-long aluminium frame.
4. Buying too small
We conducted a survey and found that 65% of returning customers wish they had bought a greenhouse one size larger. A 6x8ft feels spacious when empty, but a staging bench, a tomato row and a few seed trays fill it quickly. If your budget and garden allow, go one size up. Our size guide helps you calculate the right dimensions.
5. Skipping pest prevention
Greenhouse whitefly, red spider mite and aphids thrive in warm, still air. Hang yellow sticky traps from the first day to monitor pest levels. Good ventilation and removing dead leaves reduces problems before they start. Our pest control guide covers prevention and treatment.
What should I grow first?
Start with fast, forgiving crops that give you results within weeks. You will learn more from a tray of lettuce than from reading another guide.
Spring setup (march-may)
Sow lettuce, radishes and spring onions directly into trays on the staging. Lettuce germinates in 7-10 days and gives a first harvest within 4-6 weeks. Start tomato seeds in a heated propagator in March for planting out in late May. Sow basil alongside your tomatoes, they are natural companions. Our tomato growing guide covers the full season.
Summer setup (june-august)
You have missed the seed-starting window for most crops, but you can buy plug plants of tomatoes, cucumbers and peppers and plant them straight into grow bags or soil beds. Summer is also ideal for sowing quick salads: rocket, mizuna and baby spinach produce leaves within 3 weeks of sowing.
Autumn setup (september-november)
Sow winter salads like lamb's lettuce, land cress and winter-hardy lettuce varieties (Arctic King is reliable). Plant overwintering onion sets in October. Use the autumn months to get the greenhouse organised: install staging, set up a watering system, and prepare soil beds for spring planting.
Winter setup (december-february)
Clean the greenhouse thoroughly and plan your spring sowing calendar. If you have electricity, a heated propagator lets you start early seeds in January. Without heating, your greenhouse still protects overwintering plants and keeps tools dry. February is the time to sow broad beans, sweet peas and early peas for a head start on the season.
First-week setup checklist
Use this checklist to get your greenhouse productive within the first seven days.
| Day | Task | Why It Matters |
|---|---|---|
| 1 | Check the frame is level and all bolts are tight | Prevents twisting and glass cracking |
| 1 | Fit auto-vent opener to at least one roof vent | Stops overheating from day one |
| 2 | Install staging and shelving | Gives you a workspace and organises the layout |
| 2 | Hang a max-min thermometer at plant height | Tracks temperature range for the first week |
| 3 | Lay gravel or set up floor surface | Improves drainage and prevents muddy conditions |
| 3 | Set up watering equipment (can, hose, water butt) | Ready for your first seeds |
| 4-5 | Sow your first seeds (lettuce, radishes, herbs) | Quick wins build confidence and skills |
| 6-7 | Hang yellow sticky traps and check for gaps | Early pest monitoring saves plants later |
Frequently asked questions
Do I need planning permission for a greenhouse?
Most domestic greenhouses do not need planning permission. They fall under permitted development rights as long as the total height is under 2.5 metres within 2 metres of a boundary, or under 4 metres for a ridged roof elsewhere. The greenhouse must not cover more than 50% of the garden area. Listed buildings, conservation areas and Article 4 Direction zones have stricter rules. Our full planning permission guide explains every scenario.
How long does a greenhouse take to build?
Allow 4-8 hours for a standard 6x8ft aluminium greenhouse. Two people working together can assemble most models in a day. Larger greenhouses (8x10ft and above) take a full weekend. The base should be prepared at least a week before the greenhouse arrives to allow concrete to cure or slabs to settle.
What temperature should a greenhouse be?
Aim for 18-25°C during the day and above 5°C at night for most crops. Tomatoes, cucumbers and peppers prefer the warmer end of this range. Hardy salads and herbs tolerate cooler conditions. Above 30°C, open all vents and the door. Below 2°C overnight, use a frost-protection heater or fleece.
Can I put a greenhouse on grass?
A greenhouse should not sit directly on grass. Grass holds moisture against the frame base, accelerating corrosion. The uneven surface causes the structure to flex in wind. At minimum, strip the turf, compact the soil and use a steel base frame. A concrete or paving slab base is better for long-term stability.
How do I stop a greenhouse overheating?
Ventilation is the main solution: open roof vents and the door on sunny days. Fit at least one auto-vent opener so the greenhouse regulates itself when you are away. Shade paint or shade netting reduces solar gain by up to 50% during summer. Damping down the floor with water in the morning also cools the air through evaporation.
What is the best month to buy a greenhouse?
January to March offers the widest stock availability and seasonal promotions. Greenhouses sell fastest between March and June. Ordering in late winter means your greenhouse is installed and ready for the spring growing season. Autumn (September-October) is another good buying window as end-of-season stock becomes available.
Do I need to anchor a greenhouse to the ground?
Yes, every greenhouse should be anchored to its base. Aluminium greenhouses are light and can lift in strong gusts. Bolt the frame directly to a concrete or paving slab base using rawlbolts. If using a steel base frame, anchor it with ground anchors or concrete pads at each corner. We install every greenhouse with full anchoring as standard.