How to Fix a Greenhouse Door: Wheels and Runners
A greenhouse door that drags, jumps or leaves a gap usually has one of four faults. Check for dirty tracks, worn wheels, damaged lower guides or a frame that is no longer square. Clean and inspect everything before ordering parts. Measure the old wheel diameter and fixing, then match both the greenhouse brand and runner profile.
A bad sliding door often feels like a wheel failure. Quite often, the first problem is grit packed into the lower track.
Other doors fail because a guide has snapped or a stopper is missing. A replacement wheel will not repair either fault.
Key takeaways
- Clean the upper and lower tracks before loosening any door parts.
- Elite replacement wheels currently come in 28mm and 32mm diameters.
- Wheel diameter alone does not prove compatibility with another greenhouse.
- Check the frame is square and level when gaps differ from top to bottom.
- Support a glazed door with a second adult during removal and refitting.
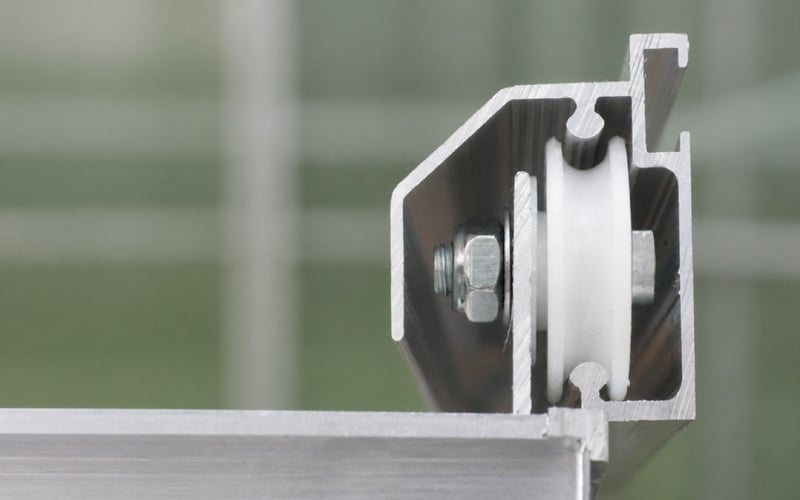
The genuine Elite wheel assembly in section. Match the wheel, bolt and aluminium profile to the original door.
View Elite 28mm door wheels, currently £21
Installer's note
Our installation teams check the frame before adjusting a sliding door. The base must be level and both diagonal measurements must agree. Otherwise, the door opening can pull out of square. New wheels may feel better briefly, but they cannot correct a twisted frame.
Why is my greenhouse door sticking?
A sticking greenhouse door usually has dirty tracks, a damaged guide or poor alignment.
Move the door slowly through its whole travel. Notice whether resistance is constant or occurs at one point. Constant resistance often indicates dirt, wheel wear or alignment. A single hard point suggests a dent, raised fixing or damaged section.
Look at the door from inside and outside. An uneven side gap points towards frame or door alignment. A smooth door with a cold gap usually needs a seal check instead.
| Symptom | Likely cause | Check first | Possible repair |
|---|---|---|---|
| Stiff for the full travel | Grit, corrosion or tight alignment | Upper and lower tracks | Clean, then adjust to the model manual |
| Hard at one point | Dented runner or raised fixing | Exact stopping position | Correct the obstruction or replace the runner |
| Door drops on one side | Worn wheel, loose fixing or twisted door | Both wheel heights | Refit or replace wheels as a pair |
| Door jumps from the top | Wheel, runner or stopper fault | Top-wheel engagement | Replace the matched part and refit stoppers |
| Door scrapes below | Broken lower guide or misalignment | Both bottom guides | Replace guides and align the door |
| Gap widens towards one end | Frame or door is out of square | Level and diagonal measurements | Correct the structure before buying wheels |
| Door moves well but draughts | Worn brush or edge seal | Full seal length | Fit the correct replacement seal |
How should you clean greenhouse door runners?
Clean both runners dry before adding water or any cleaning product.
- Open the door far enough to expose the lower track.
- Remove loose leaves, compost and grit with a stiff hand brush.
- Vacuum the loosened material with a narrow nozzle.
- Wipe the runner with warm water and a mild detergent.
- Use a wooden or plastic tool for packed dirt. Avoid scratching the aluminium.
- Dry the runner, then test the door through its full travel.
Vitavia's current instructions specifically require regular cleaning of upper and lower door tracks. They also warn against aggressive detergent on aluminium or glazing clips.
Do not spray oil over a dirty track. Oil can hold grit against the running surfaces. Follow the greenhouse manual if it specifies a particular lubricant.
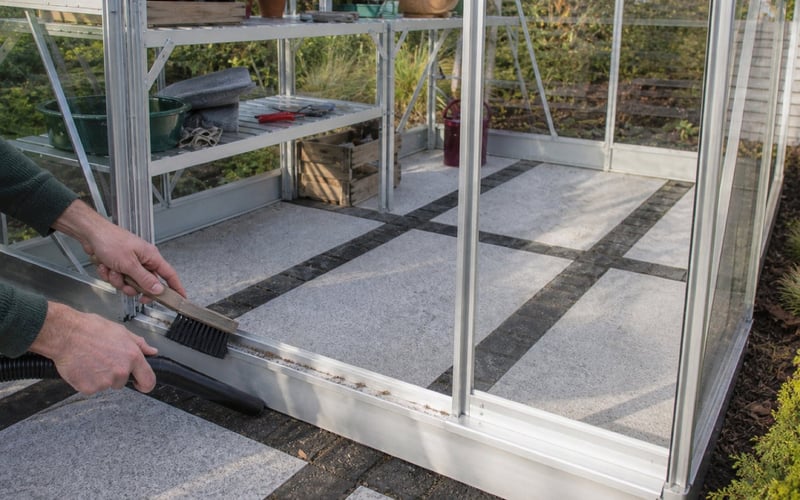
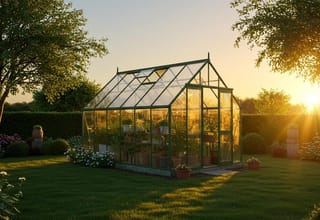
The genuine Vitavia Venus 5000 setting shows where to brush and vacuum the narrow lower aluminium guide.
View the Vitavia Venus 5000 greenhouse shown, currently £509
For other manufacturers, start with our greenhouse spare parts collection and match the original brand and profile.
Which tools do you need for a greenhouse door repair?
Most inspections need cleaning tools, measuring equipment and the spanners specified by the manual.
- A stiff hand brush and narrow vacuum nozzle for both runners.
- A steel rule or calliper marked in millimetres.
- A tape measure and spirit level for structural checks.
- A PH2 screwdriver plus the correct flat screwdriver.
- A 10mm spanner or socket only where the model instructions specify it.
- A magnetic tray or labelled card for washers, spacers and nuts.
- Protective gloves and safety glasses for work near glazing.
The Vitavia Venus instructions list a PH2 screwdriver, 10mm tools, measuring stick and spirit level. Another model may use different fixings. Check before applying force.
Use our greenhouse accessories department for general fittings and maintenance extras. Use the spare-parts collection for model-specific door components.
Safety warning for glazed doors
Do not lift a glazed door alone. Wear gloves and eye protection, then ask another adult to support its weight. Stop if the glazing is cracked, loose or unsupported. Read our greenhouse reglazing guide before handling damaged glass.
How do you measure greenhouse door wheels?
Measure the removed wheel across its widest point, then record the fixing and profile.
Use a steel rule or calliper. Do not estimate against the runner while the door is fitted. A worn wheel may be smaller than its original size, so identify the greenhouse as well.
Elite's current accessories brochure lists 28mm and 32mm plastic wheels with self-lubricating ball bearings. Both packs contain two wheels and fittings. Those measurements apply to Elite products, not every greenhouse door.
Wheel sizes and fixings vary between models. Measure the original wheel and check the runner profile before ordering.
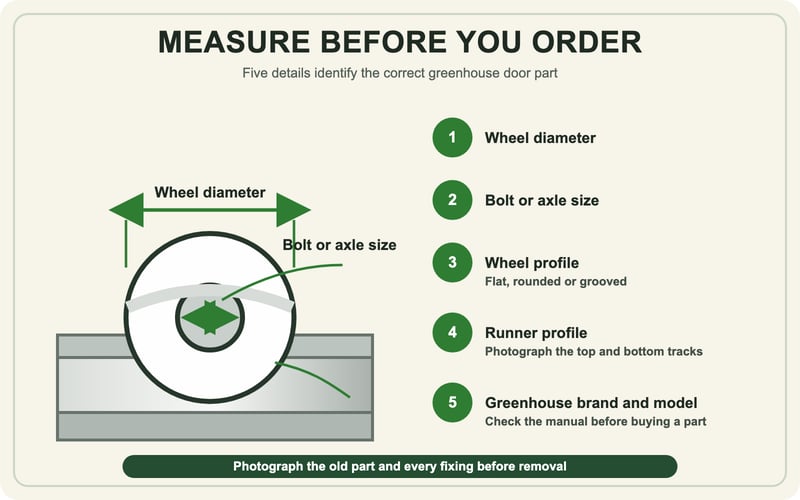
Record five details before buying: diameter, fixing, wheel profile, runner profile, plus greenhouse brand and model.
Compare Elite 32mm door wheels, currently £21
Take these five details before ordering
- Wheel diameter in millimetres across the widest point.
- Bolt or axle diameter, length and fixing arrangement.
- Wheel profile, including any groove or rounded running surface.
- Upper runner and lower guide profiles, photographed end-on where possible.
- Greenhouse manufacturer, model, approximate age and manual part number.
Photograph the assembled fixing before removal. Place each nut, washer and spacer in order on a piece of card. This simple record prevents guesswork during refitting.
|
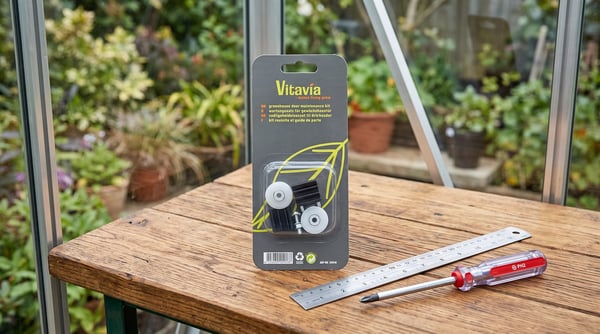
Matt's pick for a compatible Vitavia doorBest for: A Vitavia sliding door needing both wheels and lower guides. Why this one: I prefer the matched kit because it keeps the wheels and lower guides together. Confirm the model before ordering. Current review price: £19 |
How do you replace a greenhouse sliding-door wheel?
Replace a greenhouse wheel only after identifying the model-specific removal method.
Many doors run from wheels in an upper runner, with guides following a lower track. The exact stopper, guide and fixing arrangement varies between manufacturers. Older models can also differ from current instructions.
- Find the greenhouse manual and locate its door assembly diagram.
- Photograph both runners, guides, stoppers and wheel fixings.
- Ask another adult to support the door throughout removal.
- Remove only the stopper or fixing specified by the manual.
- Lift or slide the door free using the manufacturer's sequence.
- Lay the door flat on padded supports. Never rest it on plastic gliders.
- Replace worn wheels as a pair using the correct washers and fixings.
- Refit the wheels into the upper runner and guides onto the lower track.
- Restore all end stoppers before testing the door.
- Adjust gently until the door travels freely without lifting or scraping.
Vitavia's linked Venus instructions identify door rollers, lower gliders, seals and runner stoppers separately. The manual gives a maximum 3Nm tightening torque for its specified nuts.
That figure is model-specific. Do not apply it to another greenhouse unless its own instructions give the same value.
What should you avoid during door removal?
Avoid any shortcut that transfers the door's weight onto glazing, guides or one unsupported corner.
- Do not stand the assembled door on its plastic lower gliders.
- Do not remove end stoppers until another adult supports the door.
- Do not mix old washers, spacers and nuts in an unlabelled container.
- Do not file or hammer a runner until its correct profile is known.
- Do not force a nearly matching wheel into the aluminium track.
- Do not leave runner stoppers off after a successful test.
Stop when the instructions and fitted parts disagree. Older greenhouses may have revised components or previous repairs. Photograph the difference and identify the part before proceeding.
Can you adjust a greenhouse door without replacing parts?
Yes, cleaning and careful alignment often restore a door with sound components.
First confirm that both runners are clean. Check every wheel turns and each lower guide remains engaged. Make sure the runner stoppers are present at both ends.
Next, check the greenhouse base with a spirit level. Measure both frame diagonals between matching corners. Equal diagonal measurements indicate a square rectangle.
A visibly uneven side gap deserves a structural check before any wheel adjustment. Check that the greenhouse is plumb, level and square.
Do not compensate for a distorted opening by overtightening a wheel. Aluminium profiles can deform, while a clamped bearing may stop turning.
Matt's installation tip
Make one small adjustment, then move the door through its full travel. Do not change both sides together. A single change is easier to reverse when the door starts scraping elsewhere.
If the base has moved, read our greenhouse foundation comparison before altering the frame. Structural correction may need glazing removed first.
How do you stop draughts around a greenhouse door?
Replace a worn door seal only after the door closes squarely and moves freely.
A new strip cannot hide a badly aligned frame. Close the door and inspect the gap from inside. Use daylight to locate missing contact, split brush seals or shortened edge strips.
Measure the full seal length and photograph its cross-section. Check how it slides, clips or fixes into the profile. Buy the brand-specific part where the original system is known.
Fit the strip without stretching it. A stretched seal can shrink later and leave a gap at one end.
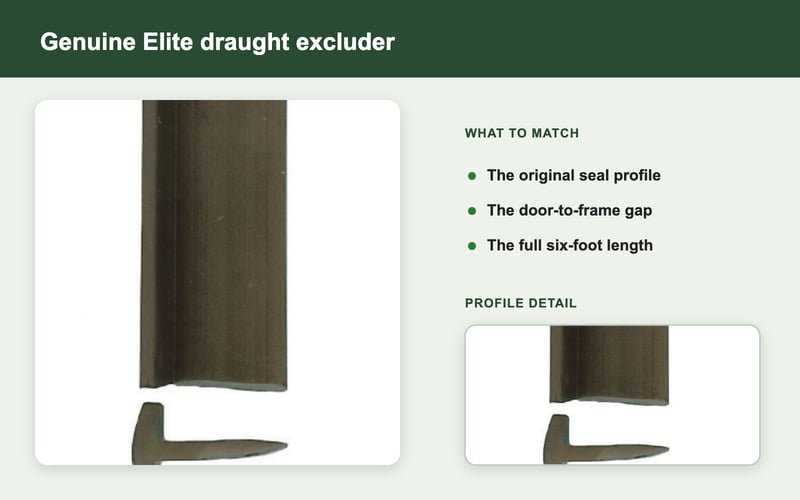
This is the genuine Elite flexible seal and profile. Match the section before ordering a replacement.
View the Elite draught excluder, currently £26
Which greenhouse door repair part do you need?
The right part depends on the failed component, manufacturer and exact door system.
| Option | Use it when | Identification check | Current price | Verdict |
|---|---|---|---|---|
| Elite 28mm wheels | An Elite door uses the smaller listed wheel | Confirm 28mm diameter and fixing | £21 | Best for a confirmed 28mm Elite setup |
| Elite 32mm wheels | An Elite door uses the larger listed wheel | Confirm 32mm diameter and fixing | £21 | Do not substitute by appearance alone |
| Vitavia maintenance kit | Compatible wheels and lower guides need renewal | Check the Vitavia model manual | £19 | Useful matched service pack |
| Elite draught excluder | The door moves correctly but leaves an edge gap | Match the seal and door profile | £26 | For sealing, not alignment repair |
| Complete replacement door | The door frame is bent or parts cannot be identified | Confirm model, opening and glazing | Quote required | Last resort after diagnosis |
Why we use brand and model checks
"I would not order a wheel from diameter alone. Photograph the old wheel, bolt, runner and lower guide. Then confirm the greenhouse model. That short check is cheaper than forcing the wrong part into an aluminium profile."
Matt W, Greenhouse Stores
When does a greenhouse need a complete replacement door?
A complete door is justified when its frame is bent, cracked or beyond safe adjustment.
Replacement also makes sense when several obsolete components are missing. Mixing improvised wheels, guides and fixings can create new stress points.
Check the surrounding greenhouse before ordering a door. A damaged gable, distorted runner or moving base can spoil the replacement too.
Storm damage needs a wider inspection. Our greenhouse wind-damage guide covers frame, glazing and anchoring checks after severe weather.
If dismantling is necessary, label profiles and photograph every joint. The greenhouse dismantling guide explains the safer order.
Frequently asked questions
Why does my greenhouse door keep coming off its track?
A door leaves its track when wheels, guides, stoppers or alignment fail. Clean both runners, then inspect every component. Check the frame is square before fitting new wheels.
Are greenhouse door wheels universal?
No, greenhouse door wheels are not universal. Diameter, groove, fixing and runner profile can differ. Match the brand, model and original part arrangement.
How do I know whether I need 28mm or 32mm Elite wheels?
Remove and measure the old wheel across its widest point. Confirm the fixing and Elite model too. Wear can slightly reduce the measured diameter.
Can I lubricate a greenhouse door runner?
Clean the runner first and follow the model manual. Oil applied over grit can retain abrasive dirt. Use only a lubricant approved for that system.
Can one person remove a glazed greenhouse door?
Two adults should support a glazed greenhouse door. Wear gloves and eye protection. Stop if any pane is cracked, loose or unsupported.
Should I replace both greenhouse door wheels together?
Replace matched wheel pairs together unless the manufacturer says otherwise. A mixed worn-and-new pair may hold the door at different heights.